Modifier Up-Charges (Inventory)
Step-By-Step:
Step 1: Navigate to the Inventory Modifier Groups settings by following the path: Settings → Inventory Center → Inventory Modifier Groups → Manage Category.

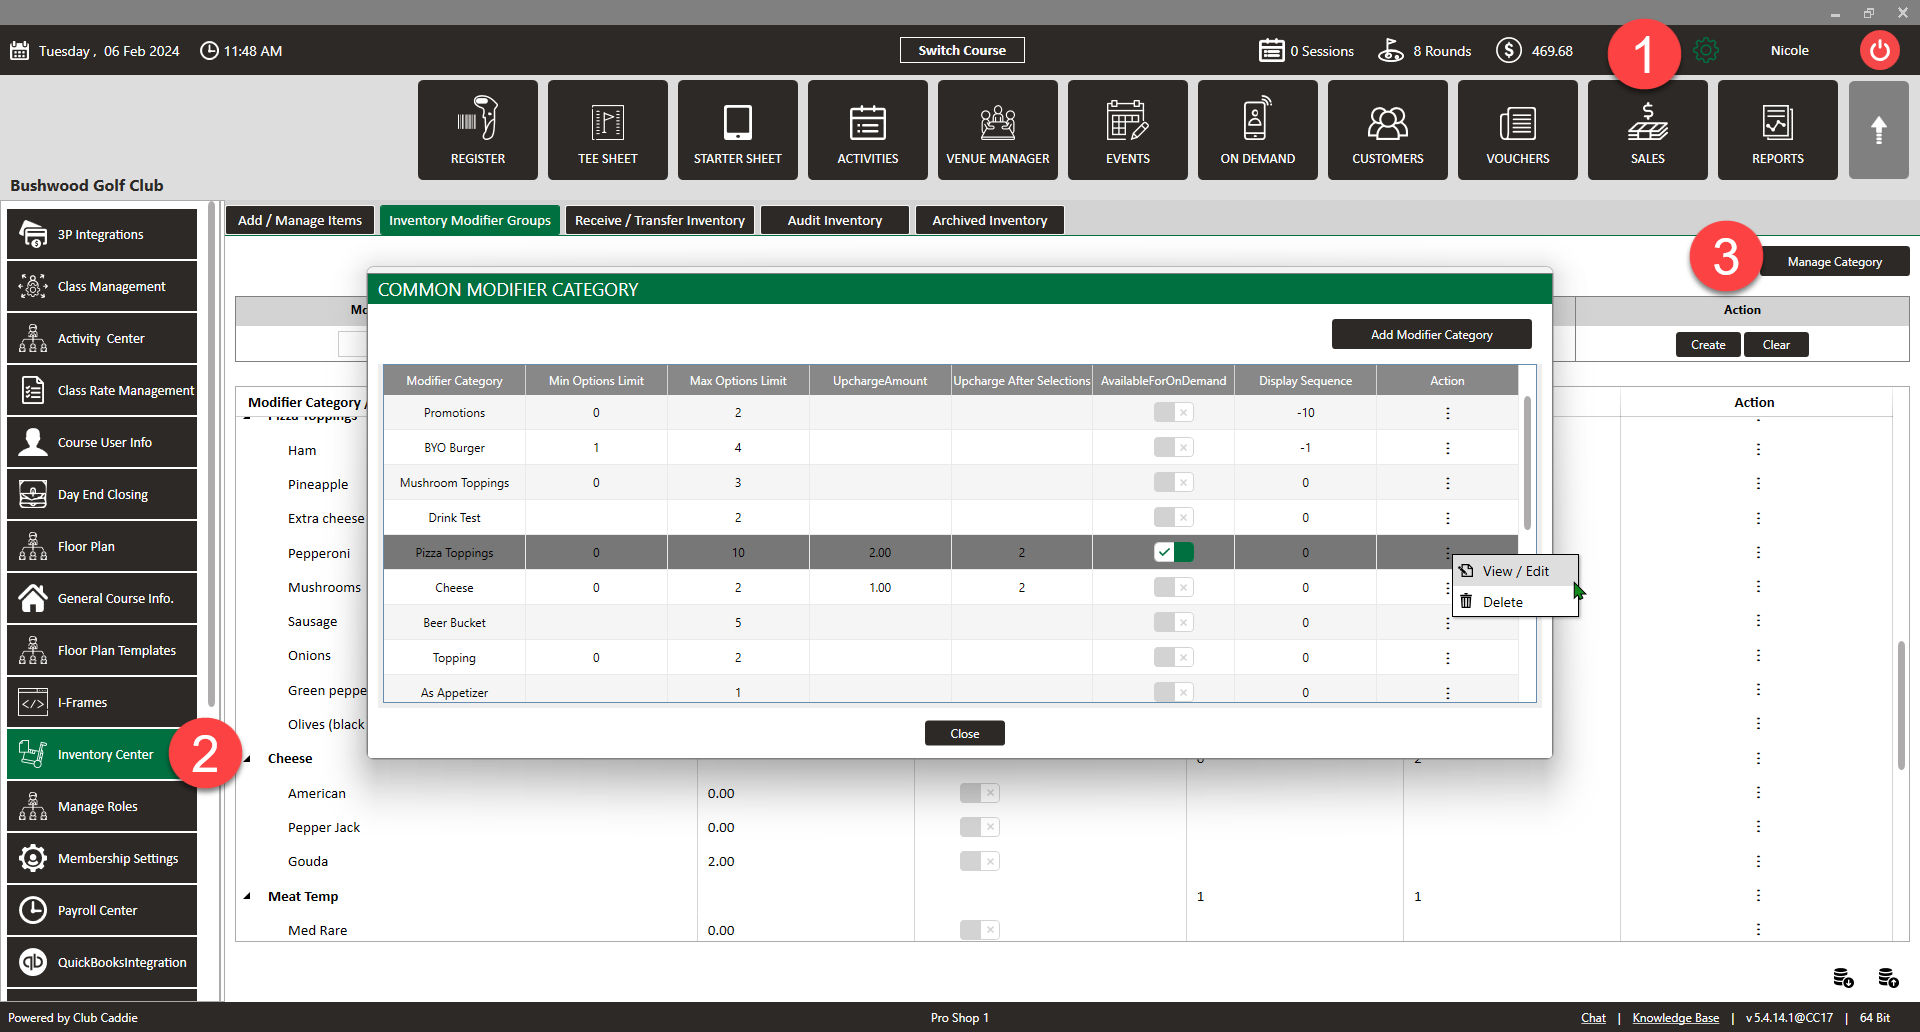
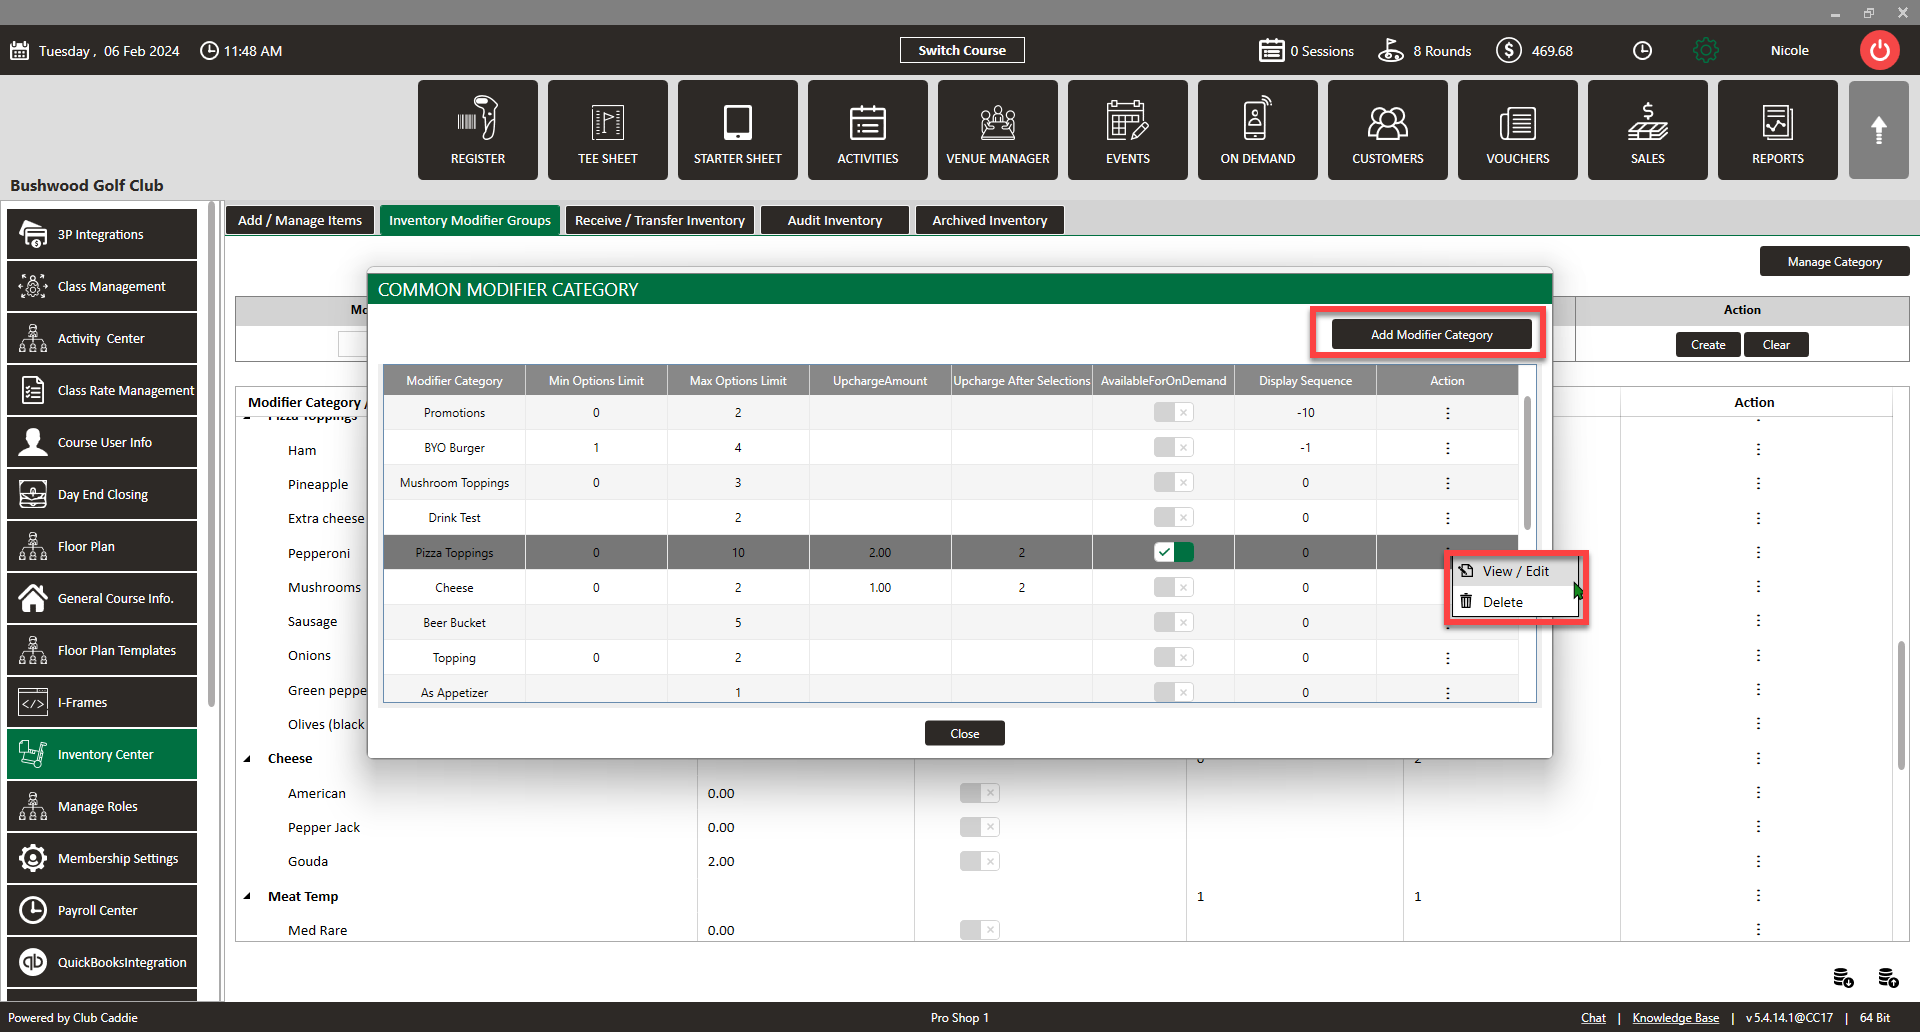
Step 2: Either Add Modifier Category or click the Action buttons next to the item you would like to apply the upcharge and select View/Edit.
Inventory - How to create a new Group Modifier Article HERE

Step 3: Set the desired upcharge fee in the Upcharge Amount field and the number of allowed selections before the upcharge is applied in the Upcharge After Selections field. Then close.
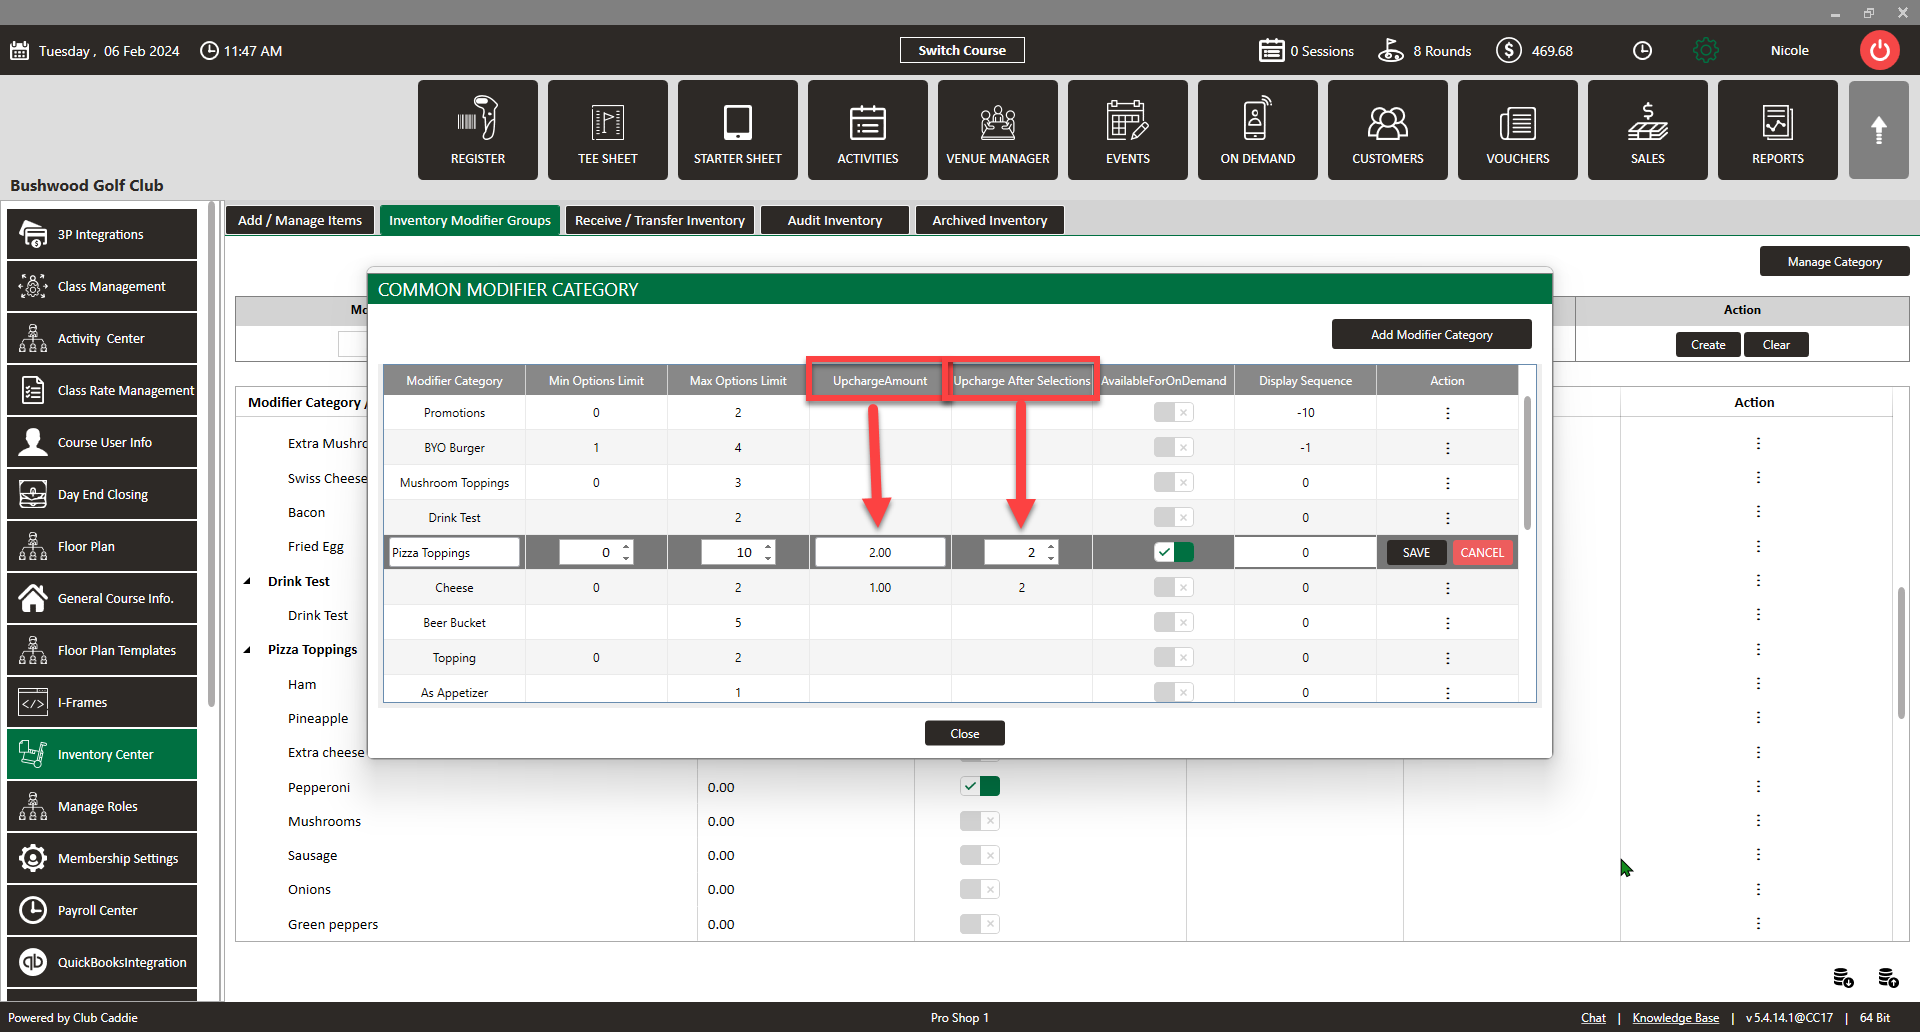


Example: If you're configuring a Modifier Group for "Pizza Toppings" and you set the "Upcharge Amount" to $2.00 and the "Upcharge After Selections" to 2, guests will be charged an additional $2 for each topping after the first two free selections.

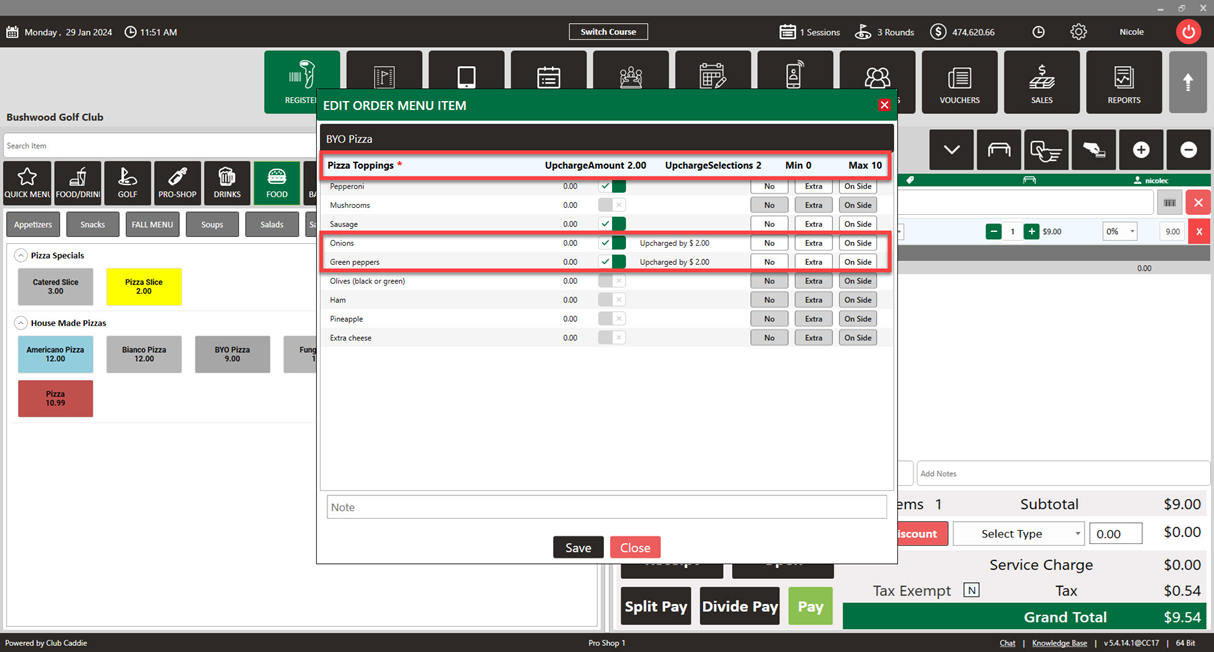

To ensure that the modifier options are displayed correctly, verify that the "Pop-Up Modifiers by Default" setting is enabled by following: Settings → point of sale Settings → point of sale Tab → "Pop Up Modifiers by Default".
Related Articles
Inventory Modifiers
You will learn how to apply Modifiers to Inventory items by either creating reusable modifier groups to reduce repetitive data entry, naming new groups and setting quantity limits, building out groups by adding modifier categories and options, ...Bulk Export / Import Inventory
This article gives step-by-step instructions on how to Import/Export Bulk Inventory. Step-By-Step: Step 1: Click the "Settings" gear wheel icon from the top right corner of the window. Select "Inventory Center" from the left-hand menu. Step 2: To ...Creating A New Group Modifier (Video)
In this video tutorial, we will guide you through the process of creating an inventory item with modifiers We will cover how to start with an existing item template, update its details, choose menu colors, add modifiers, and apply them to the ...Add Item to Inventory (Video)
Article Contents: This article summarizes how to create a new item using the Inventory Center found within Settings. Step-By-Step: Step 1: Click on the Gear Wheel Icon on the top right corner of the screen. Step 2: Click on the Inventory Center ...Apply Modifier To Item
Article Contents: This article contains instructions on how to Apply modifiers to items. Step-By-Step: Step 1: Select the POINT OF SALE module from the module navigation menu. Step 2: Add item from the Department and Sub department that is on left ...