Inventory Modifiers
You will learn how to apply Modifiers to Inventory items by either creating reusable modifier groups to reduce repetitive data entry, naming new groups and setting quantity limits, building out groups by adding modifier categories and options, quickly appending group options to menu items, enabling/disable specific modifiers per item. This will also review how to add one-off, item-specific modifiers when needed. Following these instructions will allow you to maximize the benefits of modifiers through streamlined processes, eliminate redundancies, and ensure logical configuration.
Step-By-Step:
Step 1: Accessing The Inventory Center
Log into your Jonas Synergy software and go to the Settings menu. Click on Inventory Center in the left sidebar.
Step 1: Accessing The Inventory Center
Log into your Jonas Synergy software and go to the Settings menu. Click on Inventory Center in the left sidebar.
Step 2: Using Inventory Filters
The Inventory Center provides filters to find and manage items easily:
2.1 Use the Department dropdown to filter items by type (Food, Beverage, Retail, etc)
2.2. Use the Subdepartment filter to further categorize by subcategories.
2.3. Quickly access and edit menu items sorted by these filters.
Understanding Modifier Groups
Existing menus may list modifiers separately under each item or have a combination of modifiers listed under the inventory item or a group modifier can also be applied.
If you would like to add a modifier to the individual inventory item, skip to step 6.
Modifiers listed under the inventory item:
Modifier Groups allow you to create reusable options to apply across multiple menu items:
Step 3: Creating a Modifier Group

3.1 Go to Inventory > Inventory Modifier Groups Tab.
3.2. Click "Manage Category"> Add Modifier Category > Enter a name for the new group.
3.3. Set the minimum and maximum number of selections allowed from this modifier group > Close
For example, set a minimum of 1 if you would like at least one selection required and a maximum of 1 for something like Meat Temperature, so the guest can only pick one temperature option.
S tep 4: Adding Items to a Modifier Group
To add items under the category, use the Modifier Category drop-down menu and select your category.
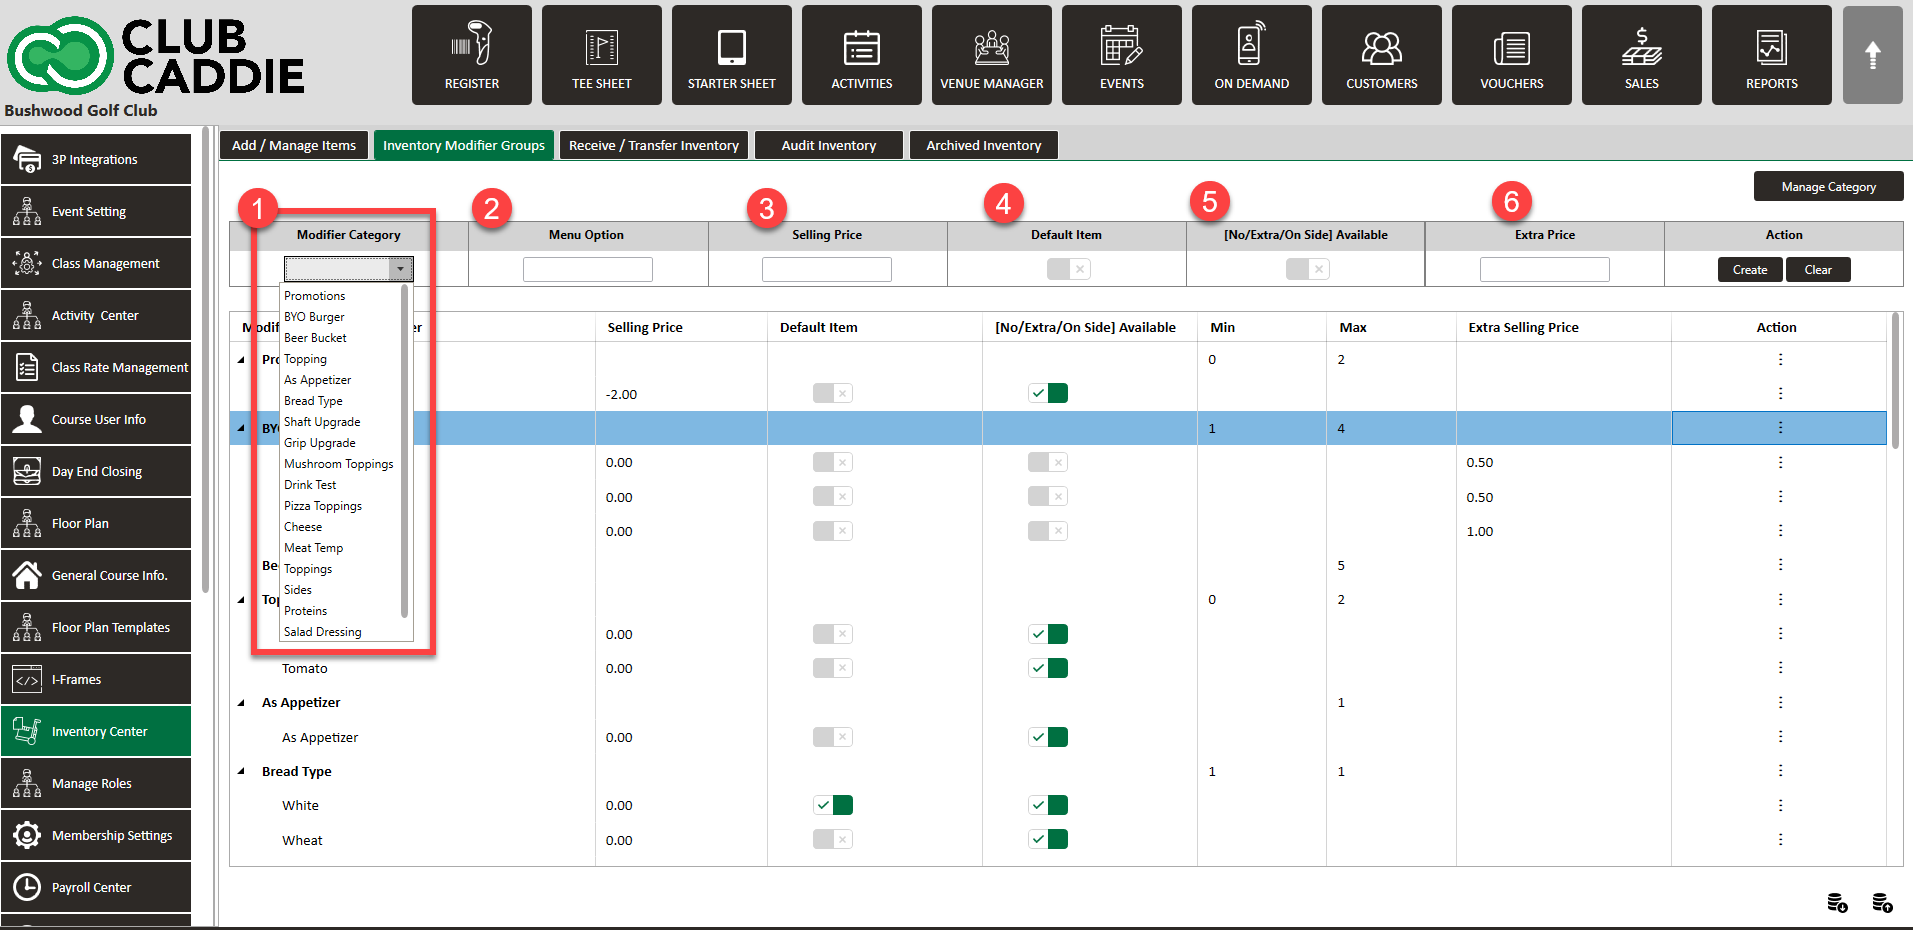
4.1 For each modifier, enter the name (EX. "Rare", "Medium Rare", "Medium", etc.), cost if any, and set as default if needed.
4.2 Click "Create" once all options are entered to add them to the Modifier Group.
4.3 Repeat to add multiple categories and modifier options to the group.
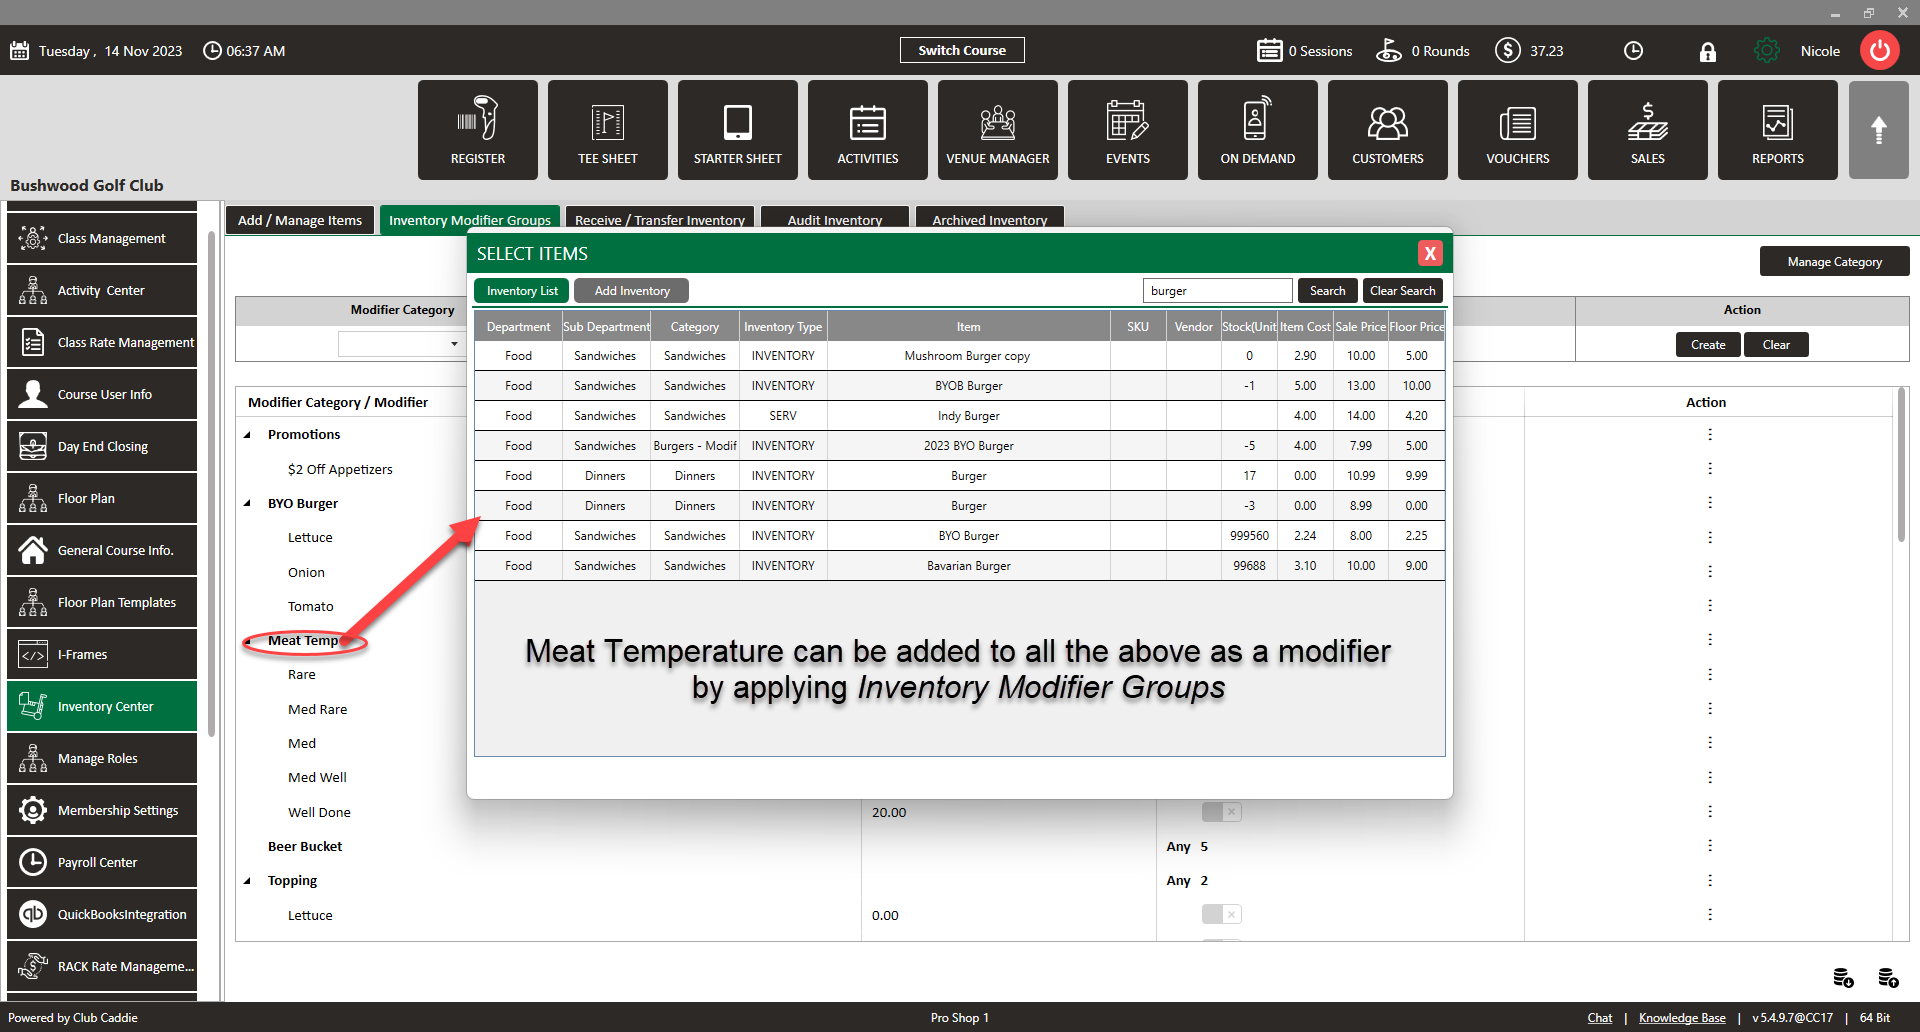
Step 5: Applying Modifier Groups to Inventory Items
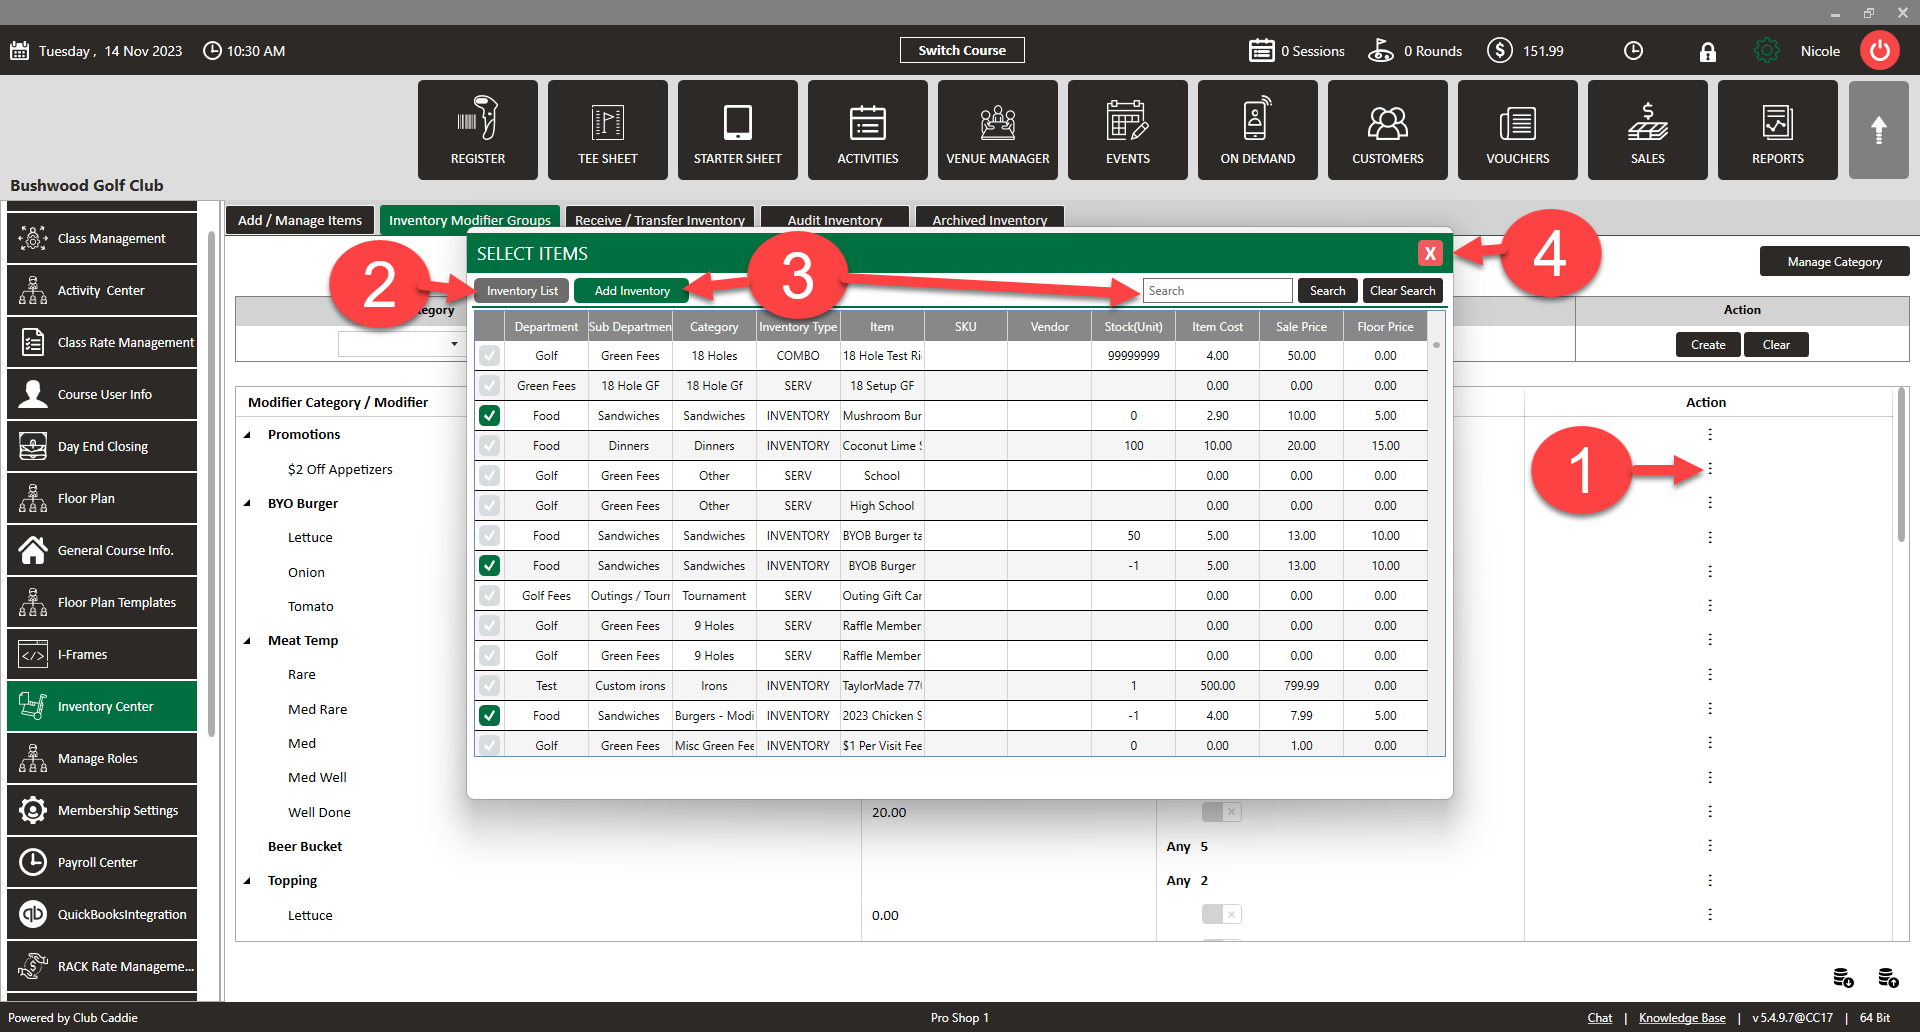
5.1 Click three dots under Action> Select Item
5.2 The Inventory List will show all inventory items this group is applied to. To add a new inventory item, click "Add Inventory" and check the box next to the relevant groups to add (you can use the search function to narrow down).
5.3 Check any inventory items you would like this modifier group applied.
5.4 You can now enable or disable specific modifiers as needed for this item. Uncheck any options that don't apply.
5. 5 Exit the window.
5. 6 Repeat for any other items that should use the same modifier group.
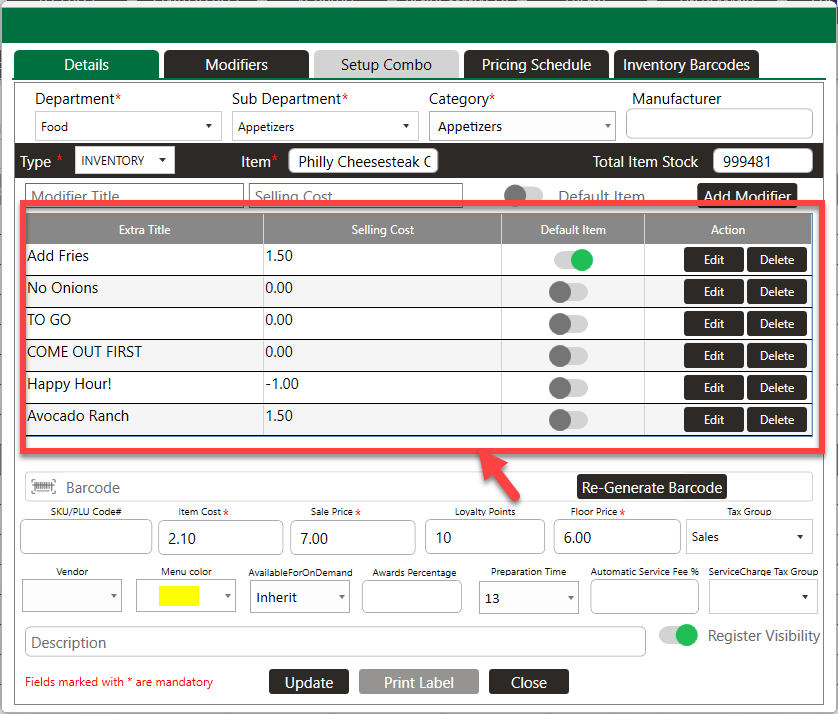
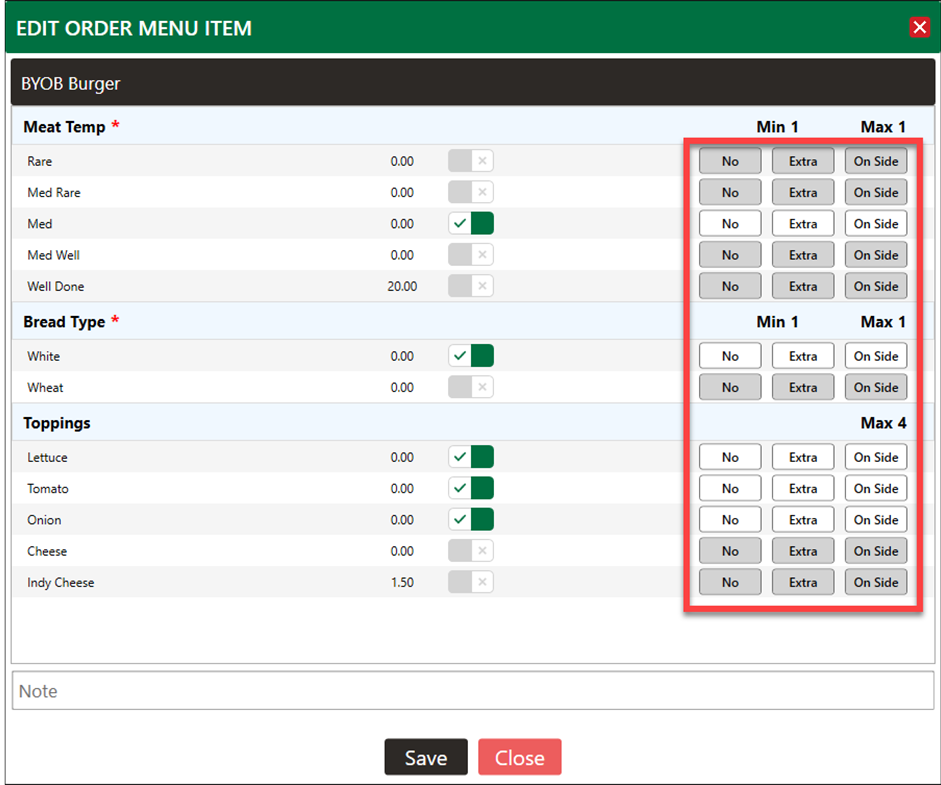
Modifier Popup Window EXAMPLE with Modifier Groups:
Step 6: Applying Modifiers to the Individual Inventory
Sometimes you may need to add a modifier that is only relevant to a single menu item. In these cases, rather than creating an entire modifier group, you can add an item-specific modifier directly to that item.
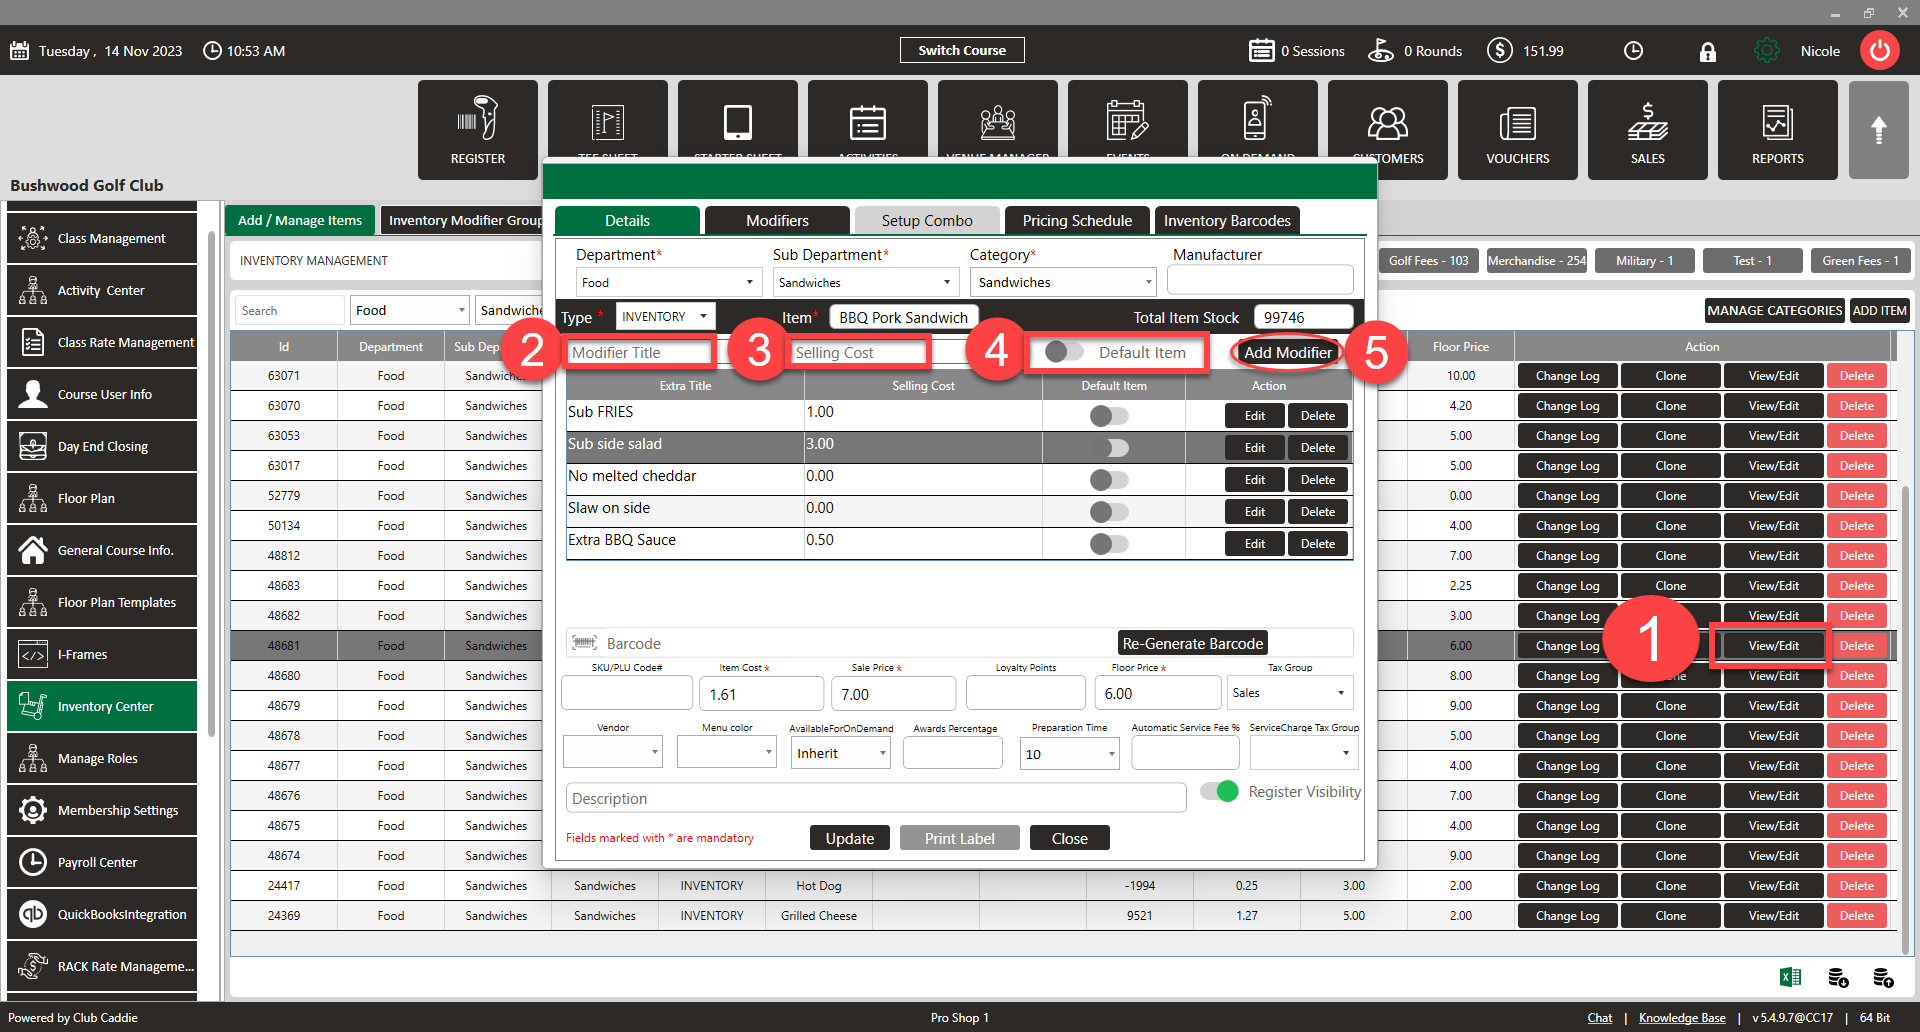
6.1 Click View/Edit of the inventory item you would like to apply a modifier.
6.2 Enter the details for the modifier: Modifier Title
6.3 Enter Cost if there is additional cost for this modifier
6.4 Toggle on Default Item if you want this modifier selected by default
6.5 Click Add Modifier once all details are entered. This will add the modifier specifically to this menu item only. You can add multiple item-specific modifiers as needed.
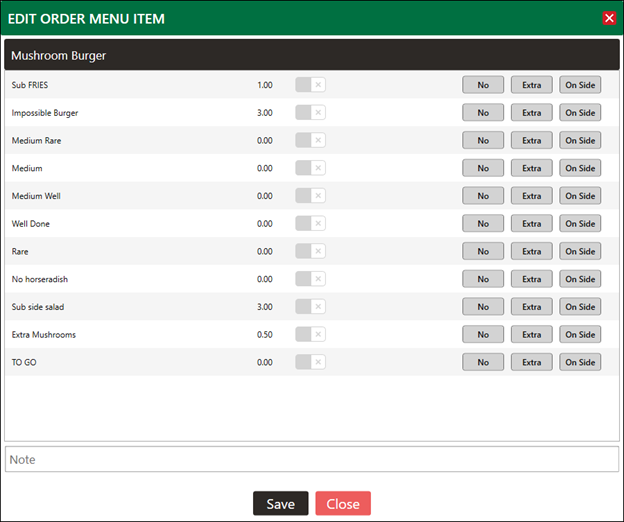
Modifier Popup Window EXAMPLE with Modifier withing the Inventory Item:
Related Articles
Editing Group Modifiers
This article provides a step by step guide on how to edit Group Modifiers Step-By-Step: Step 1: Click on Settings (gear wheel) followed by Inventory Center from the left hand menu. Step 2: Click on the Inventory Modifier Groups tab. Then, click on ...Assigning group modifiers to items
Article Contents: This article provides a step by step guide on how to assign group modifiers to items. Step-By-Step: Step 1: Click on Settings (gear wheel) followed by Inventory Center from the left hand menu. Step 2: Click on the Inventory Modifier ...Upcharge for "Extras" on Modifiers
This article contains step by step instructions on how to assign a specific upcharge price for when Extra is selected on individual Modifiers Step-By-Step: Step 1: Navigate to Settings > Inventory Center > then click on the Inventory Modifier Groups ...Modifier Up-Charges (Inventory)
This article contains step-by-step instructions on setting up Modifier Upcharge Features to charge additional fees for item customizations. It covers navigating to the Inventory Modifier Groups settings, adding or editing a Modifier Category, ...Default Modifiers
This article gives step-by-step instructions on how to set a default modifier for an item. Step-By-Step: A default modifier can be set for an item at the time of the new item's creation. For an existing item, a modifier can be set directly from the ...