Register : Day End Closing
Step by Step
Step 1: Click on the Register button on the header tab. On the Register screen, click on TOOLS tab.
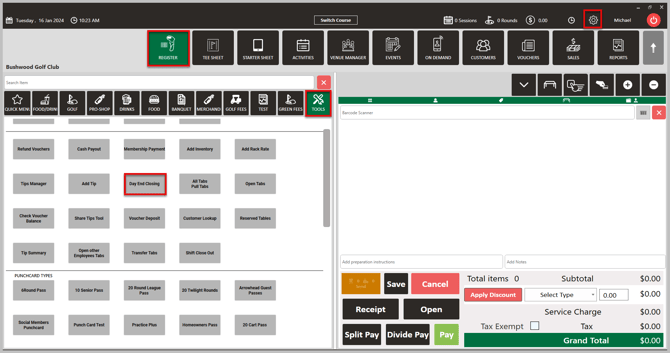
Step 2: Click on Day End Closing Button, system will generate new Day End Closing pop up window.
Step 3: Once you are on the Day End Closing screen, fill in the following details under Day End Closing:
- Closing Date: Select the closing date from the drop-down calendar.
- Closer: Choose the Name of the Employee from the drop down.
- Starting Balance: Fill in the amount which was already in the register as your opening/starting balance.
Note: Any specific notes you would like to add for this particular Day End Closing
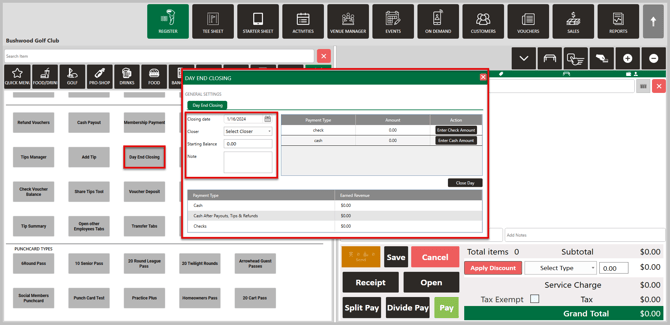
Step 4: Click on Enter Check Amount in the right column in case you have collected any payments through checks. The system will generate a pop Check Amount, fill in the amount as per each check. You can add multiple checks here. Enter the Check Amount and click on Add Check Amount. If you have accidentally added a check amount, you can click on Delete button to remove that check. Once you have added all the check amounts collected you can click on Save. You will find on the screen Payment Type and Amount has been updated.
Step 5: Click on Enter Cash Amount in the right column, system will open a pop up Cash Amount enter the information with different type of bills and coins that have been collected throughout the day. Once you fill in the cash information, the system will auto calculate the Total Cash on the same pop up. You can click on reset in case you want to count again and re-enter the information. Click on Save, and you will find on the screen Payment Type and Amount has been updated.
Step 6: Once you have filled in all the above-mentioned information, click on the Close Day, button at the right bottom corner of the screen. The system will generate a pop up to confirm if you would like to close the day on this terminal. You can click on No if you would like to go back and re-access. If you click on Yes, the terminal will be closed for the effective date and you further have access to this Day End Close in Register topic.
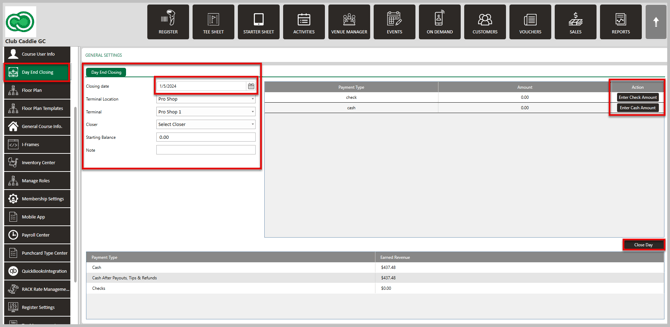
Note: If you need to edit a day you have already closed out, please see the steps below
Step 1 : Click on Settings (gear wheel), then Day End Closing on the left-hand menu.
Step 2: Click on the date that you want to edit followed by entering the correct information in the respected fields. Click Save.
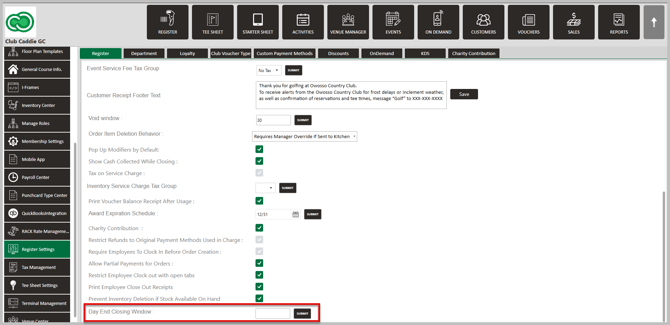
Note: If you are not able to close a previous day, your facility admin will need to edit your Day End Closing Window in Register Settings
Related Articles
Register : Voucher Deposit from Register
Article Contents This article contains step-by-step instructions on how to do Voucher Deposit from Register. Step-by-Step: Step 1: Click on “Register” in the header tab, then click on the “Tools” tab. Step 2: Select the “Voucher Deposit” option. A ...Register : Edit Item Price
Article Contents: This article gives step-by-step instructions on how to change item prices in the register. Step-by-Step: Step 1: After selecting the REGISTER module, click on an item to add it to the register tab. Step 2: Item prices can be edited ...Register : Editing Item Quantity
Article Contents: This article gives step-by-step instructions on how to edit item quantities in the register. Step-By-Step: Step 1: After selecting the REGISTER module, click on an item to add it to the register tab. Step 2: Item quantities can be ...Register : Item Visibility
This article summarizes how to hide visibility of an item in the register Step By Step: Step 1: Navigate to the REGISTER module and locate the item that you are trying to hide from the register screen. Right click on the item and select EDIT ...Register : Credit Book Distribution
Article Contents This article provides users with a step by step guide on Register - Credit Book Distribution. from the register module. Article Contents Step-by-Step: Step 1: On the Register screen, click on the "Tools" tab. Step 2: Click on the ...