Register - Edit Inventory
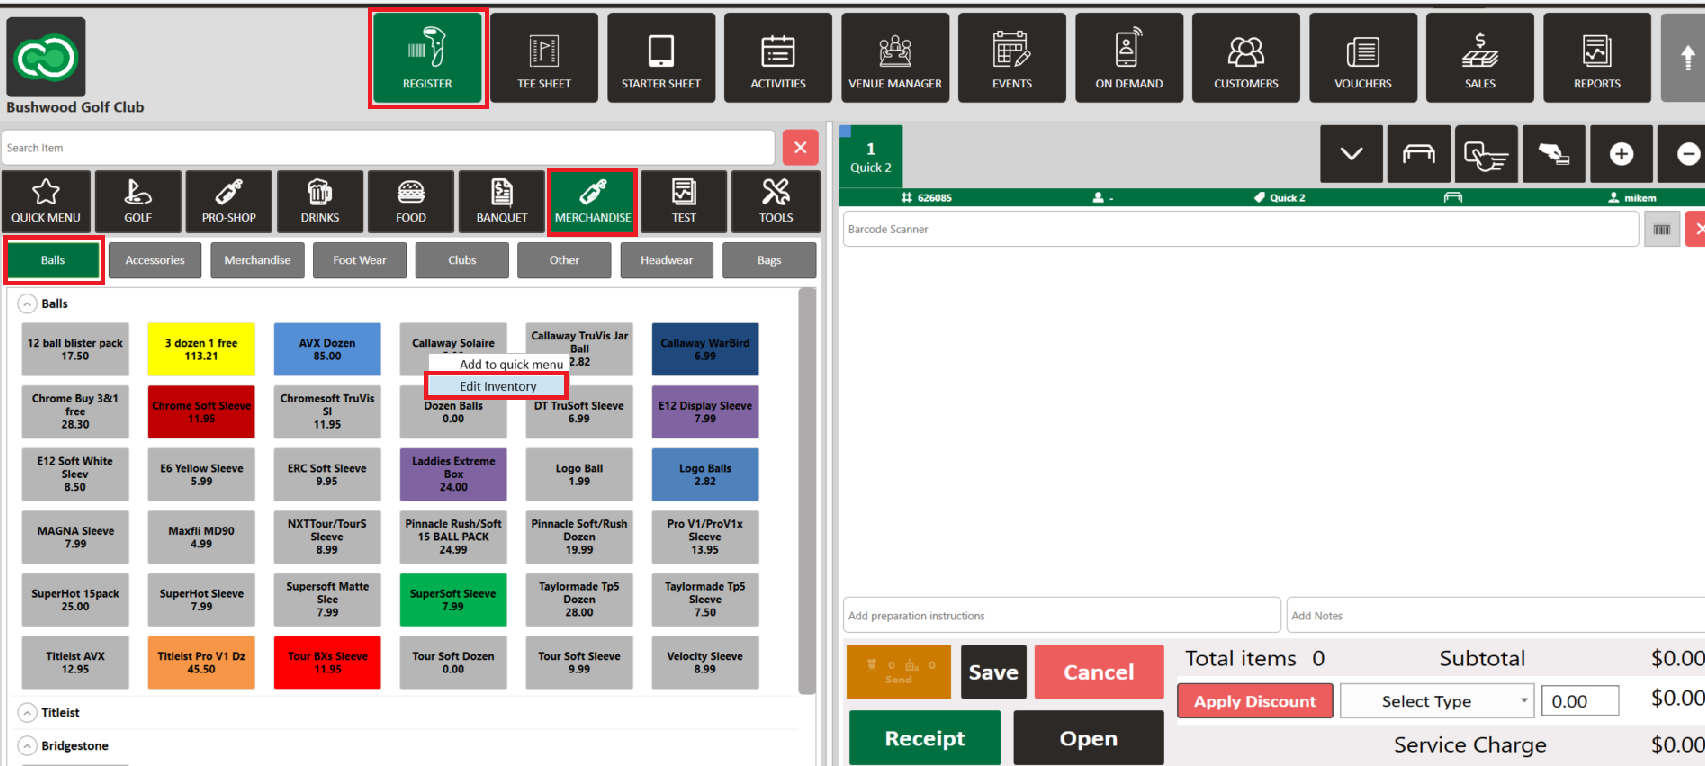
Step 1: Select the REGISTER module from the module navigation menu.
Step 2: Right-click on the item in the register that is to be edited and click on Edit Inventory.
Step 3: The system will generate a pop-up window. This window is used to make inventory item modifications.
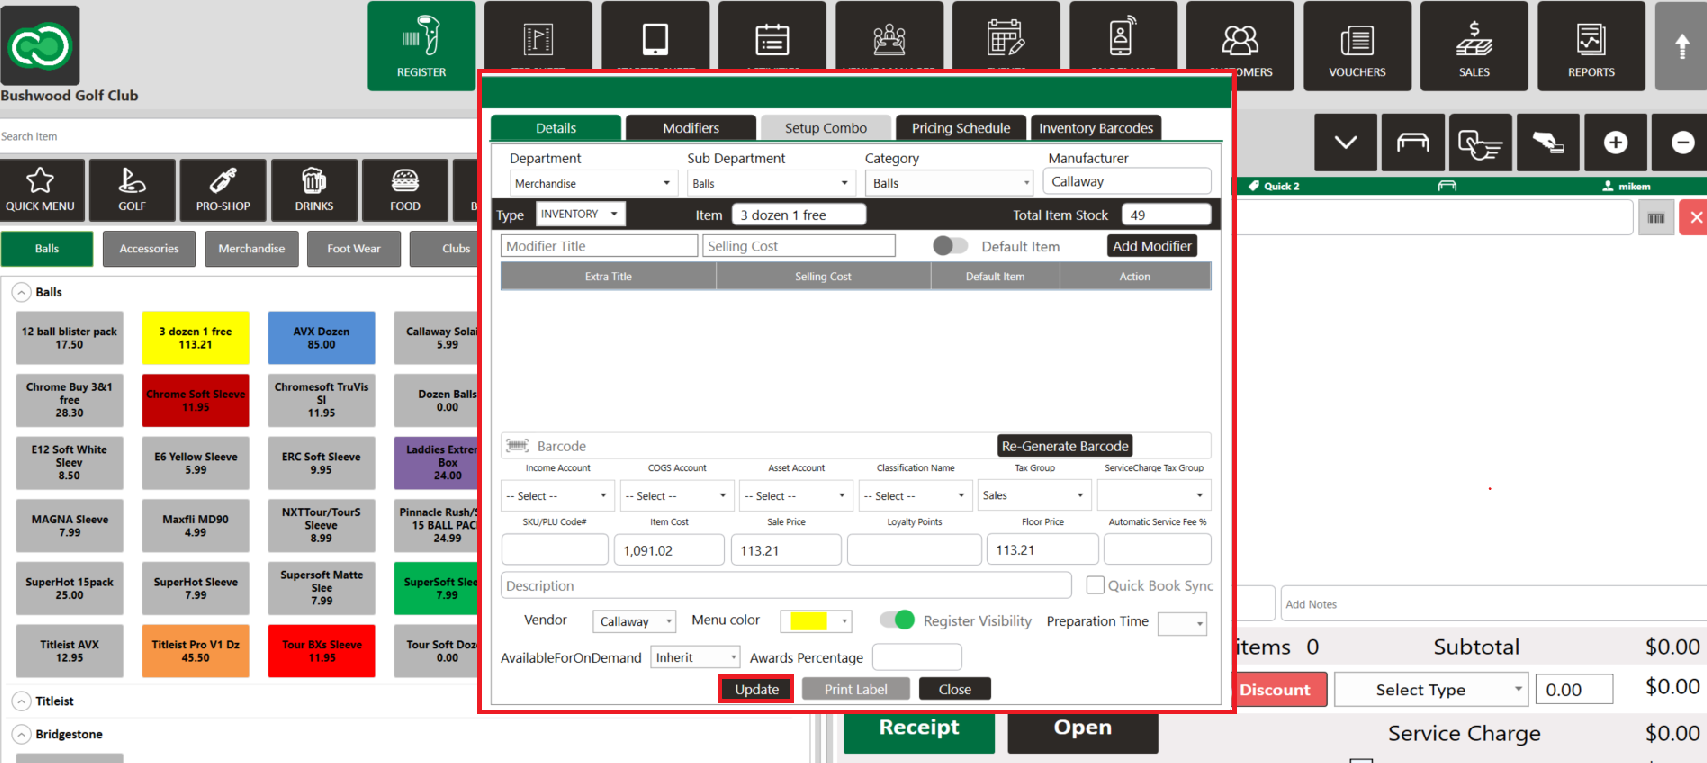
Department: Select the department to Edit an item to from the drop-down.
Sub Department: Select the sub-department to Edit an item to from the drop-down. Category: Select the category in which to Edit an item to from the drop-down.
Manufacturer: Fill in the manufacturer's title/name if it’s a 3rd party vendor.
Type: Used to update inventory from the drop-down.
Item: Used to update the title/name of the item.
Total Item Stock: N/A
Add Modifier: The modifier can be updated, which means the item can be customized with additional fees or even reduce the fees if the modifier is applied. The modifier can also be deleted.
Bar Code: A pre-labeled bar code for an item can be updated. A barcode can be generated from the software “Avery” provided for non-labeled items.
PLU Code: Updateable (If required)
Income Amount: Updateable (If required)
COGS Account: Updateable (If required)
Asset Account: Updateable (If required)
Item Cost: N/A
Sale Price: Used to update the selling price of the item. Sales Price input will be exclusive of tax prices. Taxes will be added on top as per the product and tax policies.
Floor Price: Used to update the amount that the item cannot be discounted below. This will be the minimum price the item can be sold for.
Tax Group: Used to update the Tax Group from the drop-down as the tax is applicable for this particular item. Description: The description of a product can be updated if needed.
Vendor: Used to update the vendor from the drop-down if the product is procured from any specific vendor.
Step 4: Once all necessary modifications have been made, click on the Update button. The item will be updated in the Inventory.
Related Articles
Register : Item Visibility
This article summarizes how to hide visibility of an item in the register Step By Step: Step 1: Navigate to the REGISTER module and locate the item that you are trying to hide from the register screen. Right click on the item and select EDIT ...Register : Edit Item Price
Article Contents: This article gives step-by-step instructions on how to change item prices in the register. Step-by-Step: Step 1: After selecting the REGISTER module, click on an item to add it to the register tab. Step 2: Item prices can be edited ...Register : Edit Rate Type
Article Contents: This article contains step-by-step instructions on how to change the rack rate from the REGISTER for a given tee time. Step-By-Step: Step 1: Select the TEE SHEET module from the module navigation menu. Reserve a tee time. Step 2: ...Register : Editing Item Quantity
Article Contents: This article gives step-by-step instructions on how to edit item quantities in the register. Step-By-Step: Step 1: After selecting the REGISTER module, click on an item to add it to the register tab. Step 2: Item quantities can be ...Register : Scanning a Barcode
Article Contents: This article contains step-by-step instructions on how to scan an items barcode directly from the register using a compatible barcode scanner. Step by Step Step 1: Select the REGISTER icon (1) from the top navigation bar and then ...