Setting Up a New Floor Plan

SETTINGS: SETTING UP A NEW FLOOR PLAN

Article Contents: This article contains step-by-step instructions on how to set up a new or edit an existing floor plan.

Step by Step

Step 1: Click on the Gear Wheel icon in the top-right corner of the screen. The system will open the system settings menus.


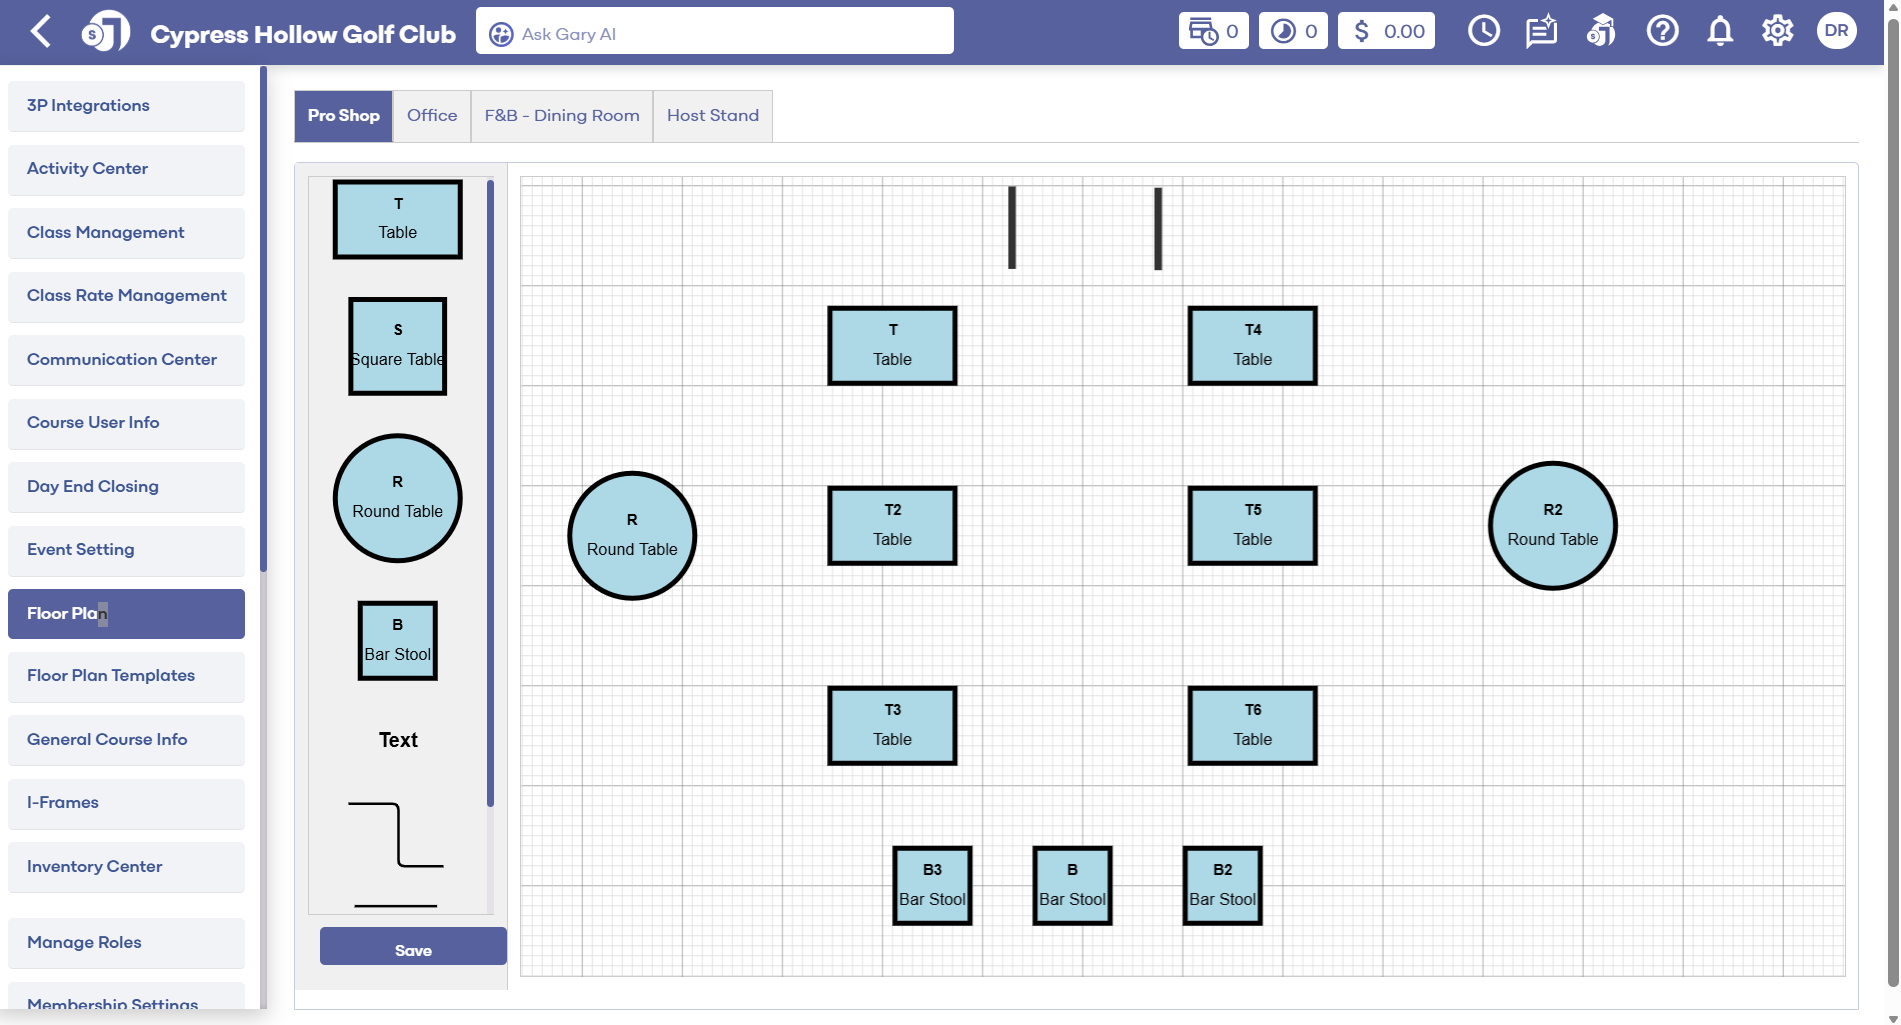
Step 2: Select the Floor Plan tab from the left-hand menu.
 

Step 3: Along the top of the floor plan editor is the location selection. Note that these options are taken from the locations created in terminal management. 
 
Step 4: Once a desired location is selected. To create a floor plan, drag and drop the necessary table or seat icons. Note to edit the location name double-click on the object.

Note: Double Click on an object to adjust it's display name

 
Step 5: After making the desired changes to the floor plan, click on the Save button in the bottom left-hand corner of the floor plan editor.


Step 6: The newly created floor plan is now accessible from the register by clicking on the table icon to assign a new tab to either a table or a seat.


    • Related Articles

    • SETTINGS: DEPARTMENT - CREATE NEW DEPARTMENT

      Article Contents: This article contains a step-by-step guide on how to create a new department for the register. Step-By-Step: Step 1: Click on the Gear Wheel Icon on the top-right hand corner of the screen. Step 2: Click on the “Register Settings” ...
    • SETTINGS: DEPARTMENT - CREATE A NEW SUB-DEPARTMENT AND CATEGORY

      Article Contents: This article contains step-by-step instructions on how to create a new sub-department. Step-by-Step: Step 1: Click on the Settings icon on the top right corner of the screen. Then click on Register Settings in the left-hand menu and ...
    • SETTINGS: REGISTER SETTINGS

      Article Contents: This will show you how to navigate through your register settings, as well as providing a brief description on what each setting can do for you club. Video: The video covers essential features such as printing tip receipts, adding ...
    • Membership Settings

      In Jonas Synergy, the membership settings are crucial to managing your club operations effectively. This knowledge-based article will guide you through the membership settings, offering a detailed understanding of each option, ensuring you make the ...
    • SETTINGS: SETTING UP A STATIC IP ADDRESS

      Setting up a static IP Address; S300 POSLink. Step 1: Setting a Static IP Address: Press the 1 and the F buttons simultaneously Password is "717777" -> Green Button On the main menu, press the down arrow once and select "Communication" setting ...