Create a New Email Campaign (MailChimp)
Step 1: Click on the Guest tab (1) from the header of the window. Select CRM (2) from the left row of the window, then select Create Email Campaign tab (3).
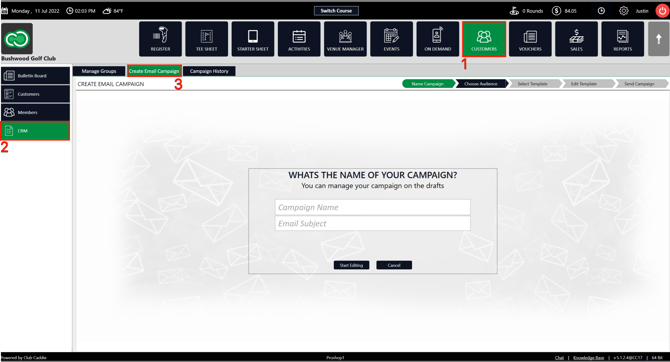
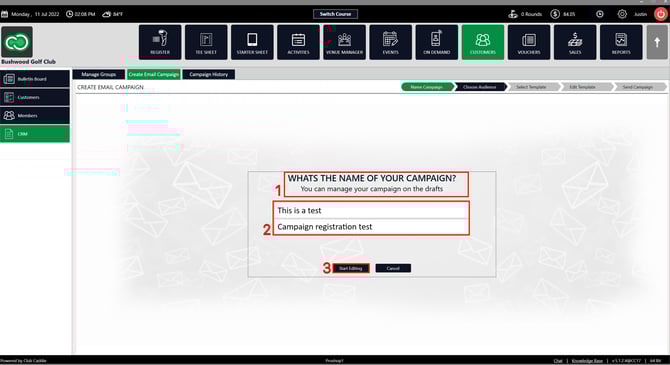
Step 2: The system will display a banner labeled What's the name of your campaign? (1). You have to fill in the Campaign Name and Email Subject (2), and then click on Start Editing (3).

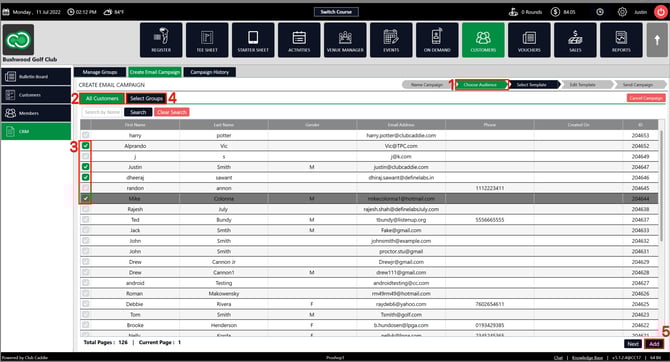
Step 3: Once you complete the above step, the next window will be Choose audience (1) and the system will have generated a list of All Guests (2). You can click the Tick Boxes (3) to select the players you want to add to this email campaign. You can also choose from created groups by clicking on the Select Groups tab (4) after clicking the Tick Boxes to select groups of players you want to add to this campaign. Once you have selected players or/and groups, click on the Add button at the bottom right corner (5).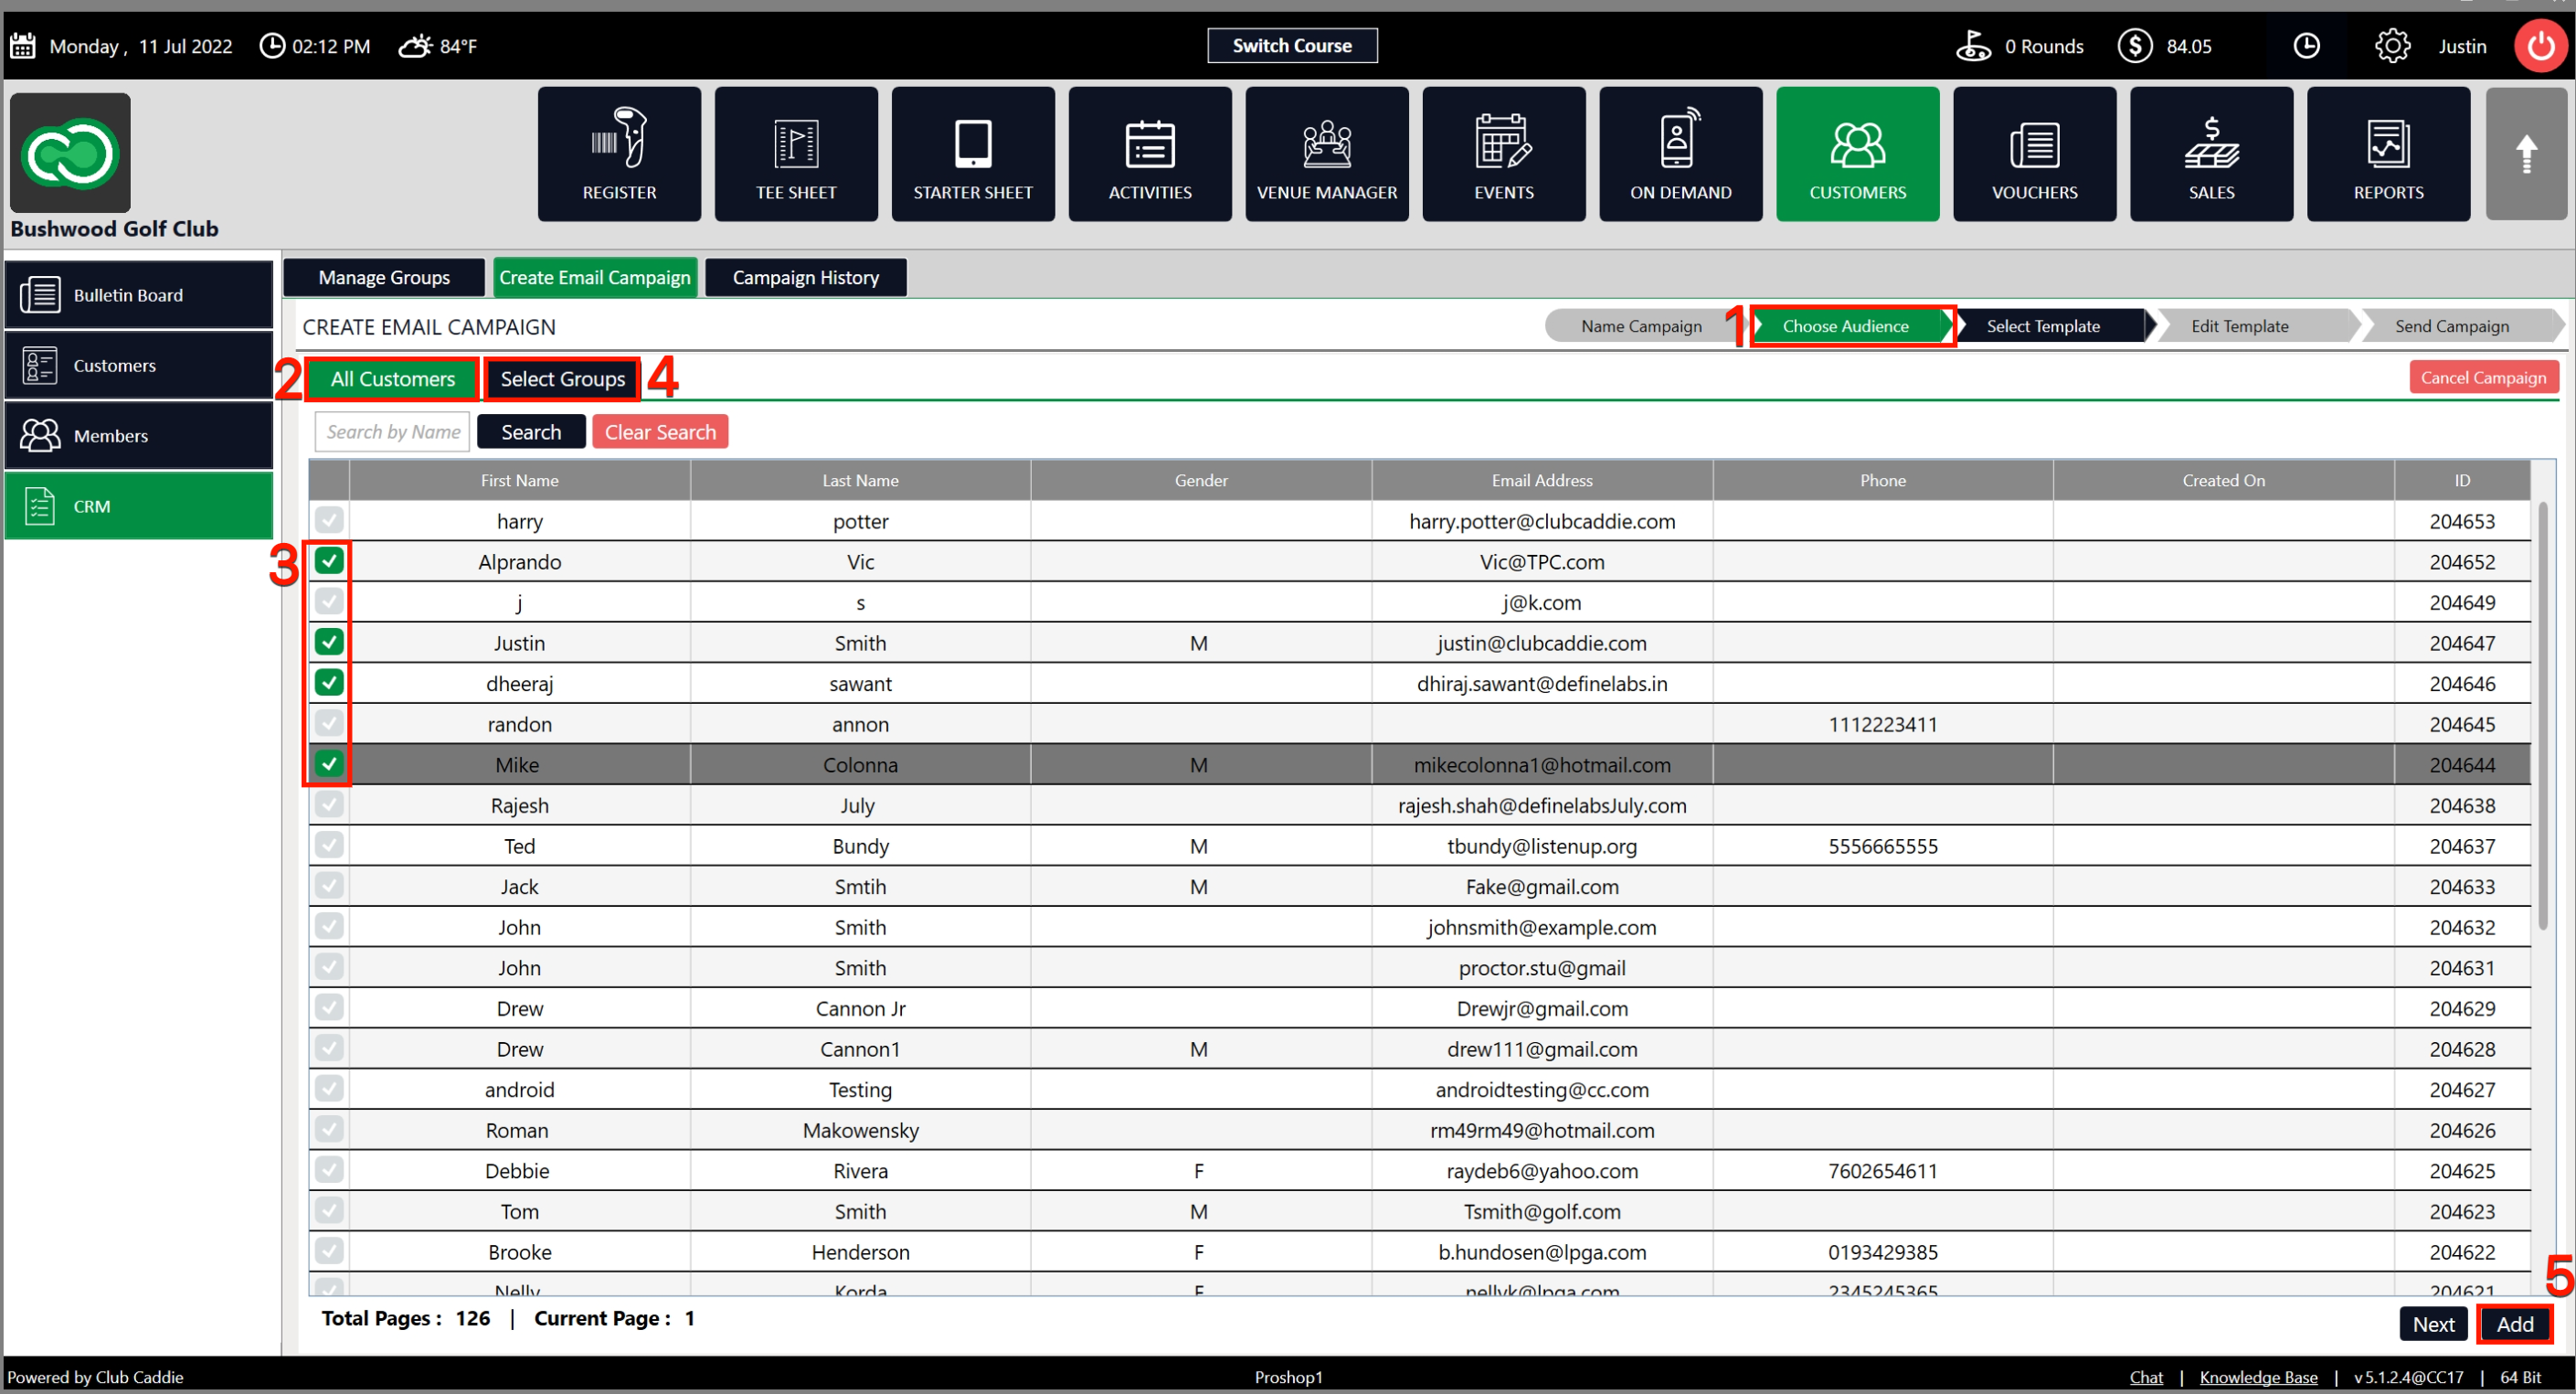
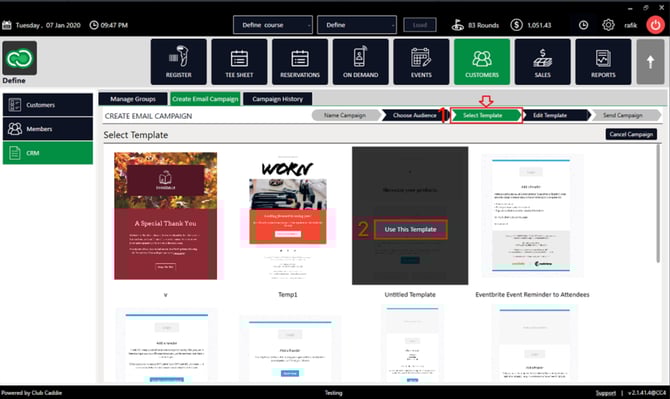
Step 4: After completing the above steps you will be taken to the next step which is Select Template (1). Select one of the existing templates. Once selected, click on the Use this Template button (2) which appears.

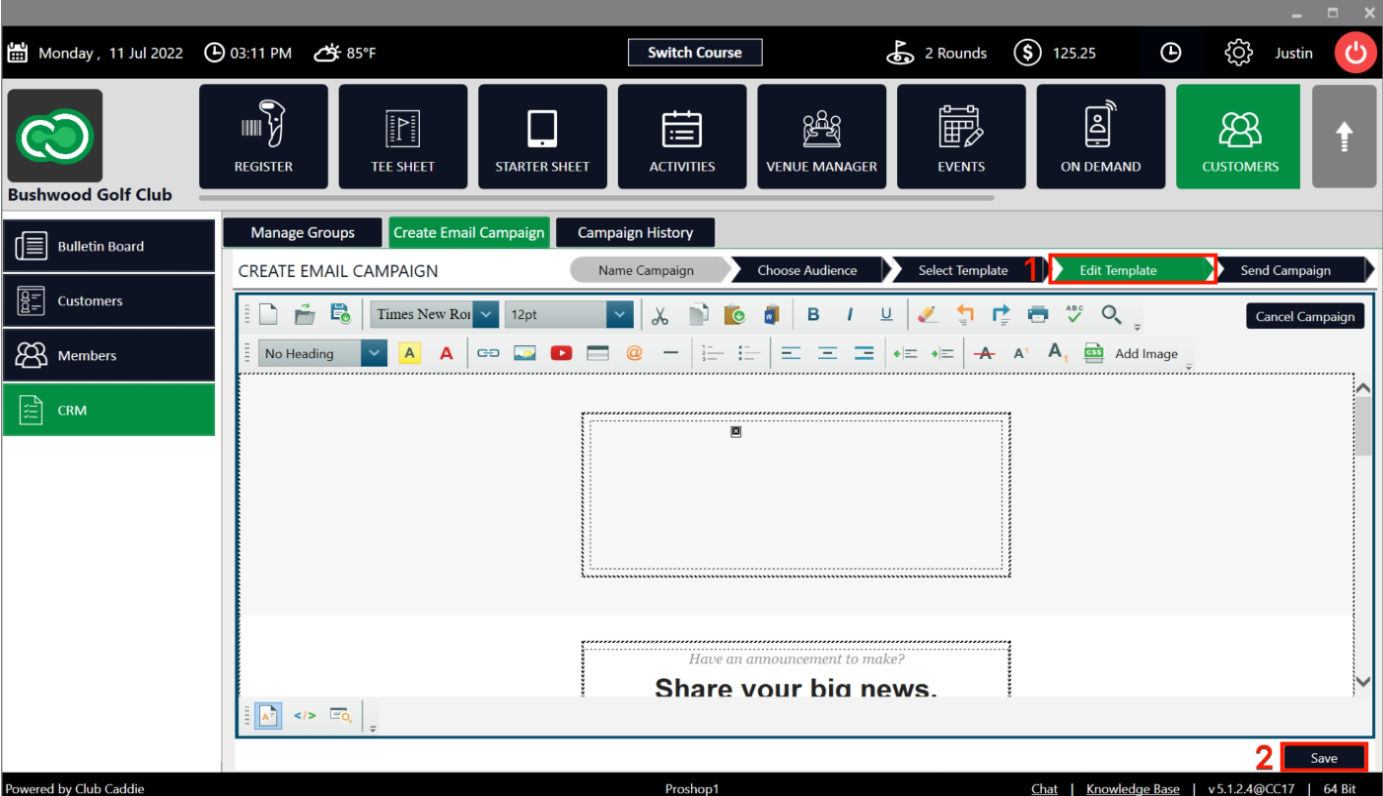
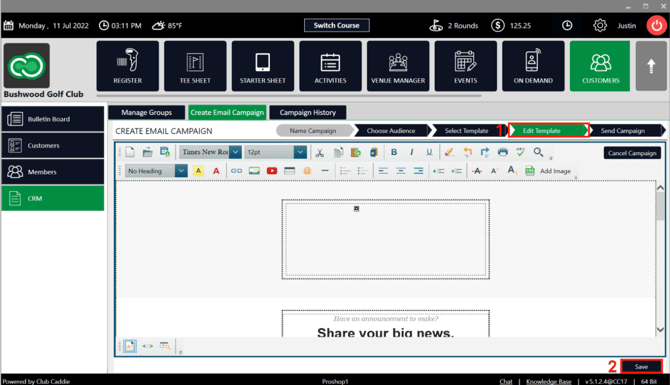
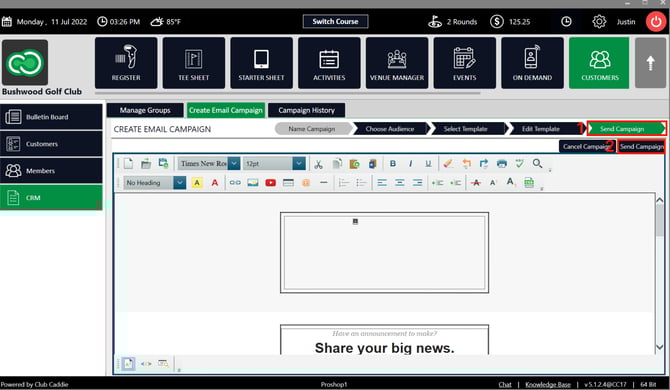
Step 5: Once you select the template from the above steps, you will be taken to next window Edit Template (1). You can fill in the content of the email campaign using the available tools, ie. font, adding hyperlinks, etc., just like you can edit content in MS Word. Once you have filled in your email marketing material, click on the Save button (2) at the bottom right side of the screen.
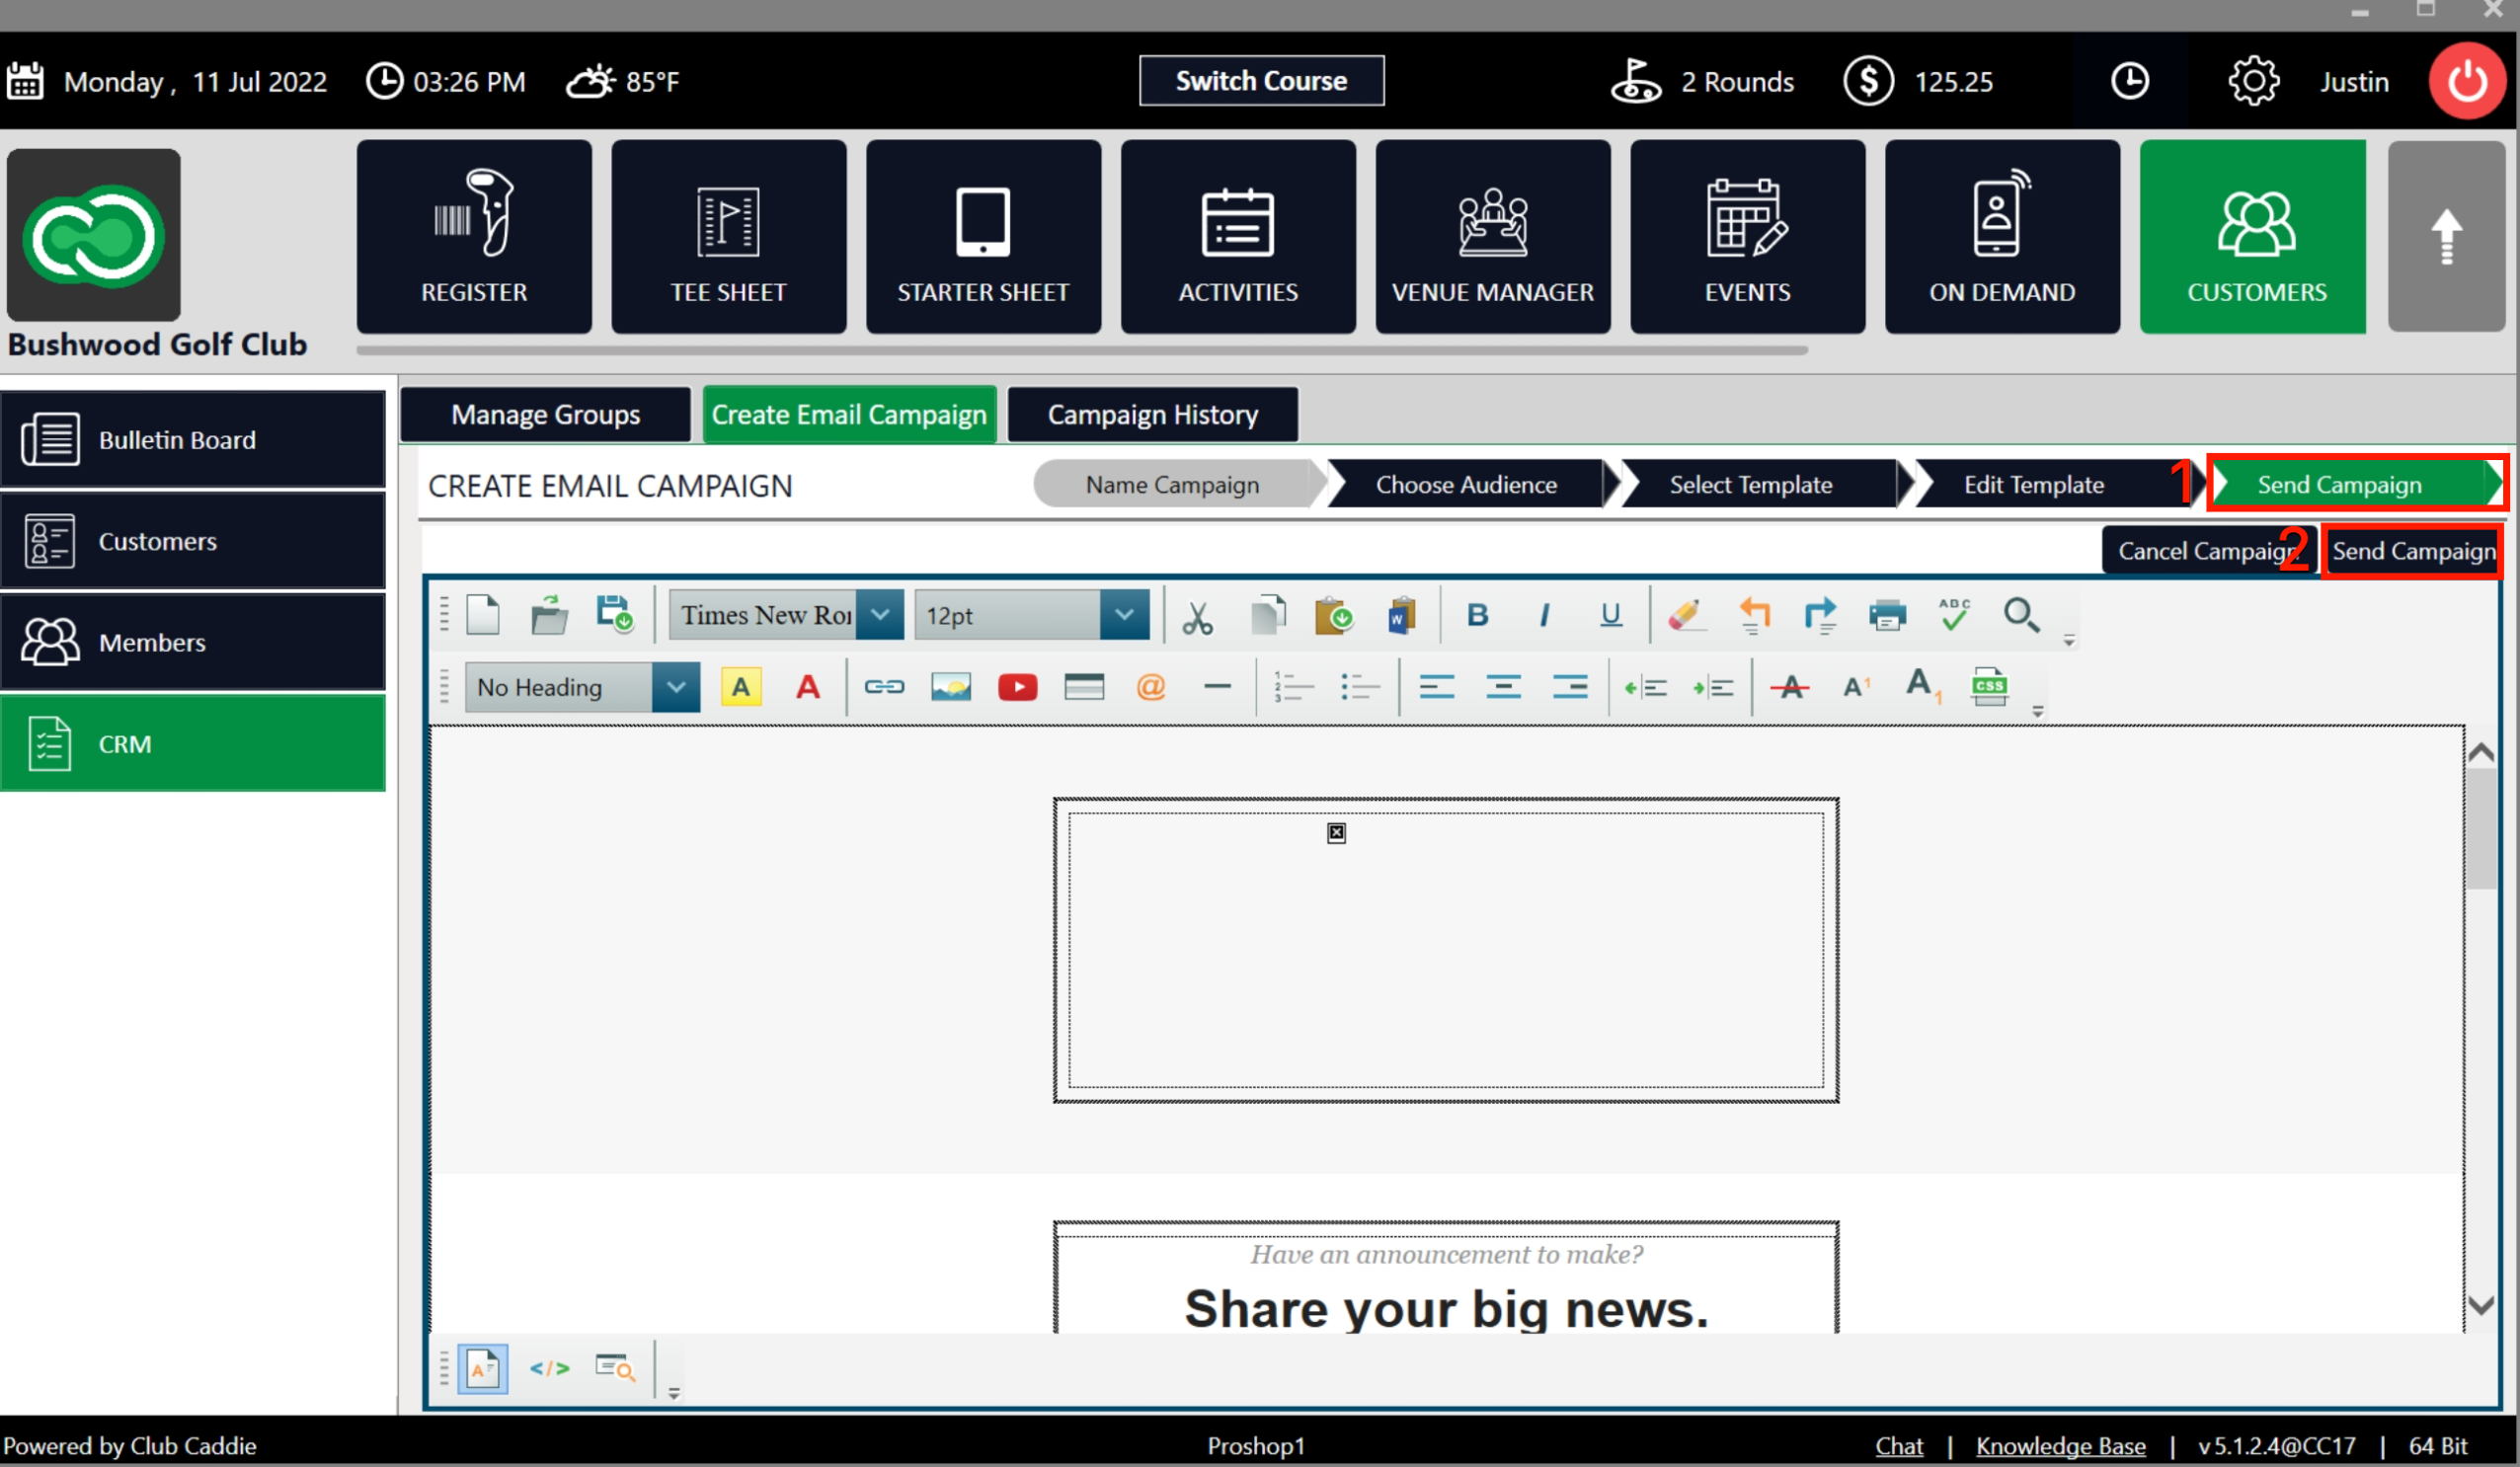
Step 6: Once saved, you will be taken to the next window Send Campaign (1). Click on the Send Campaign (2) button to have the system complete the campaign.
Campaign History: This tab will display a list of the campaigns you have sent out. It will show you details of Campaign Name, Date Sent, and No. of Recipients.
Related Articles
Relocating Guest email from archived to a new profile
This article contains a step-by-step guide on how to move an email address from an archived Guest profile to a newly created profile. This process is crucial in situations where a Guest requires a new profile or needs to change the email address. ...Create & Manage Groups
This article gives step-by-step instructions on how to create and manage Groups. Step-By-Step: Step 1: Select the Guests module from the module navigation menu. Click CRM from the left row of the window. Step 2: To create a new group click on the ...How to create a flag
This article contains step-by-step instructions on how to set a new flag for Guests. Step-By-Step: Step 1: Select the Guests module from the module navigation menu. Next, select Guest from the left side of the window. The system will show existing ...Adding a New Guest
This article summarizes how to add a new Guest from Tee Sheet, POS, and Guest Tab. Step-By-Step: A. Adding a new Guest through Tee-Sheet. Step 1: Click on the "Tee Sheet' Tab from the header of the window. Step 2: On Tee Sheet, there are time slots ...Options in Emailing Guests
Article Contents: This Article Provides A Guide On The Options You Have For Emailing Your Members (Guests). Step-By-Step: In Jonas Synergy, there are two primary methods to send messages to your Guests: directly from the tee sheet or via the ...