Member Ledger
Step-By-Step:
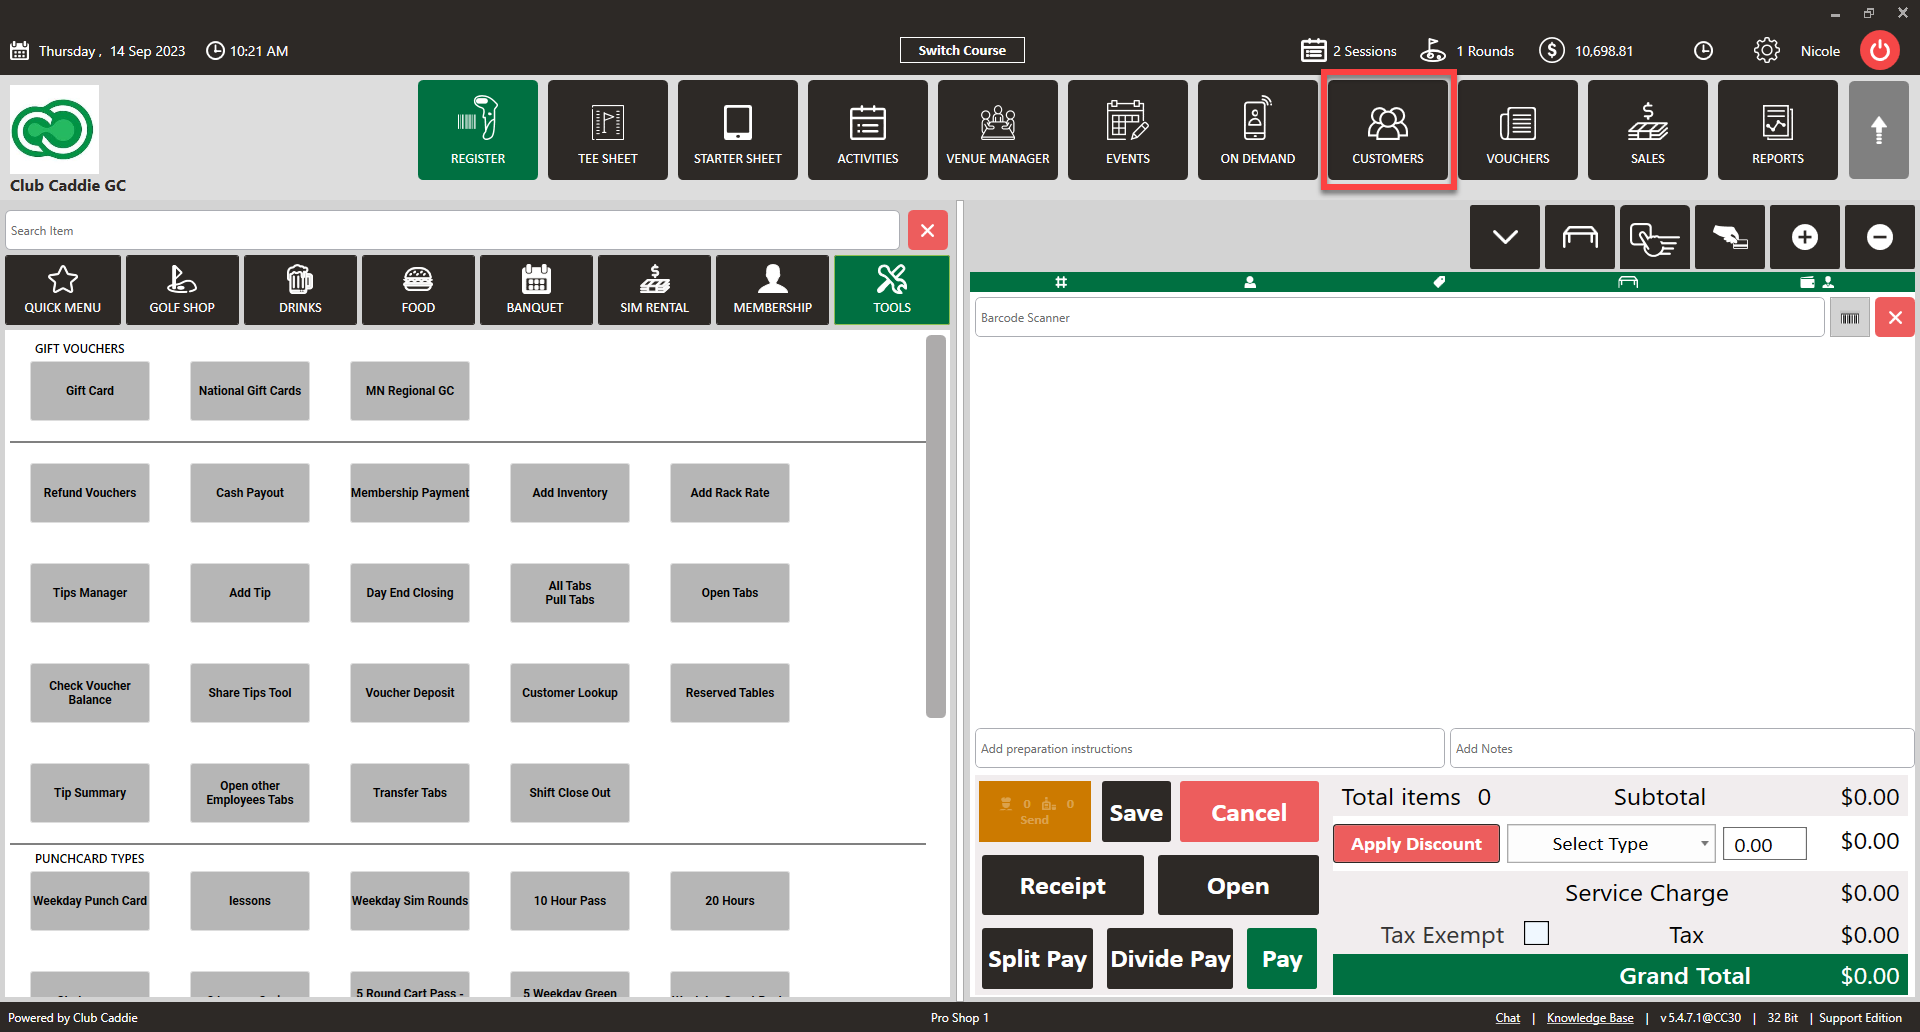
Step 1: Click on the "Customers" tab located at the top navigation bar.
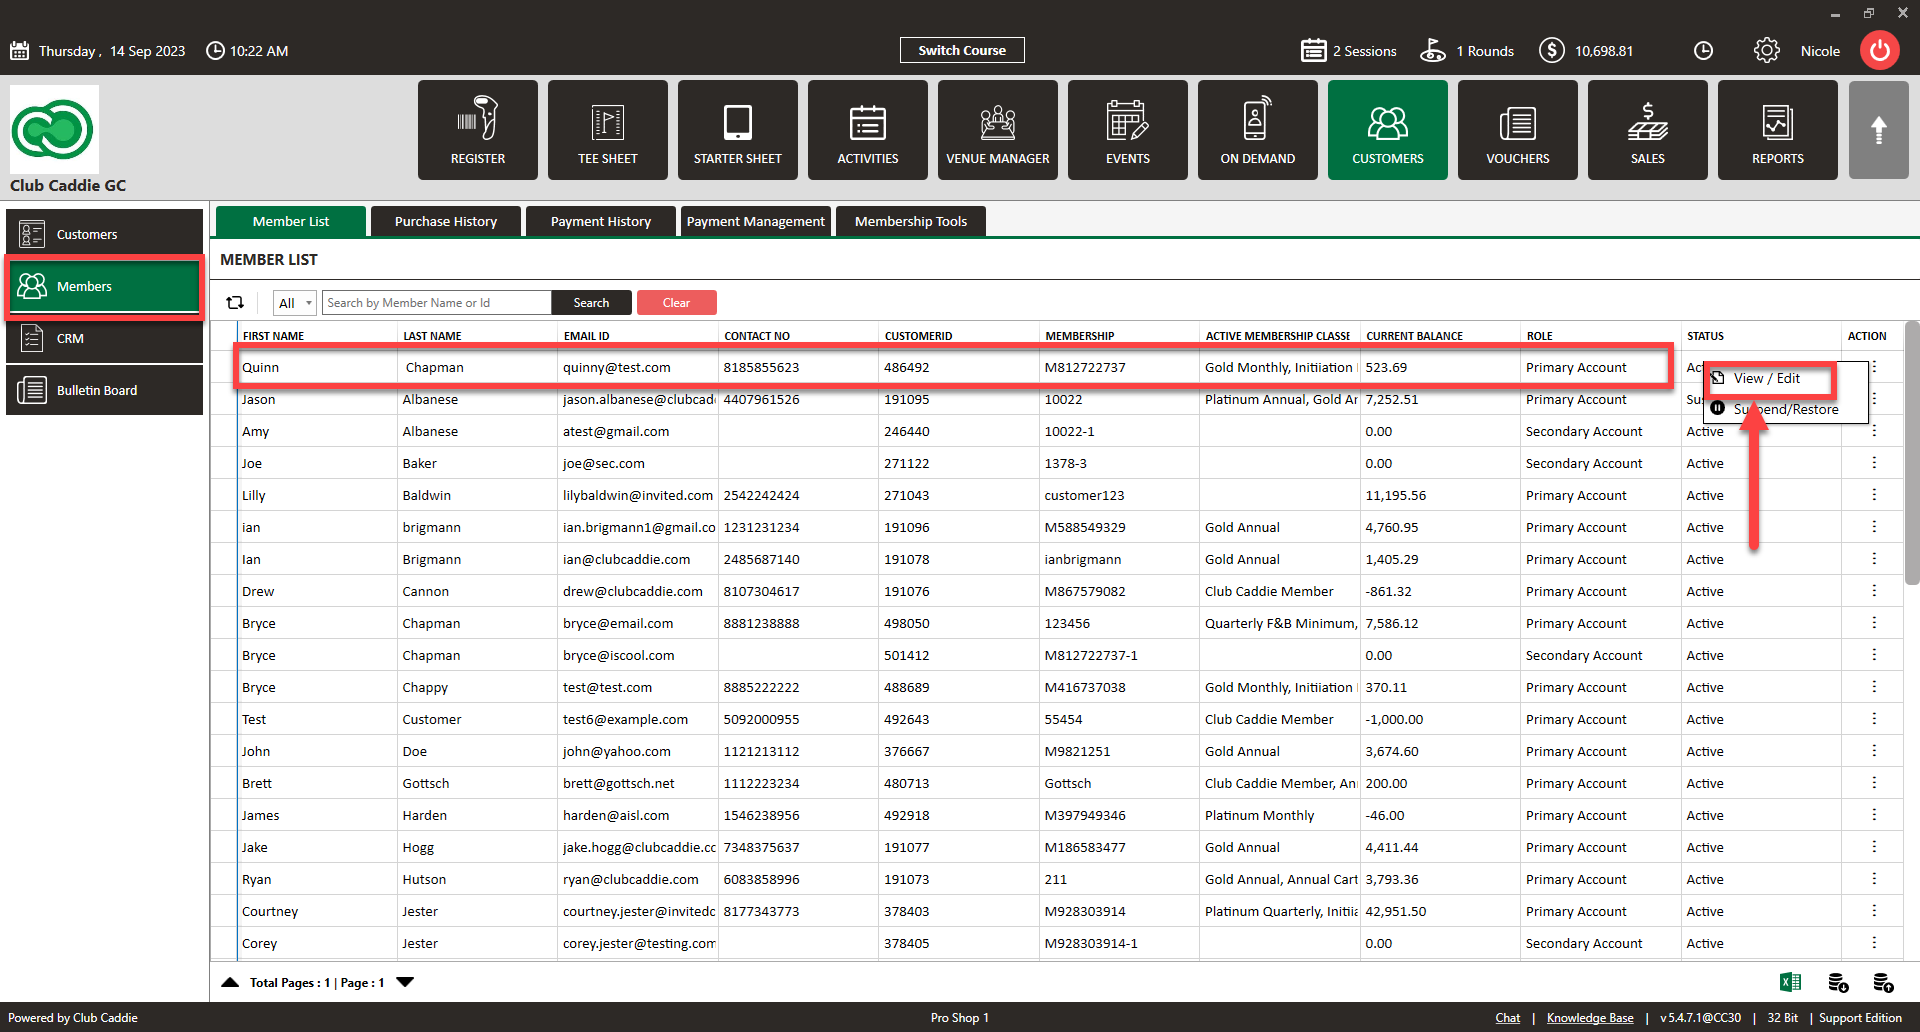
Step 2: Select the "Members" tab from the left-hand navigation menu, you will find the “Members List” in the left-hand column, then click on the "View/Edit" option.
Step 3: Click on the "Membership" tab from the top navigation menu.
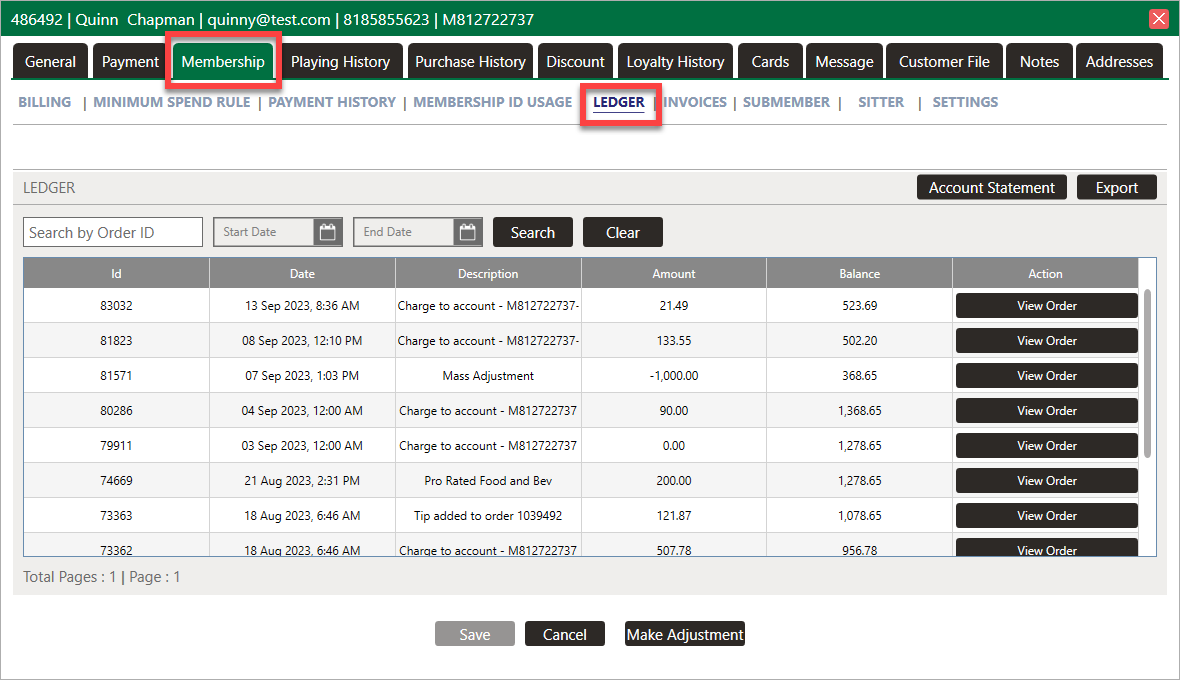
Step 4: Click on the "Ledger" tab, you will get a "Ledger window". This window will show you the ID, Date, Description, Amount, Balance and Action.
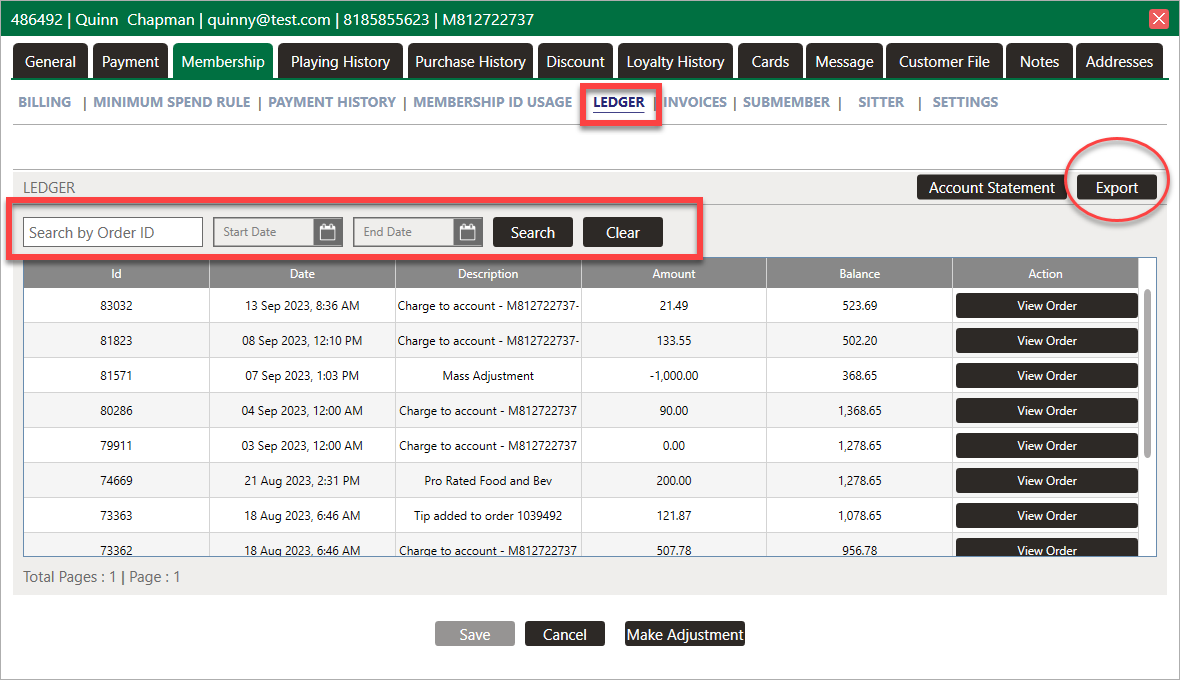
A) You can find the specific Ledger by its "Order Id".
B) You can click the “Export Icon” for the Ledger in Excel format.
Step 5: Click on the "View Order" option, you will get a "Receipt window". This window will show you the Void, Close, PDF, Print, Select Printer, Email options.
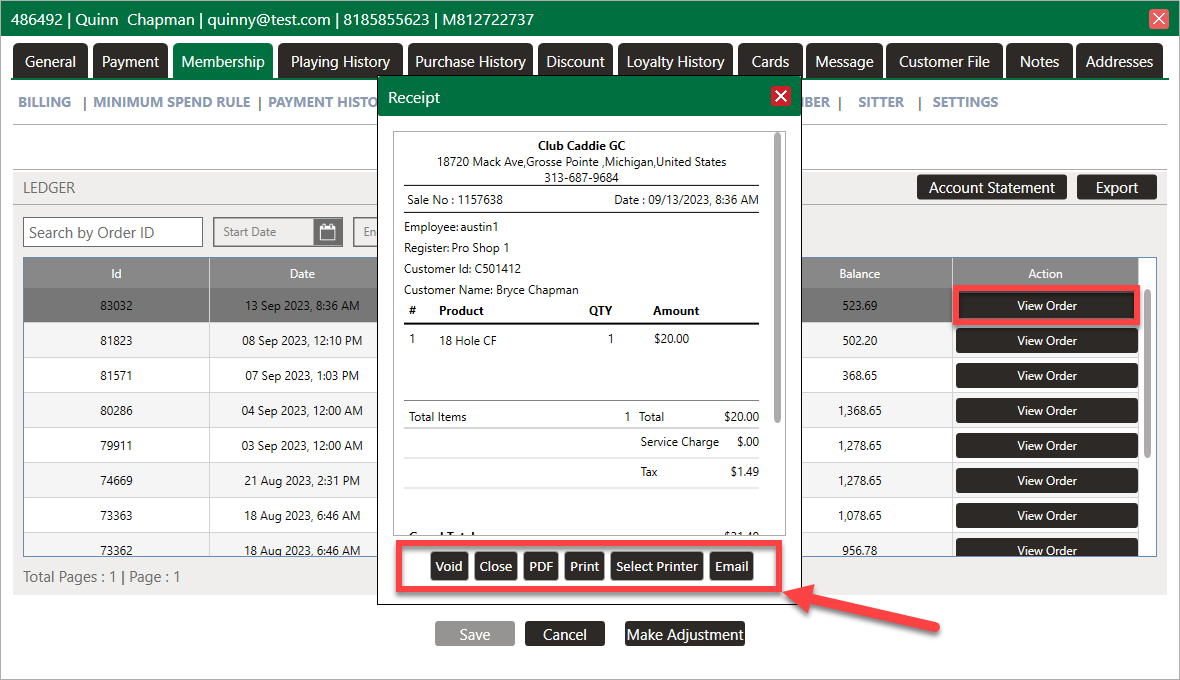
Note: A transaction can only be voided till closing time on the day of the transaction. If you are trying to void a transaction from a previous day, please contact Jonas Synergy Support Team. If you cancel an order, a negative Ledger will be generated for that order.
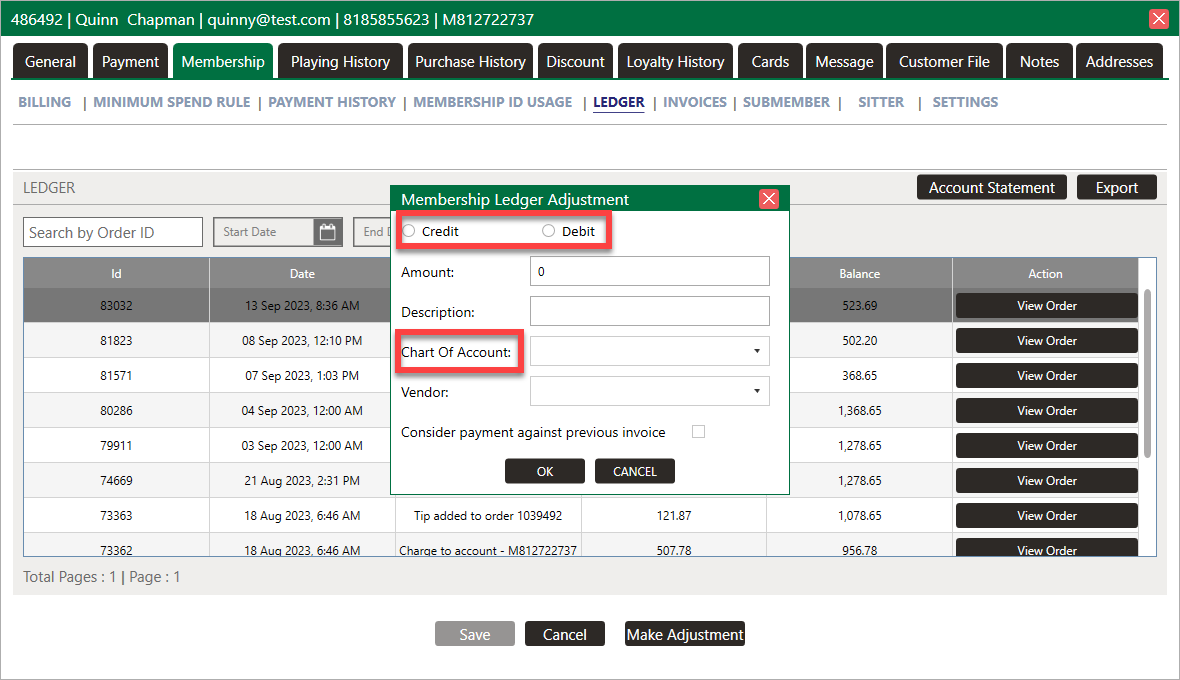
Step 6: You can also make Ledge adjustments by selecting the Make Adjustment option on the bottom of the window and fill in all the information and click on the OK button. This allows you to debit or credit the account and link to the proper GL account by using the Chart of Account drop-down option.
Related Articles
How to Perform a Ledger Adjustment
Article Contents: This portion summarizes how to make Ledger adjustment. Step-By-Step: Step 1: Click on the Guest module along the top row. Step 2: Select the Members list in the left-hand menu, then click on the action button and View/Edit for the ...Member List
Article Contents: This article contains a step-by-step guide on how to view your member list. Step-By-Step: Step 1: Click on the Members Tab on the left pane. Step 2: Click on the Members button on the left side of the window to go to the member ...Add a Sub-Member
Article Contents: This article explains how to add sub-member to the primary members. Step-By-Step: Step 1: Click on the "Guests" then click on "Members". Step 2: Select Particular member that you want to add sub-member and click on Action -> ...Assign Member Classes
Article Contents: This article gives step-by-step instructions on how to assign a member class to a member. Step-By-Step: Step 1: Select the members module from the module navigation menu. Here you will see a list of all the members. Step 2: Click on ...Downloading Member Invoice
This article gives step-by-step instructions on how to download member invoices. Step-By-Step: Step 1: Select the CUSTOMERS module from the module navigation menu. The system will show a list of all the customers within the CUSTOMER LIST. Step 2: ...