Membership Portal Builder
The Membership Portal Builder is easy to use and does not require any coding or technical skills. You can create your own membership website in just a few steps.
Step 1: Navigate to Settings > I-Frame > Member Portal Builder.

Step 2: Click on the Membership Builder tab. You can add sections from here by clicking the Add Section button.
Each section will create a different web page for your membership site.
Use the Identifier field to select the section you want to include.
The Title field is used to name the section and will be displayed on the webpage.
The Display Order field determines the sequence in which sections appear on the webpage.

Click save to update the Membership Portal Builder.
You can choose from 19 pages that are selectable in the builder:
Overview: This page gives an overview of the member's account. Including contact info, current balance, sub-accounts, and recent purchase history.

Bulletin Board: This page allows you to post announcements, updates, news, tips, etc., for your members.
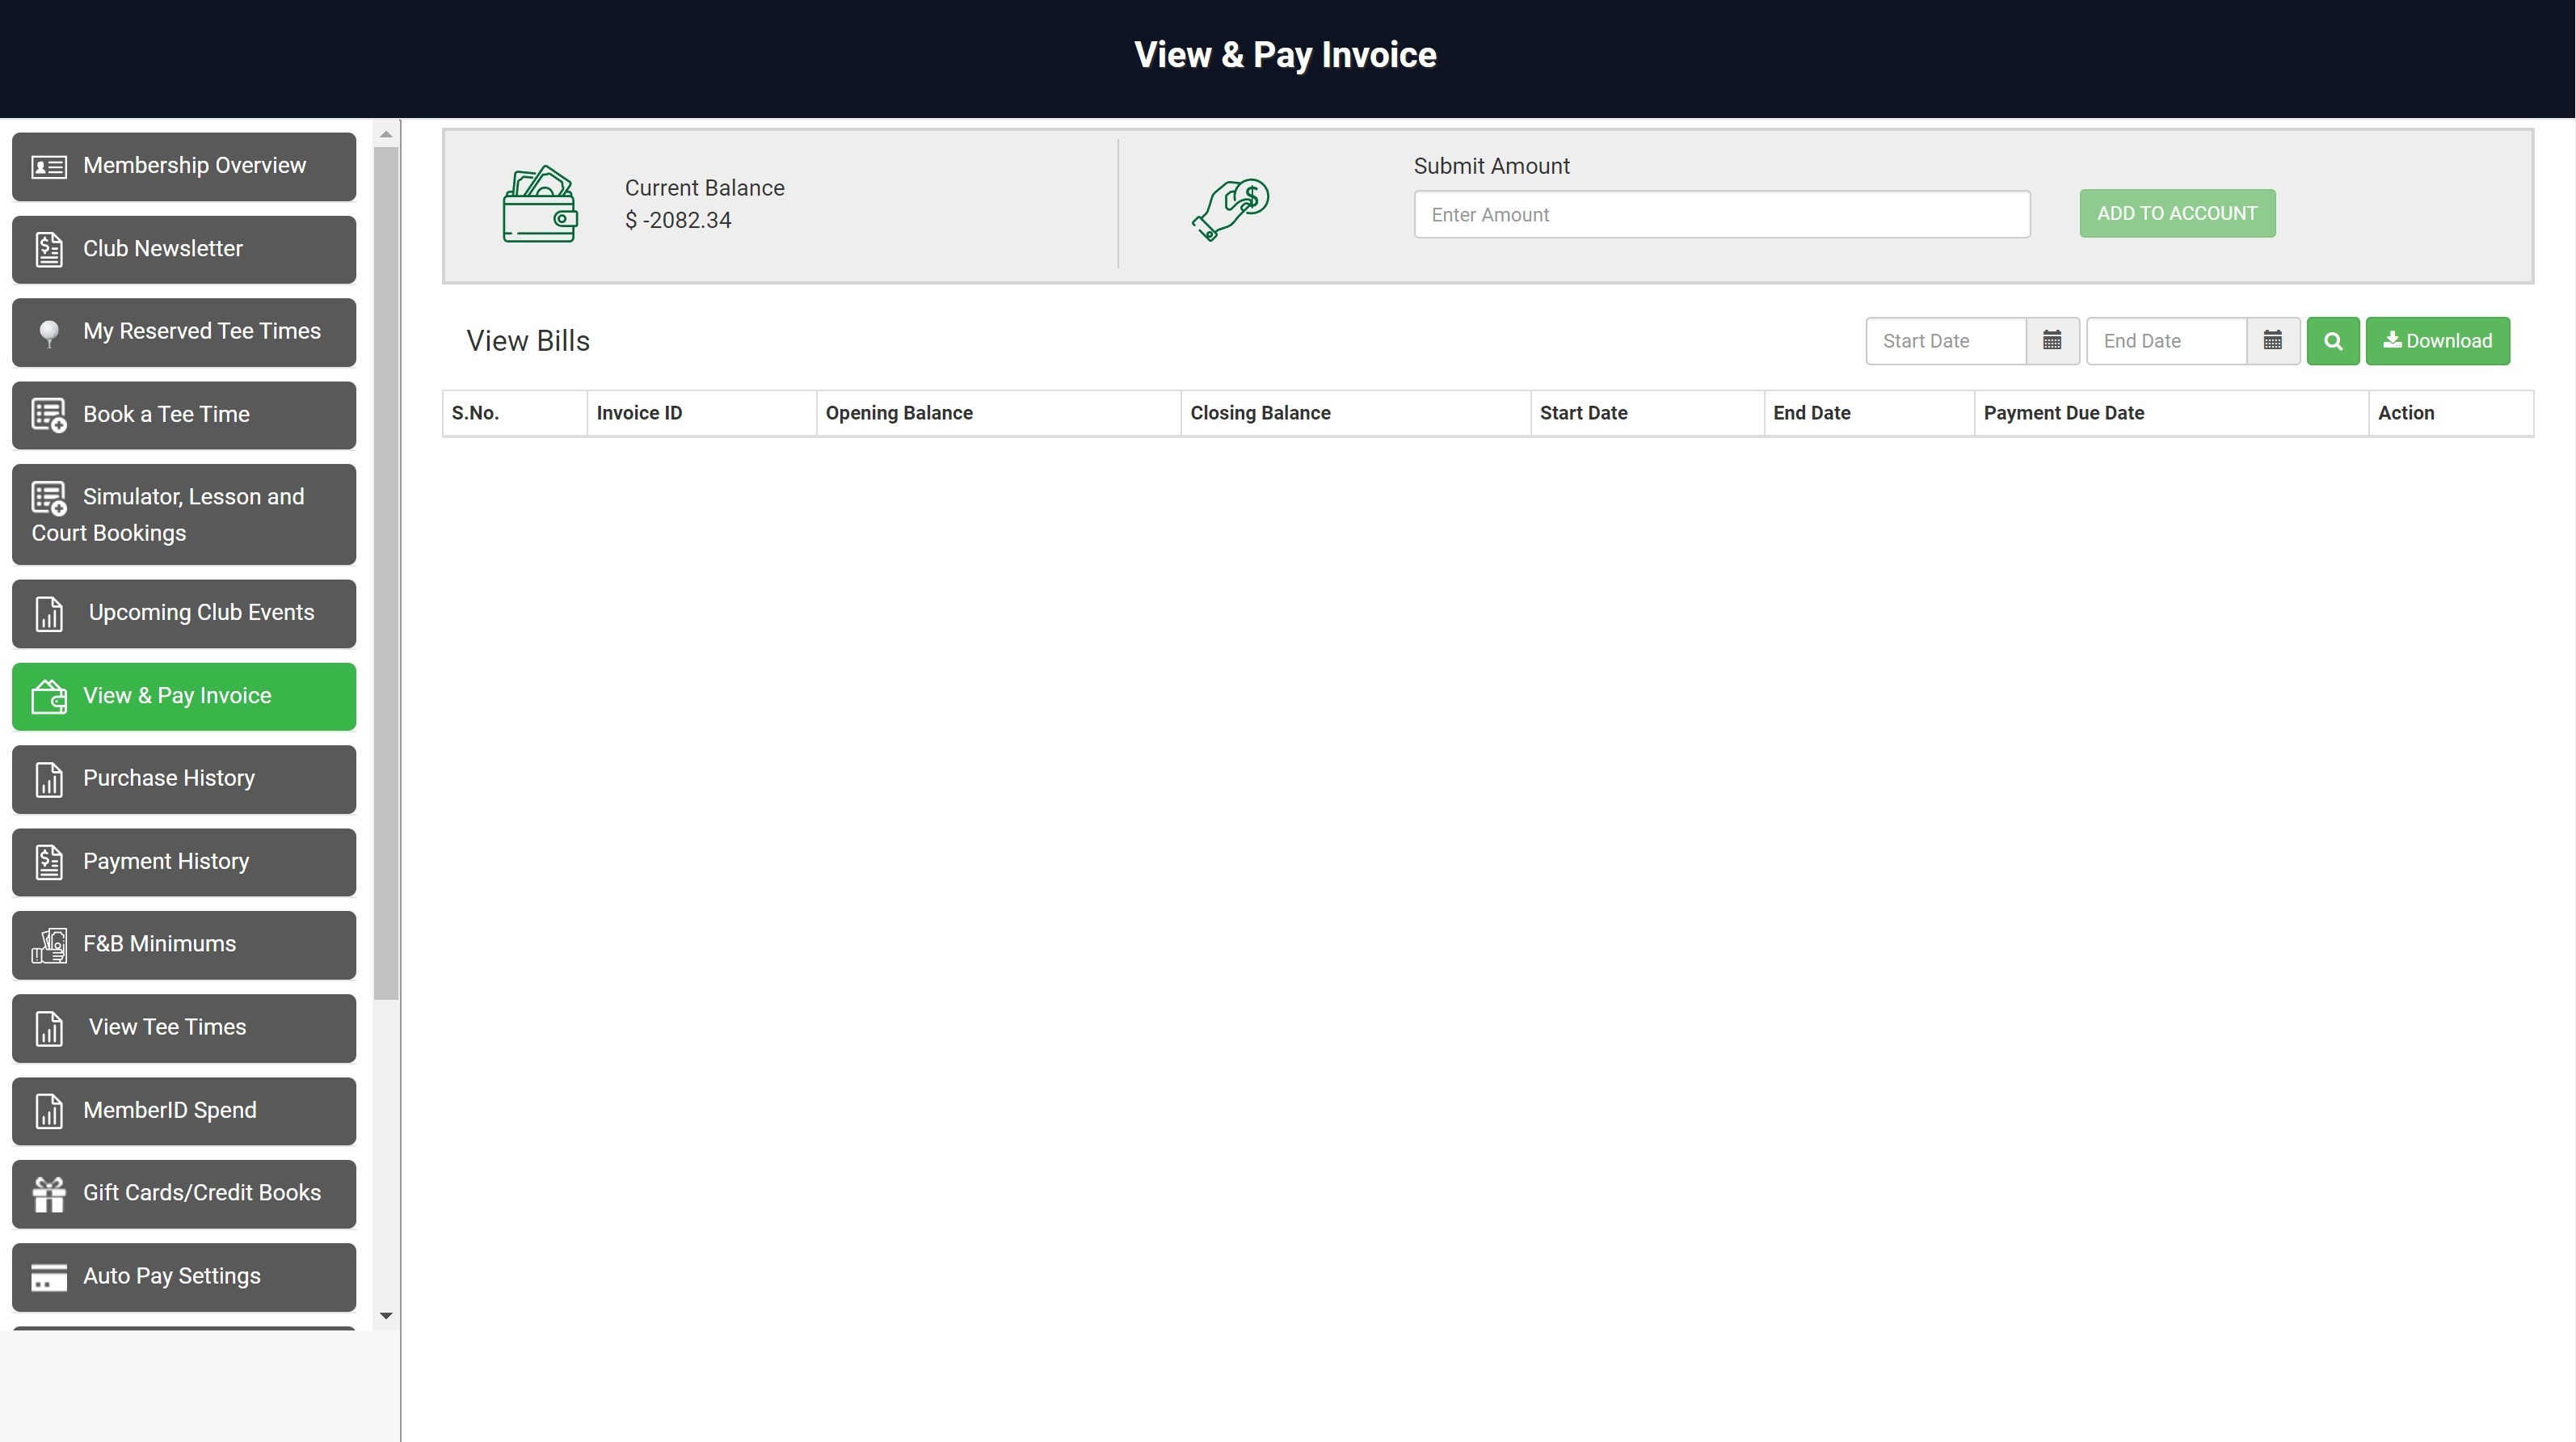
Invoice Payment: This page allows your members to view their current balances, invoices, and pay them online using stored credit card information.
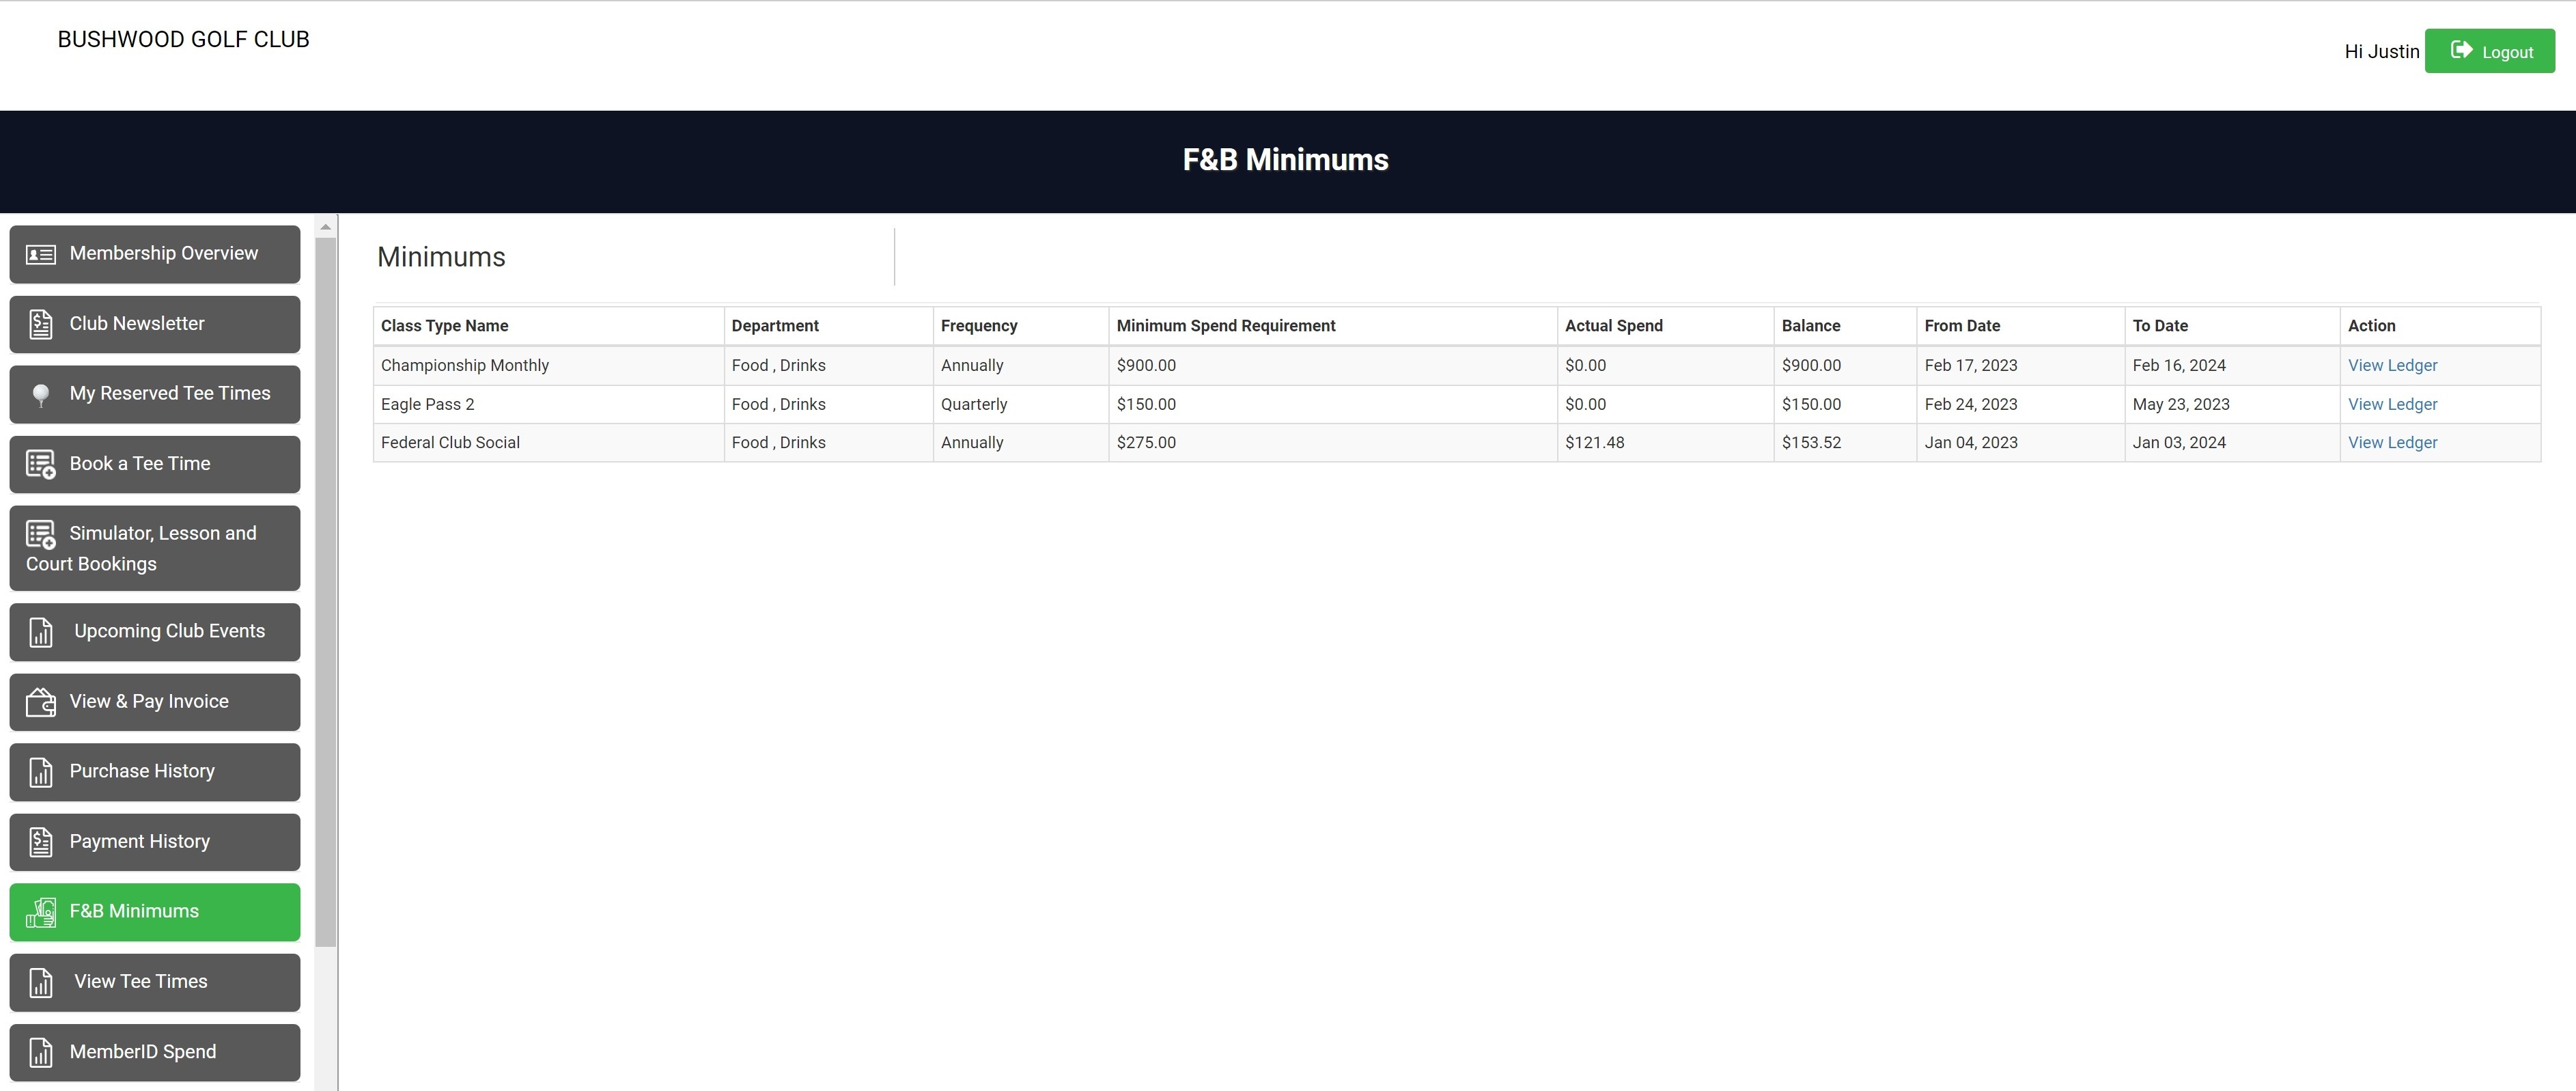
Minimums: This page allows members to track how much the member has spent so far on their account towards their monthly minimums.
Purchase History: This page allows your members to view their purchase history at the club and online. They can see details like the date, amount, and receipts for each transaction. The purchase history can be filtered by date using the Start date / End date fields.

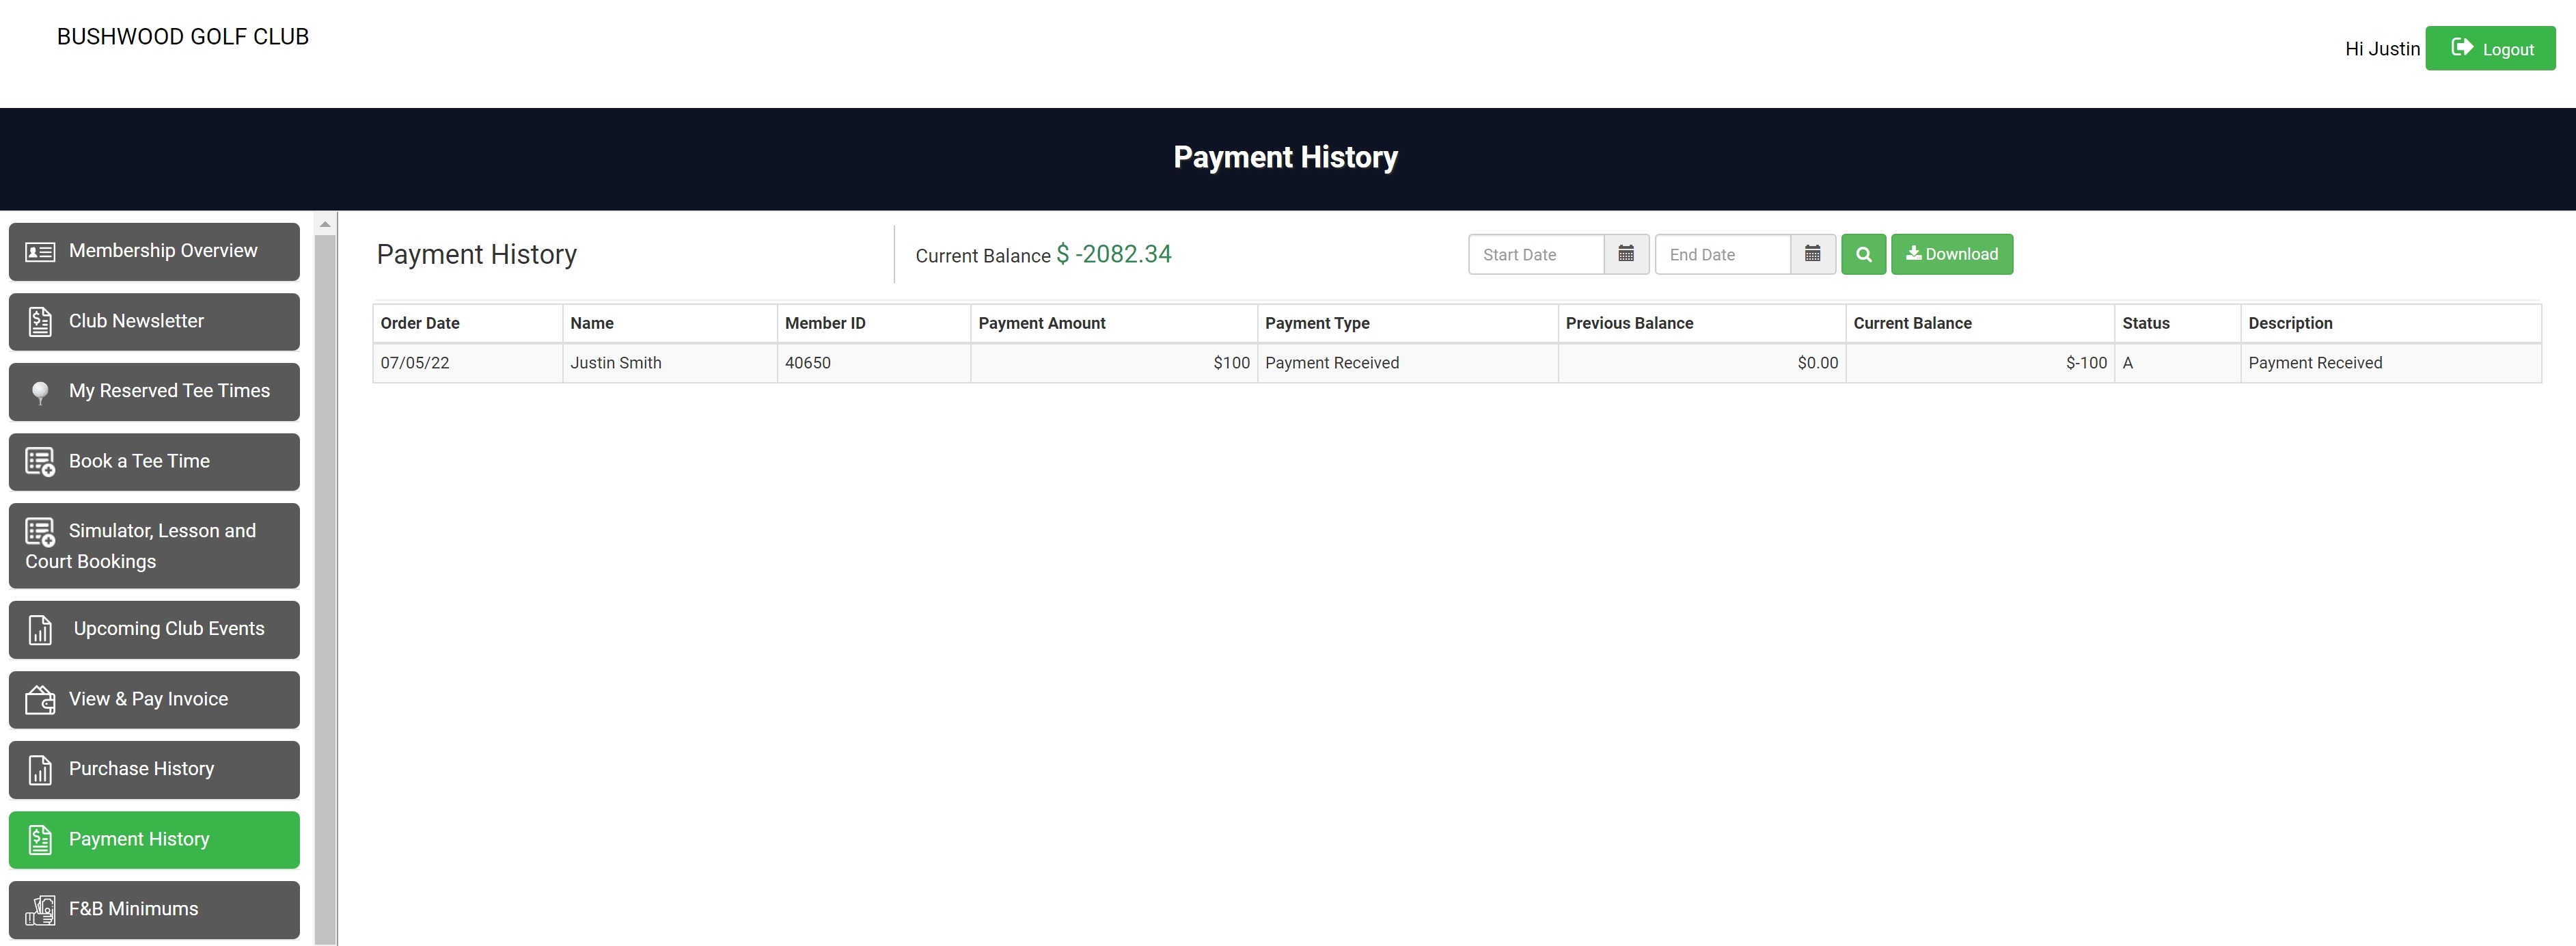
Payment History: This page allows your members to view their payment history at the club and online. They can see details like the date, amount, and status of each payment. The payment history can be filtered by date using the Start date / End date fields.
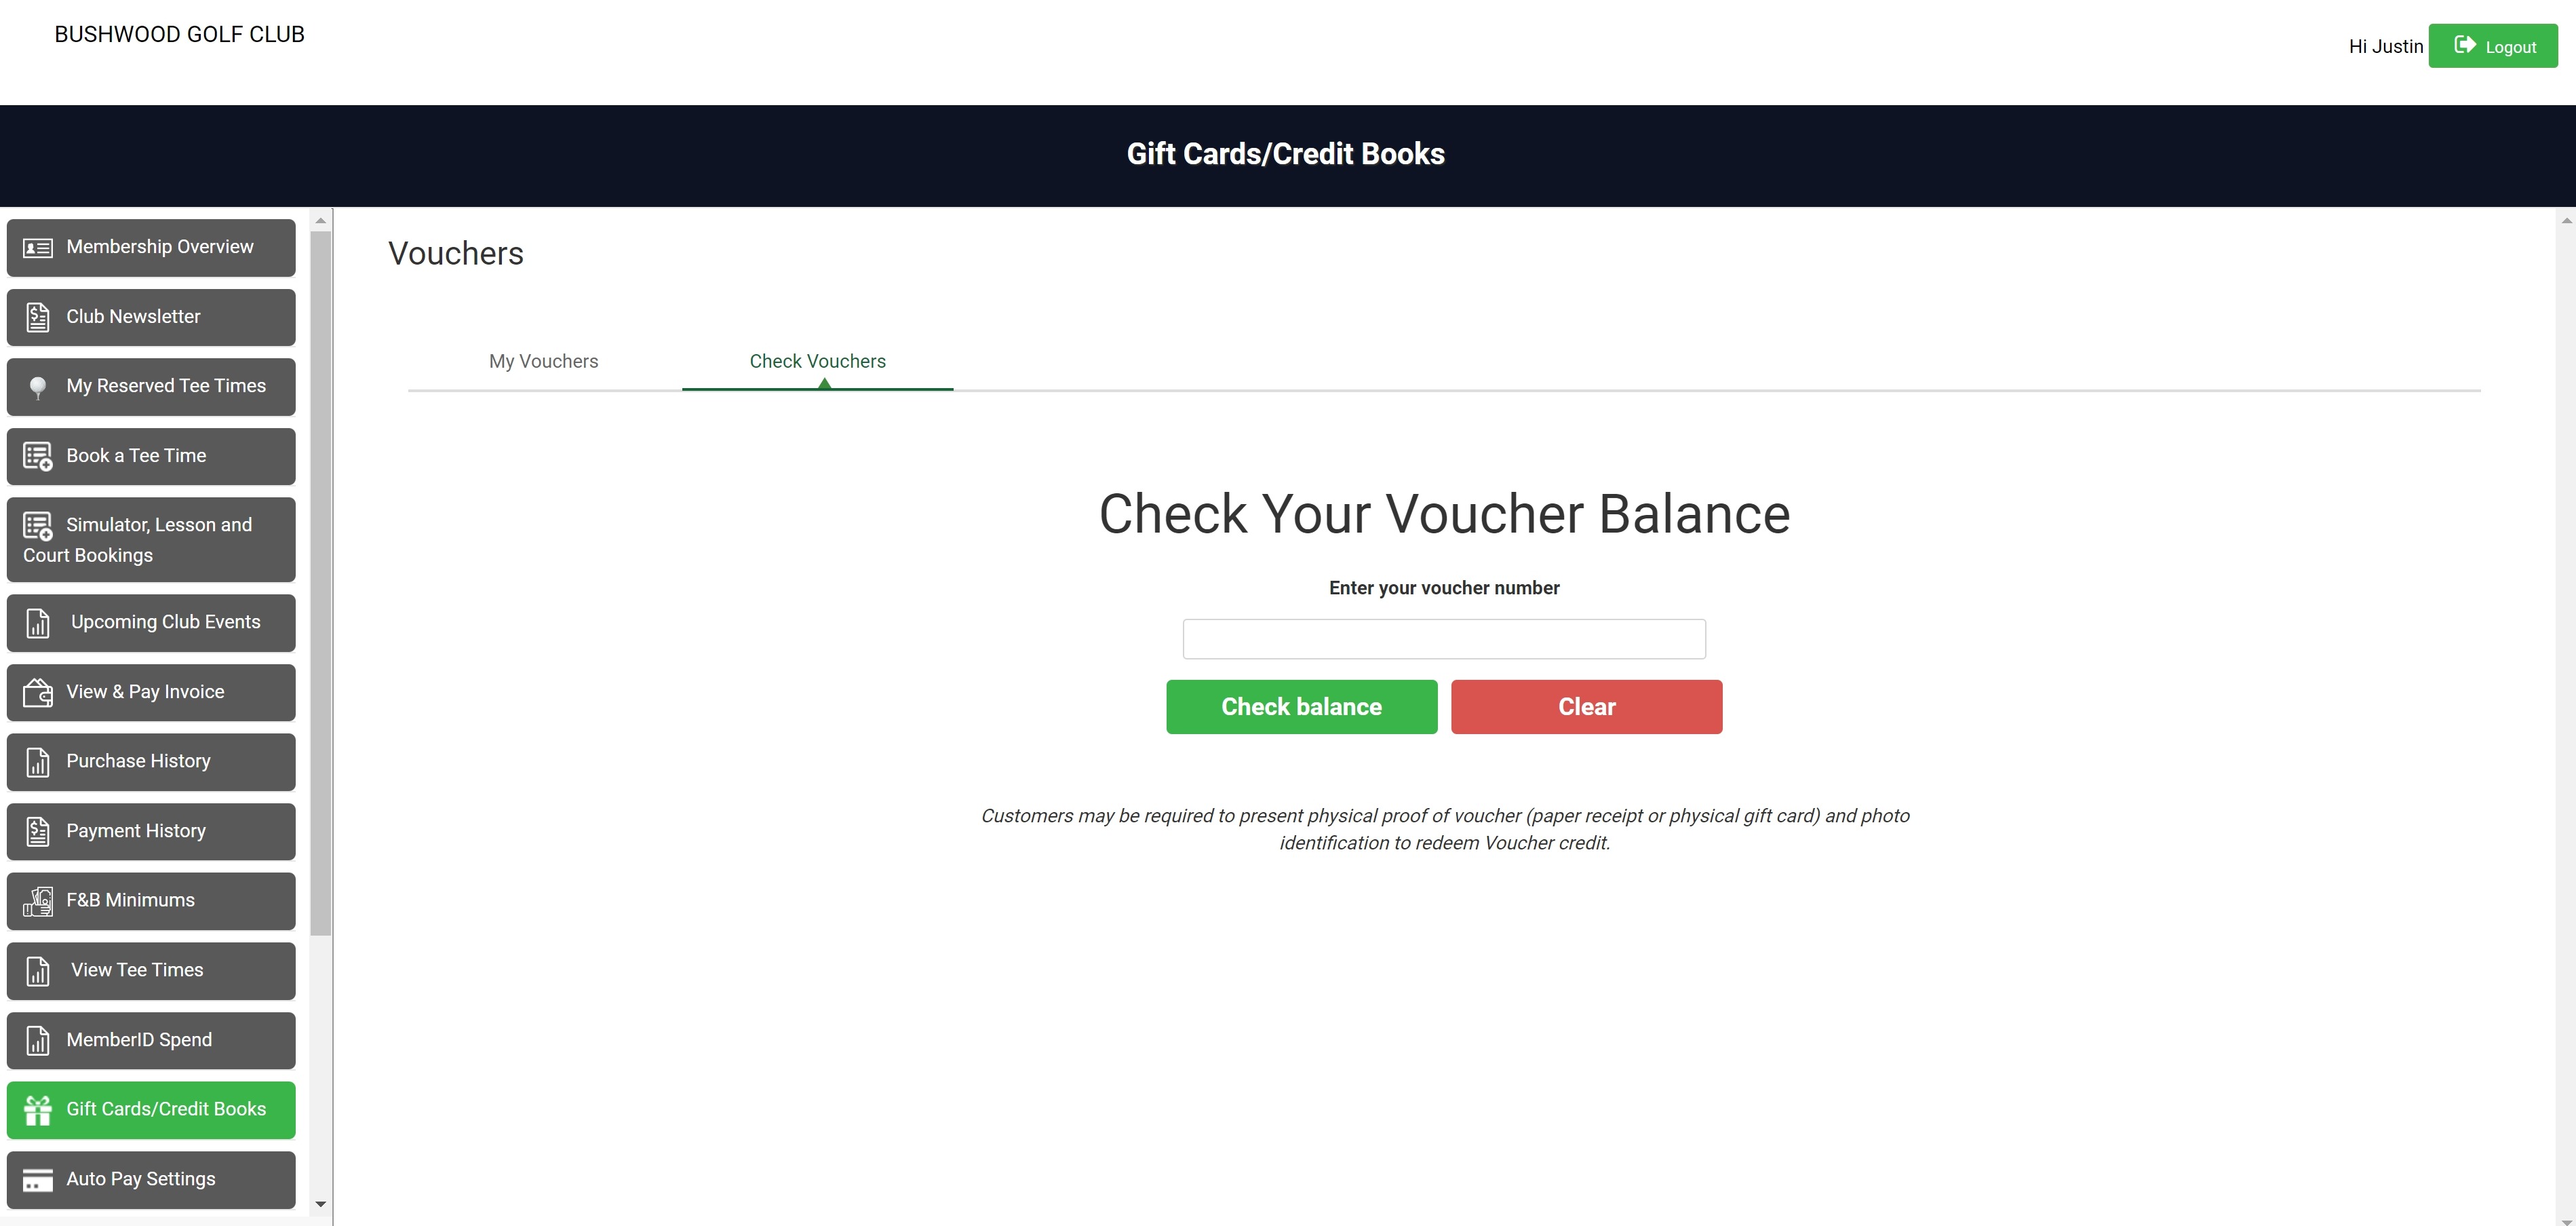
Vouchers: This page allows members to see the info on any vouchers that have been assigned to their accounts. The check voucher balance tab allows members to input a voucher number and check the voucher's current balance.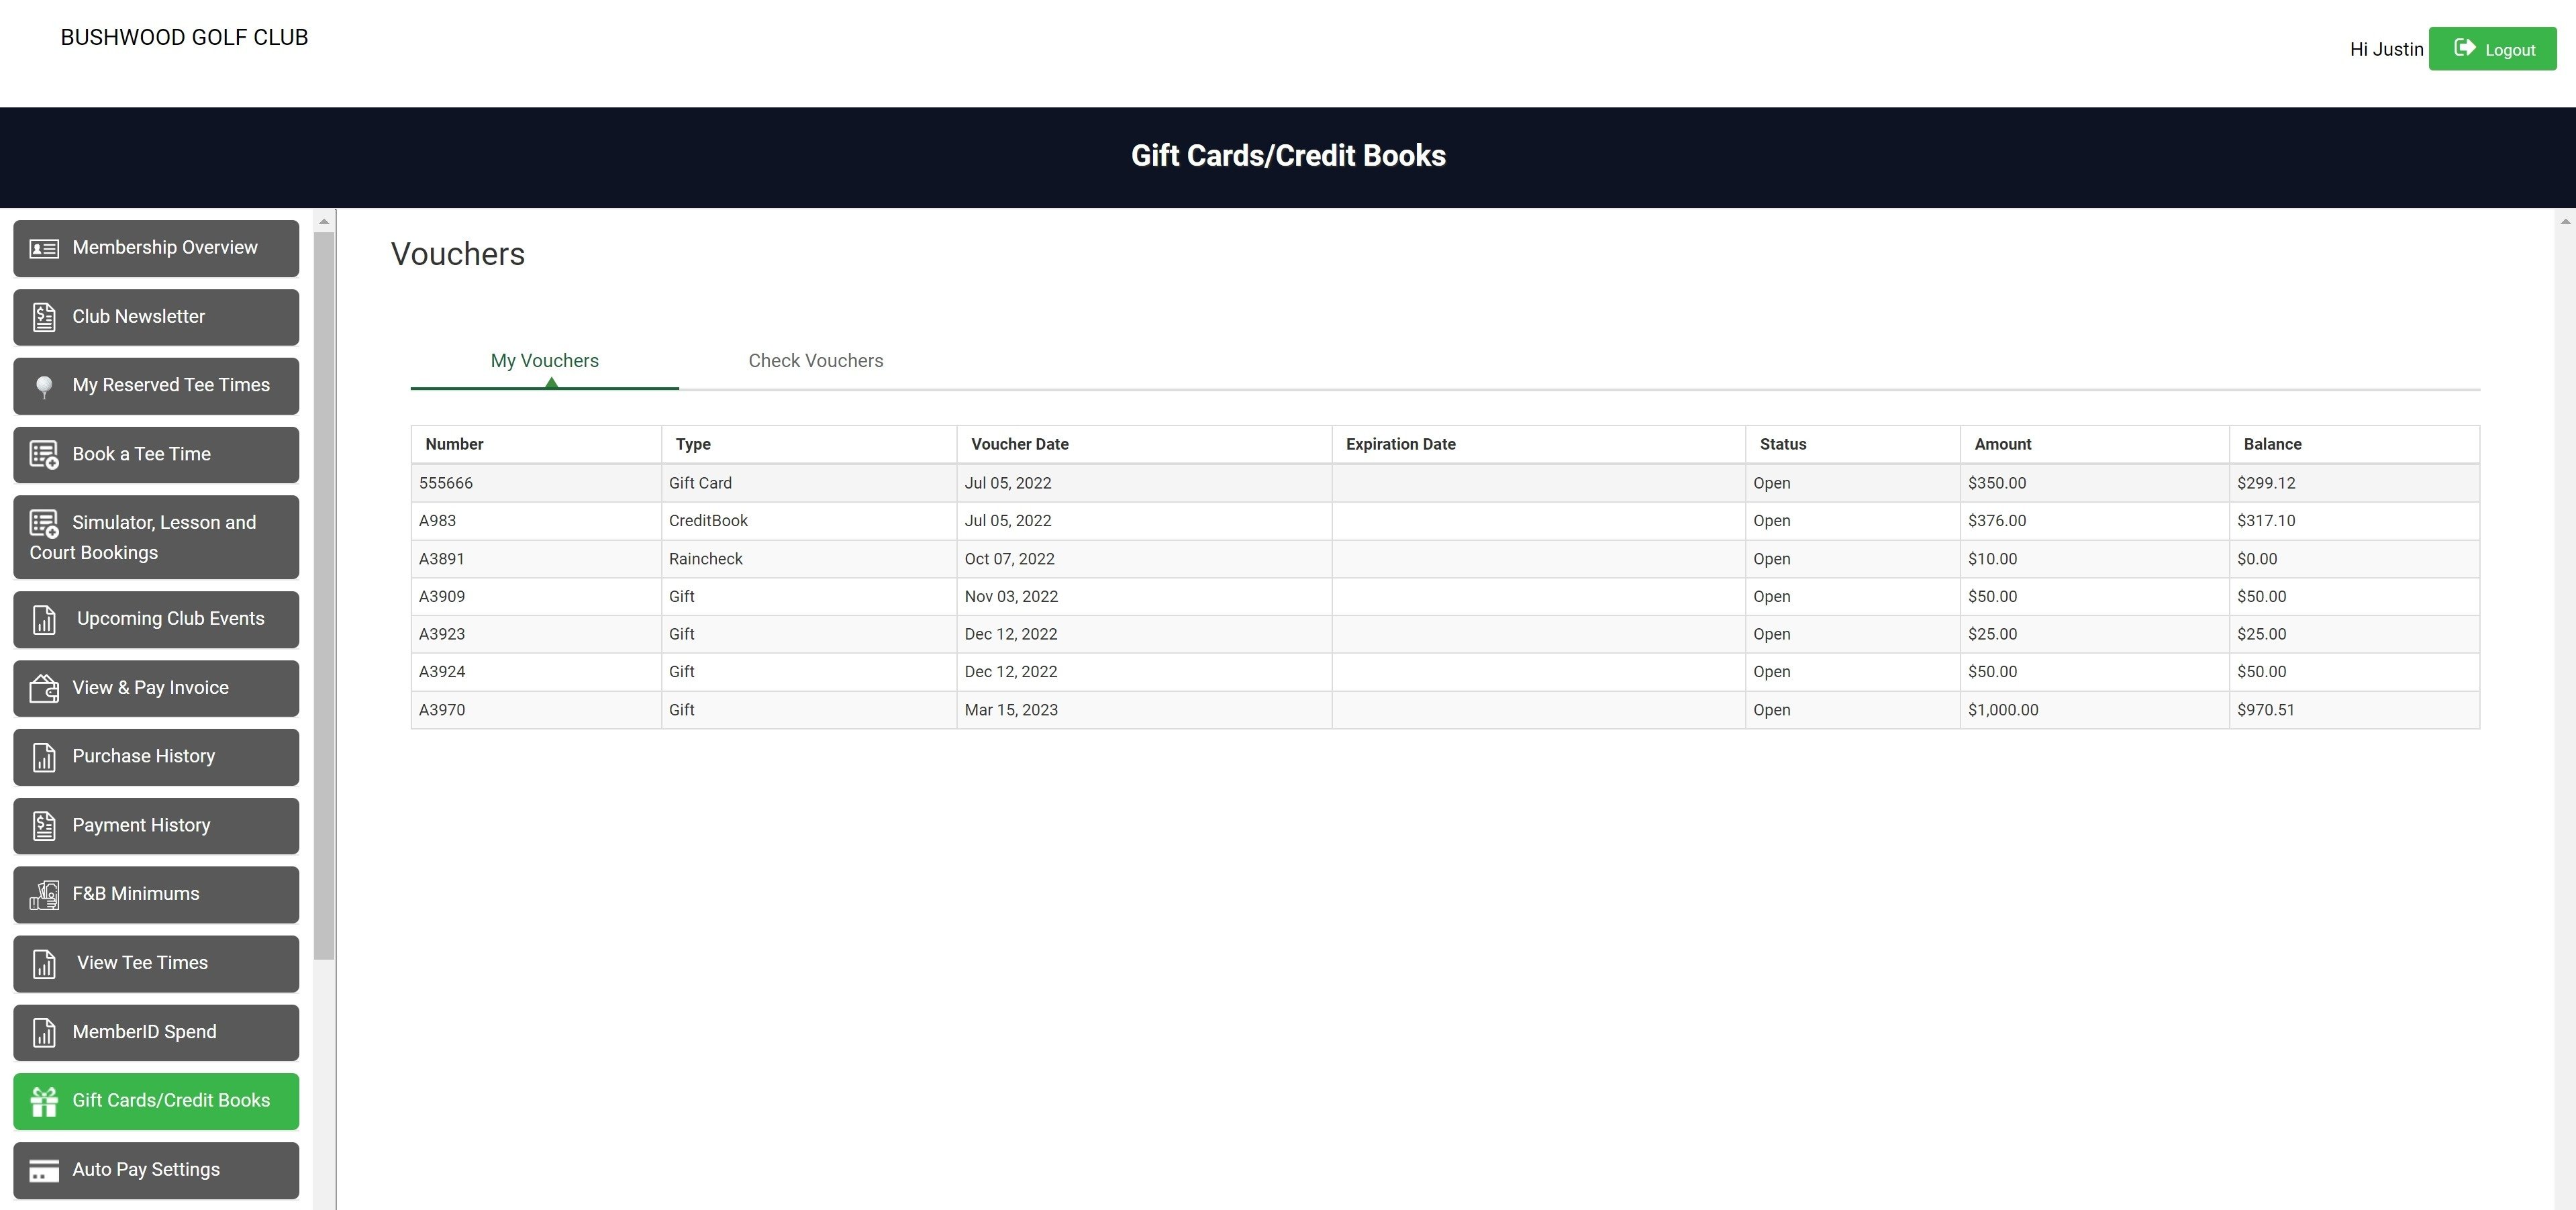
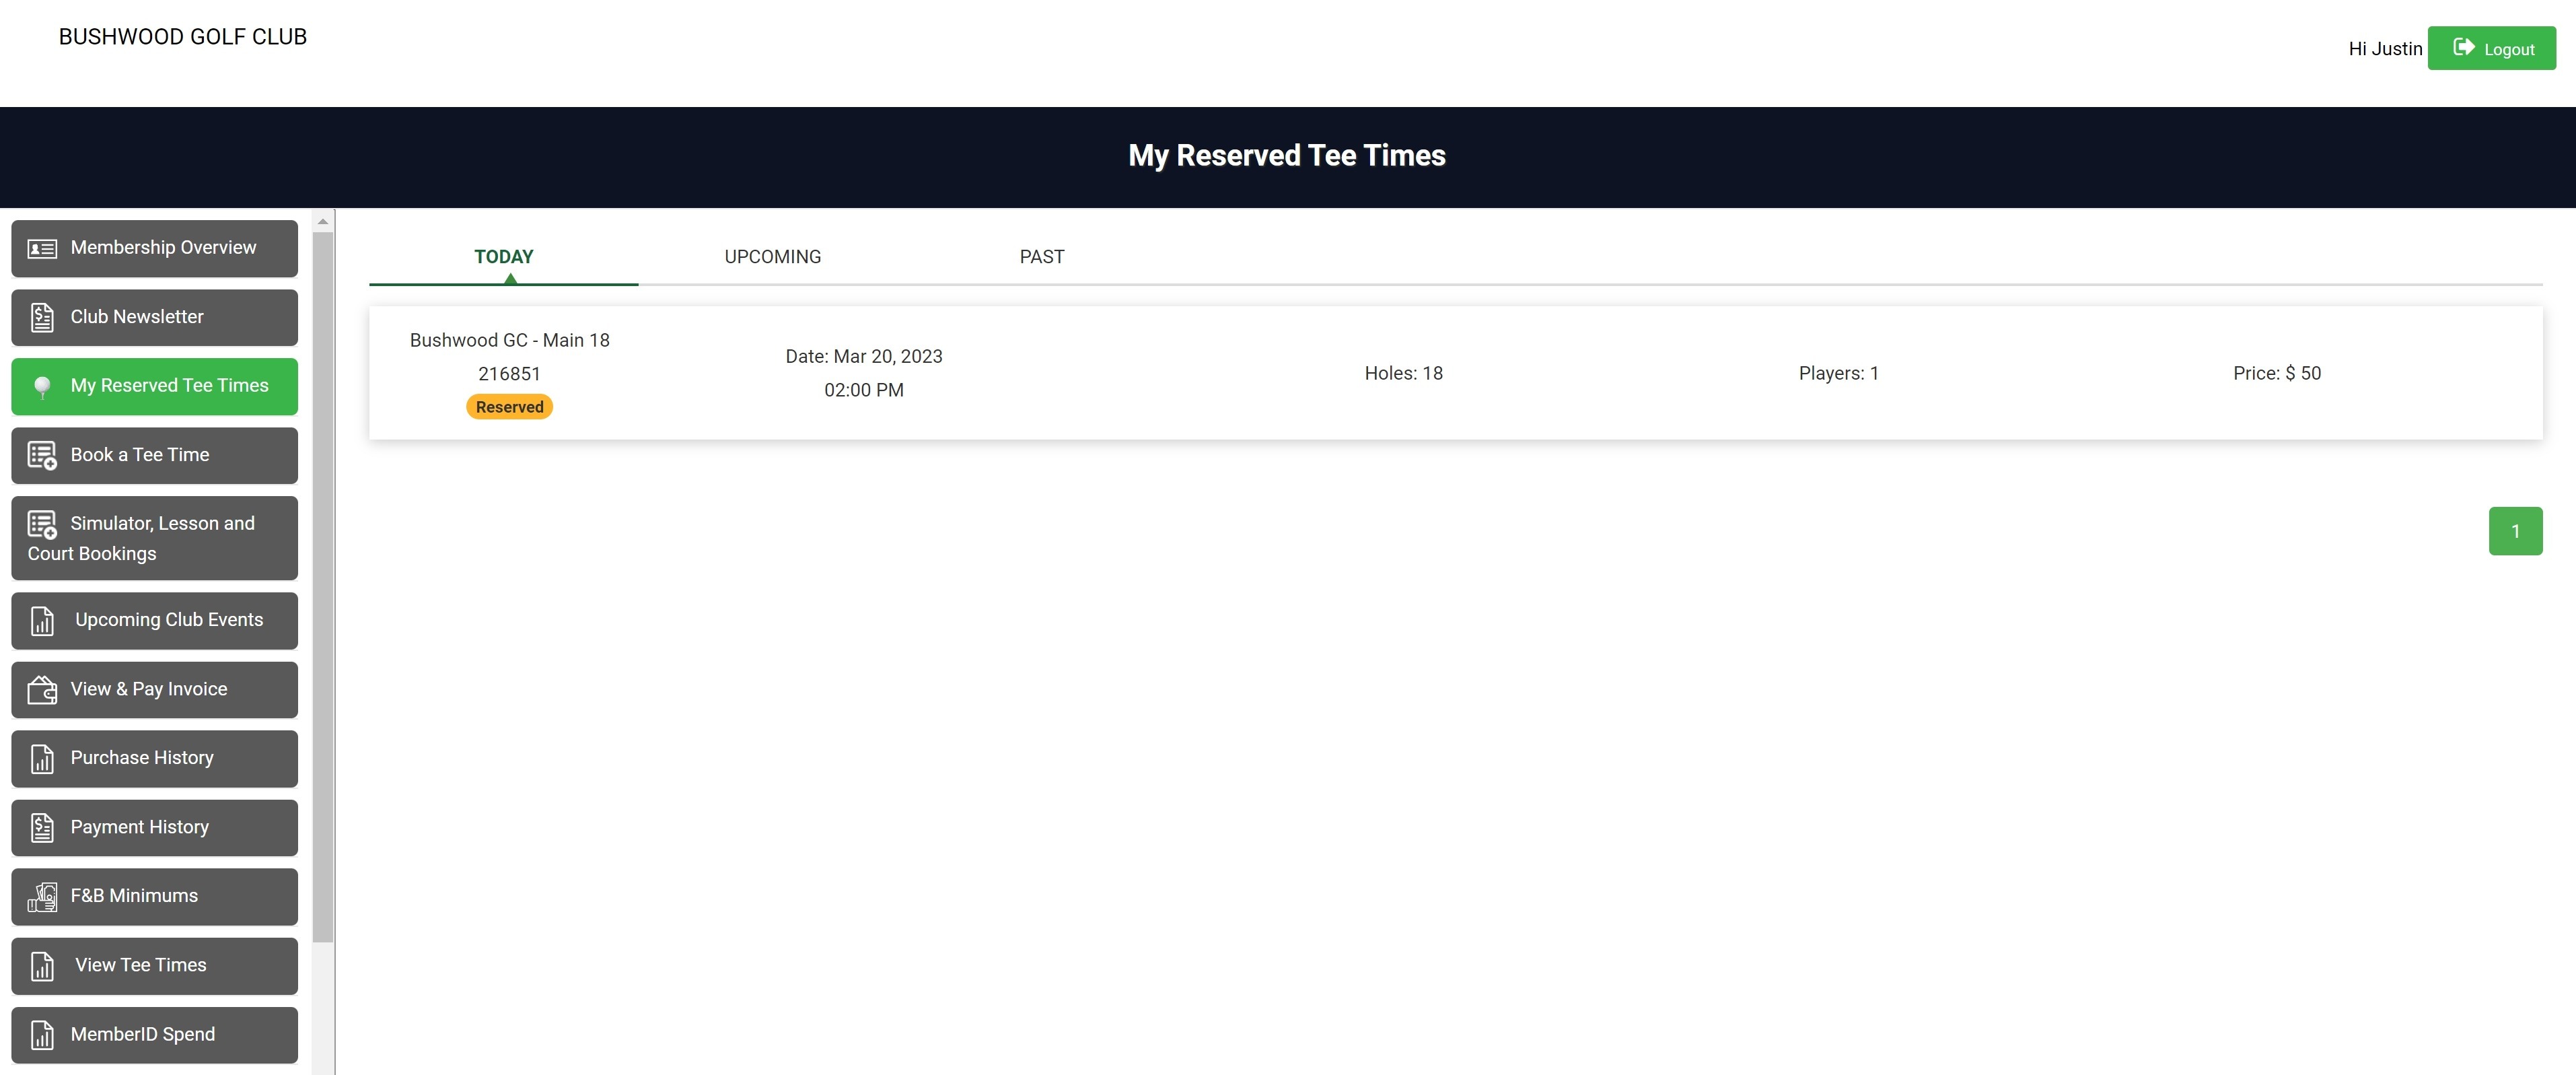
My Tee Times: This page allows members the ability to see tee times they have reserved either online or at the club. There are tabs for the current day, future bookings and historical past bookings.
Book Tee Time: This page allows your members to book tee times online. They can also cancel or reschedule their bookings if needed.
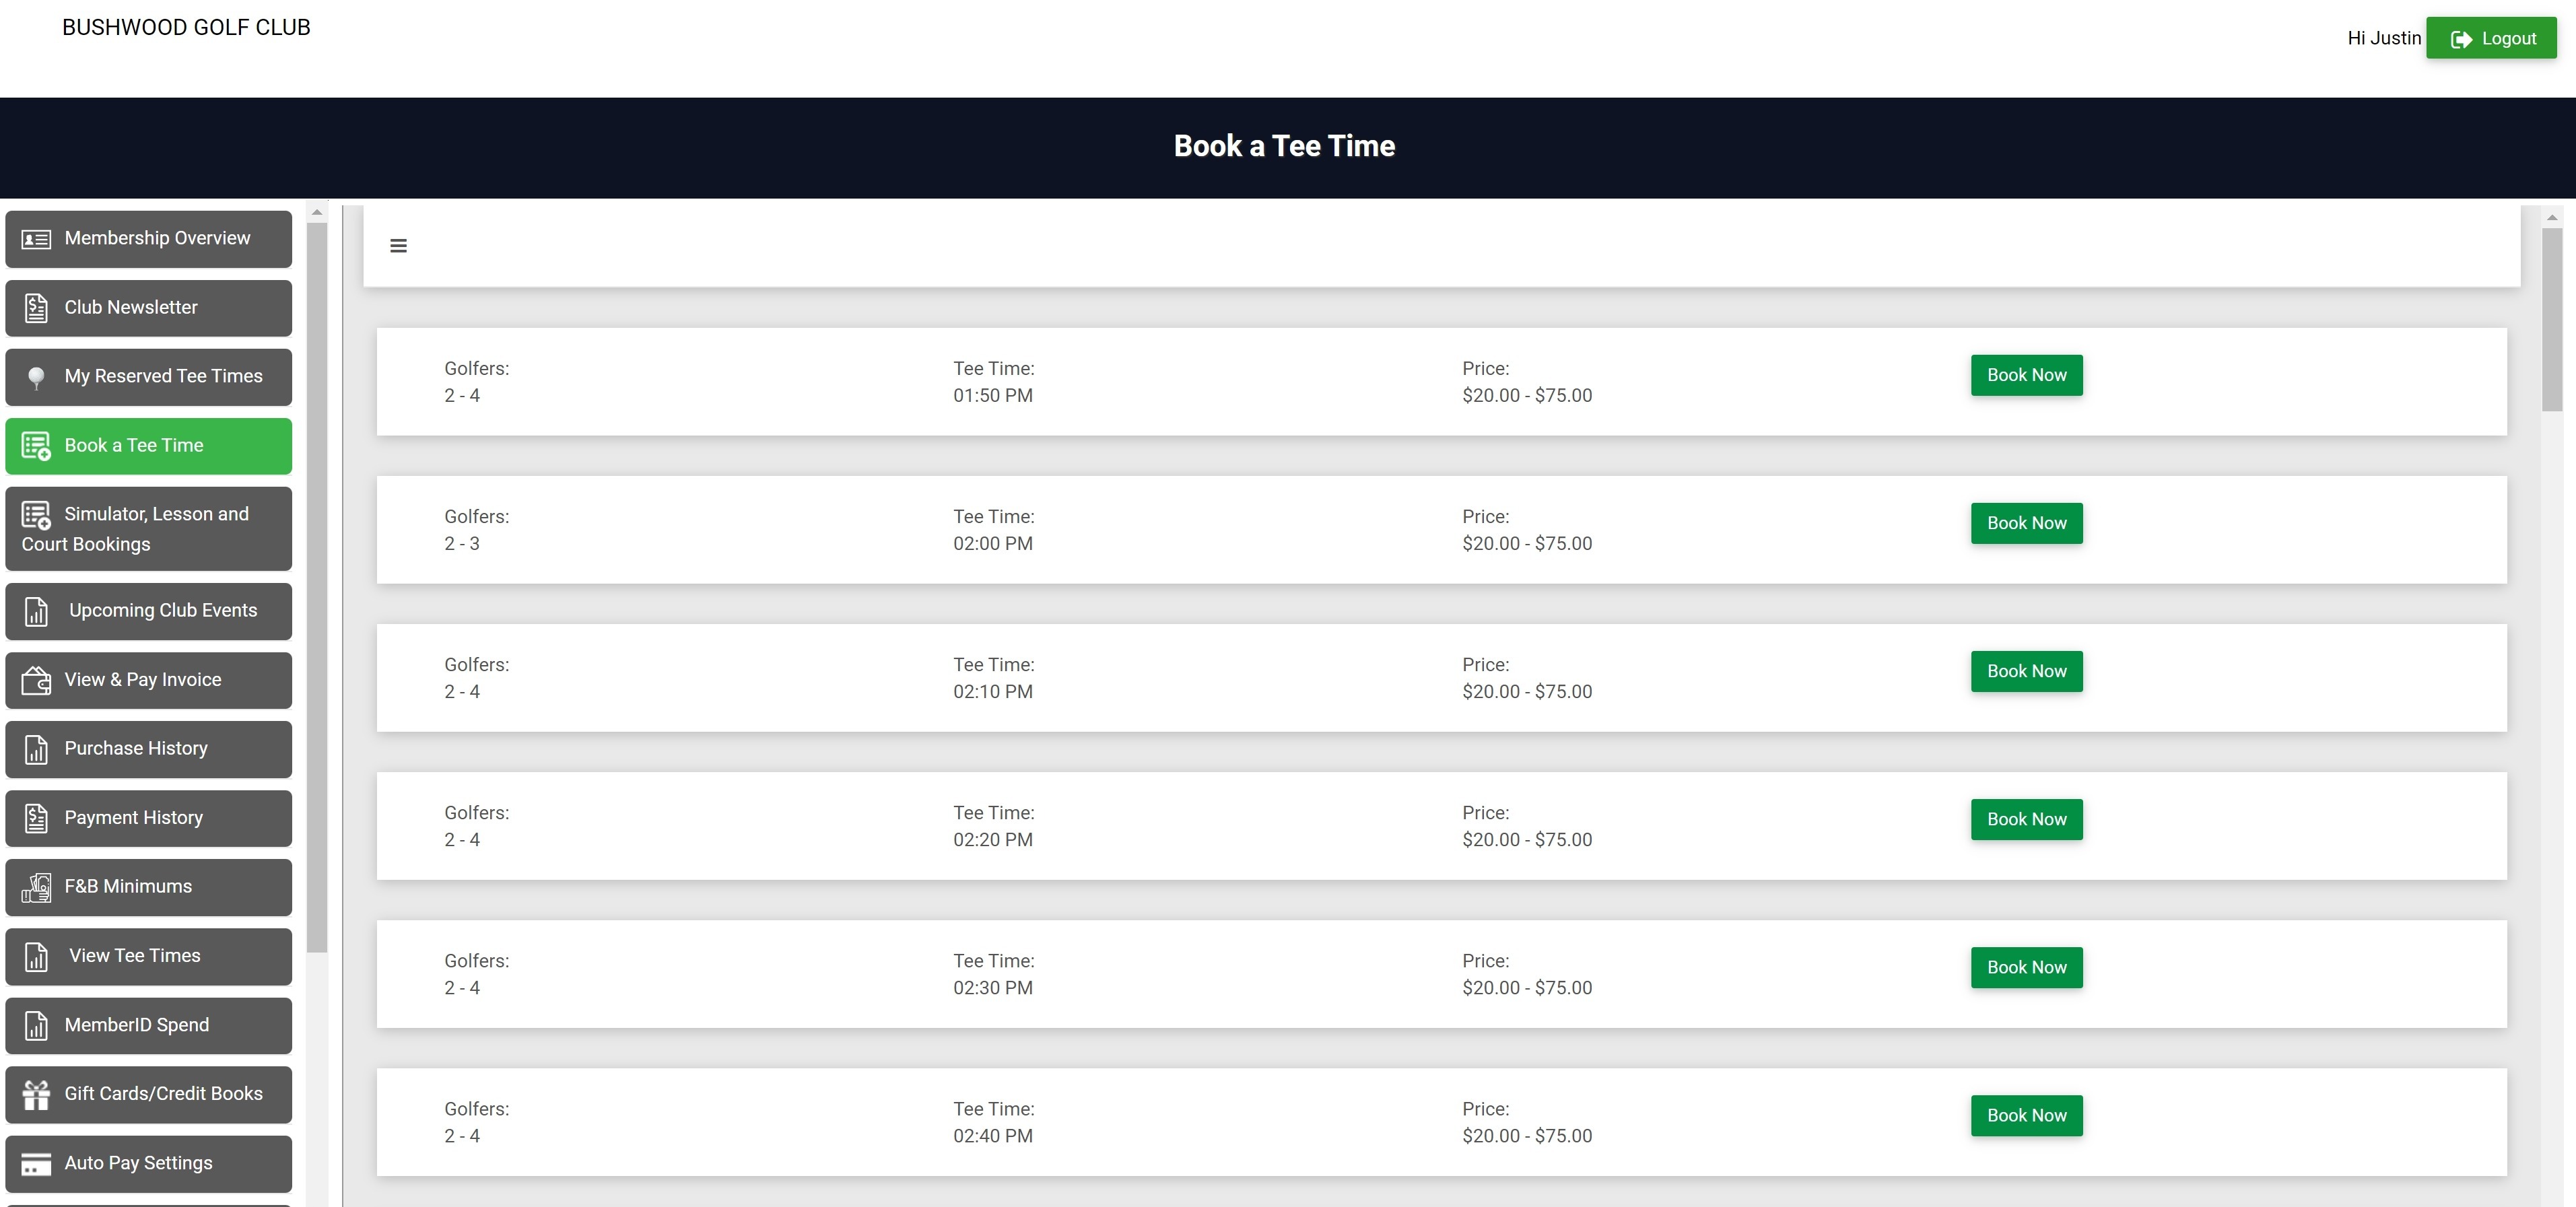
The booking engine allows for searching by date, the number of players, holes, time, and price.

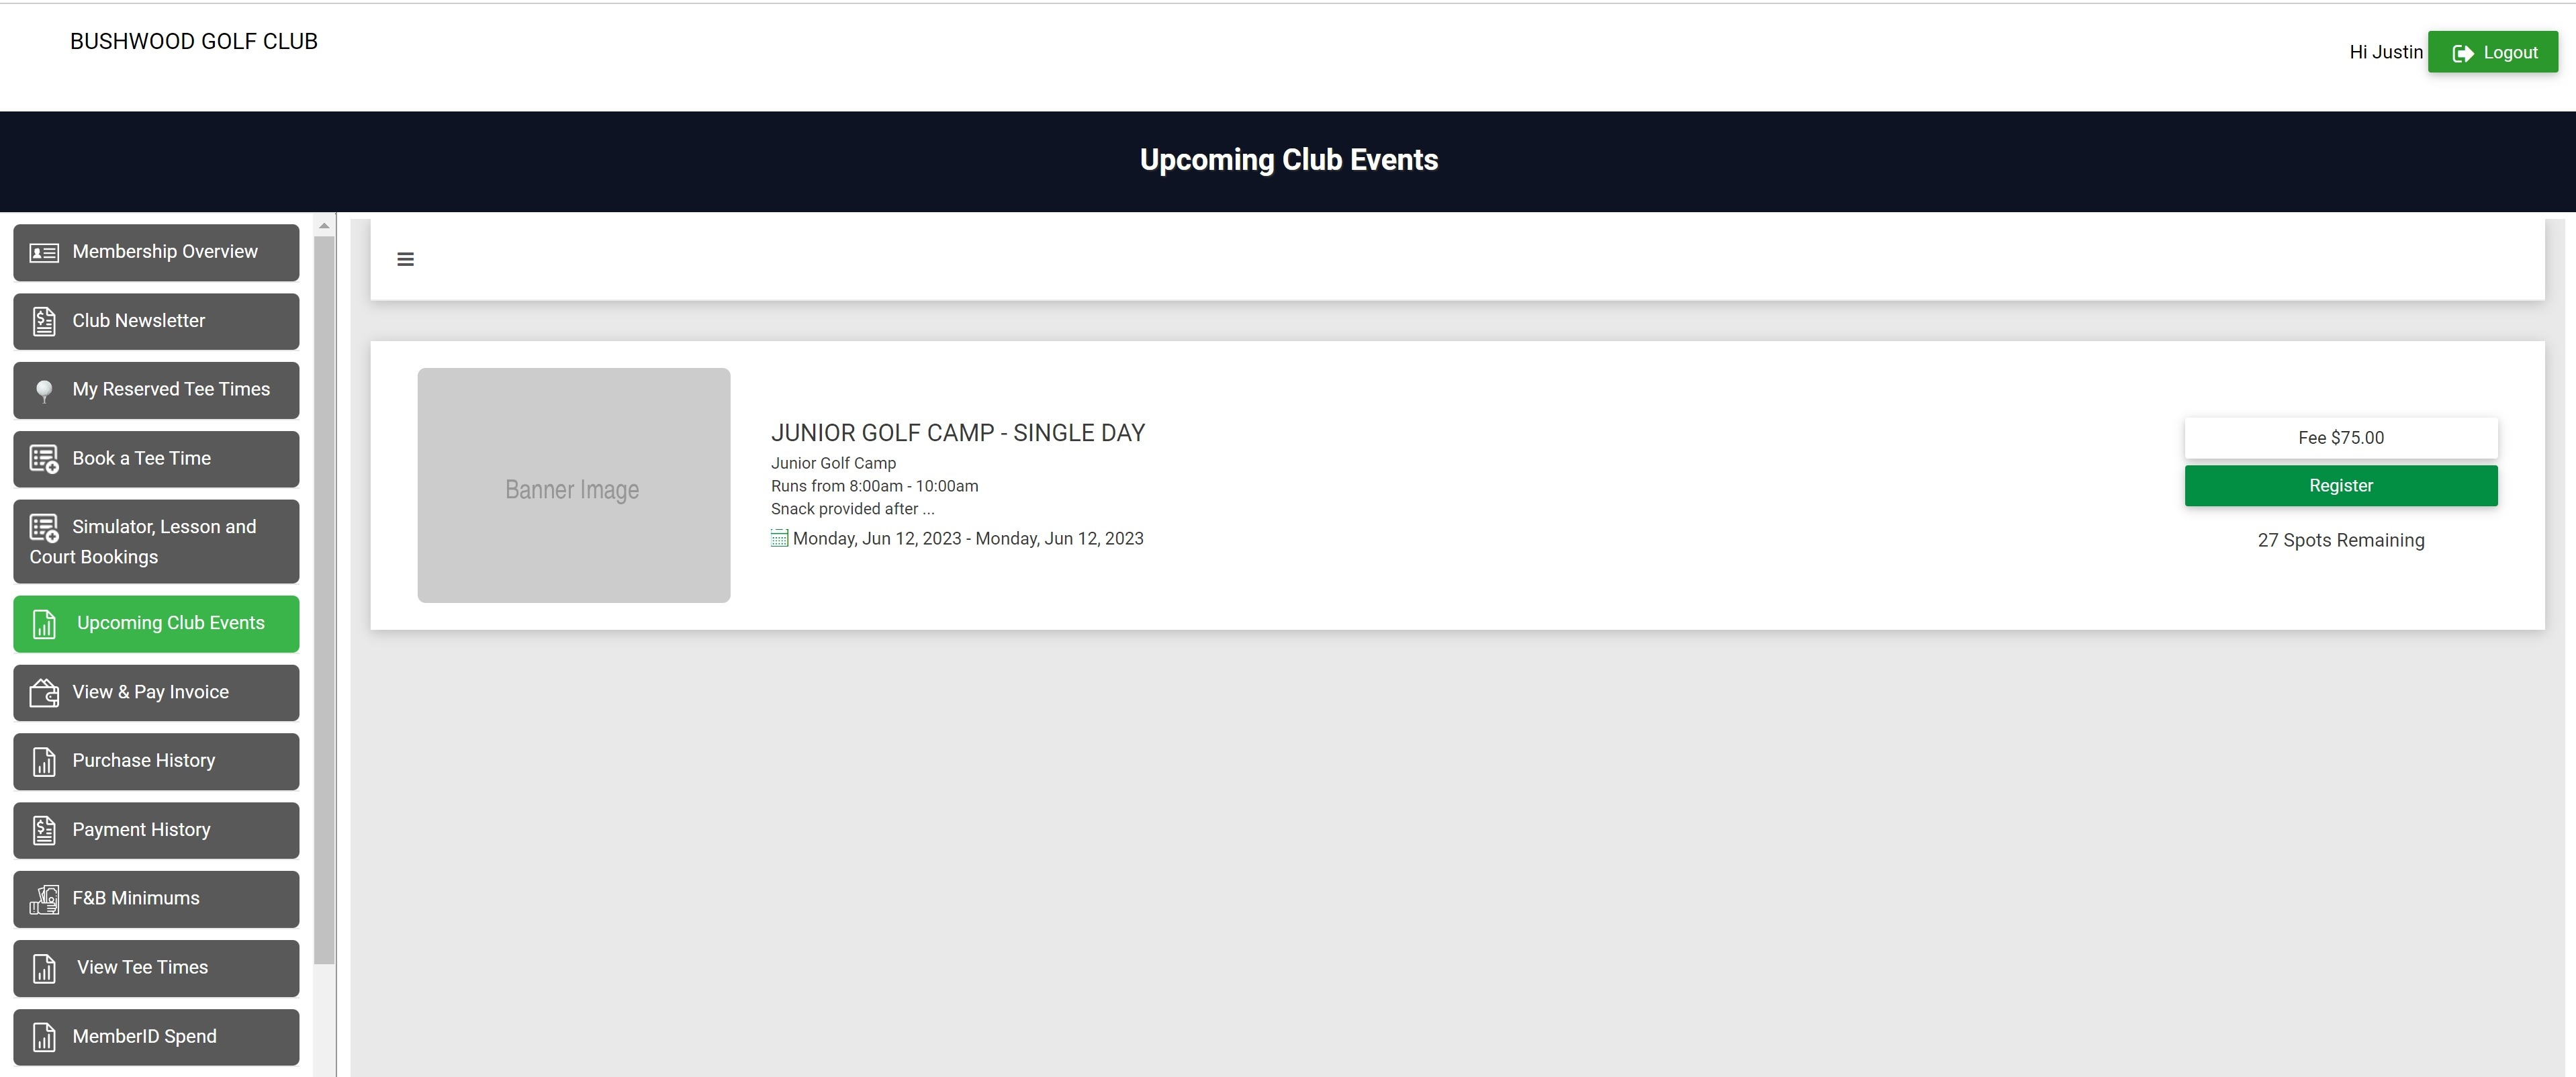
Events: This page allows members to see created upcoming events (e.g., webinars, workshops, and parties). They can see details like date, time, location, description, and registration fee. Members will have the ability to register and pay for listed events based on the parameters set up with the EVENTS module of Jonas Synergy.
Autopay Setup: This page allows your members to view and add credit/bank account information which can be used for invoice payments, event registrations, and tee and activity time bookings.

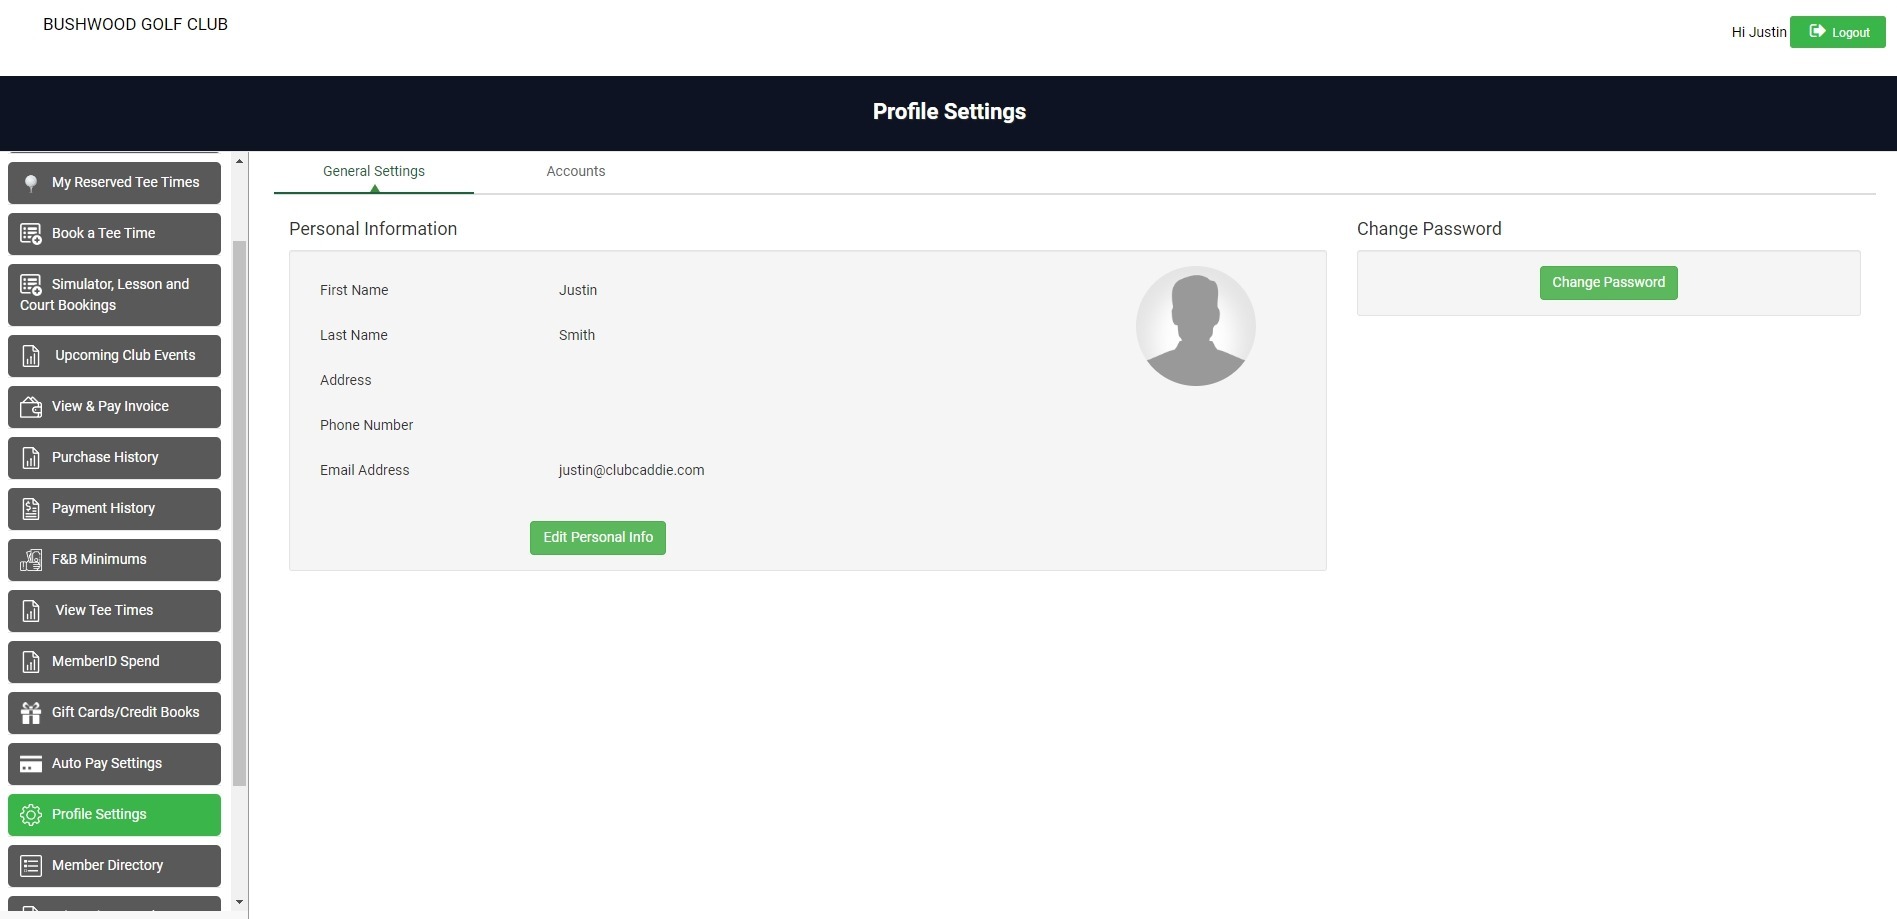
Settings: This page allows your members to update their personal information such as email, password, and address.
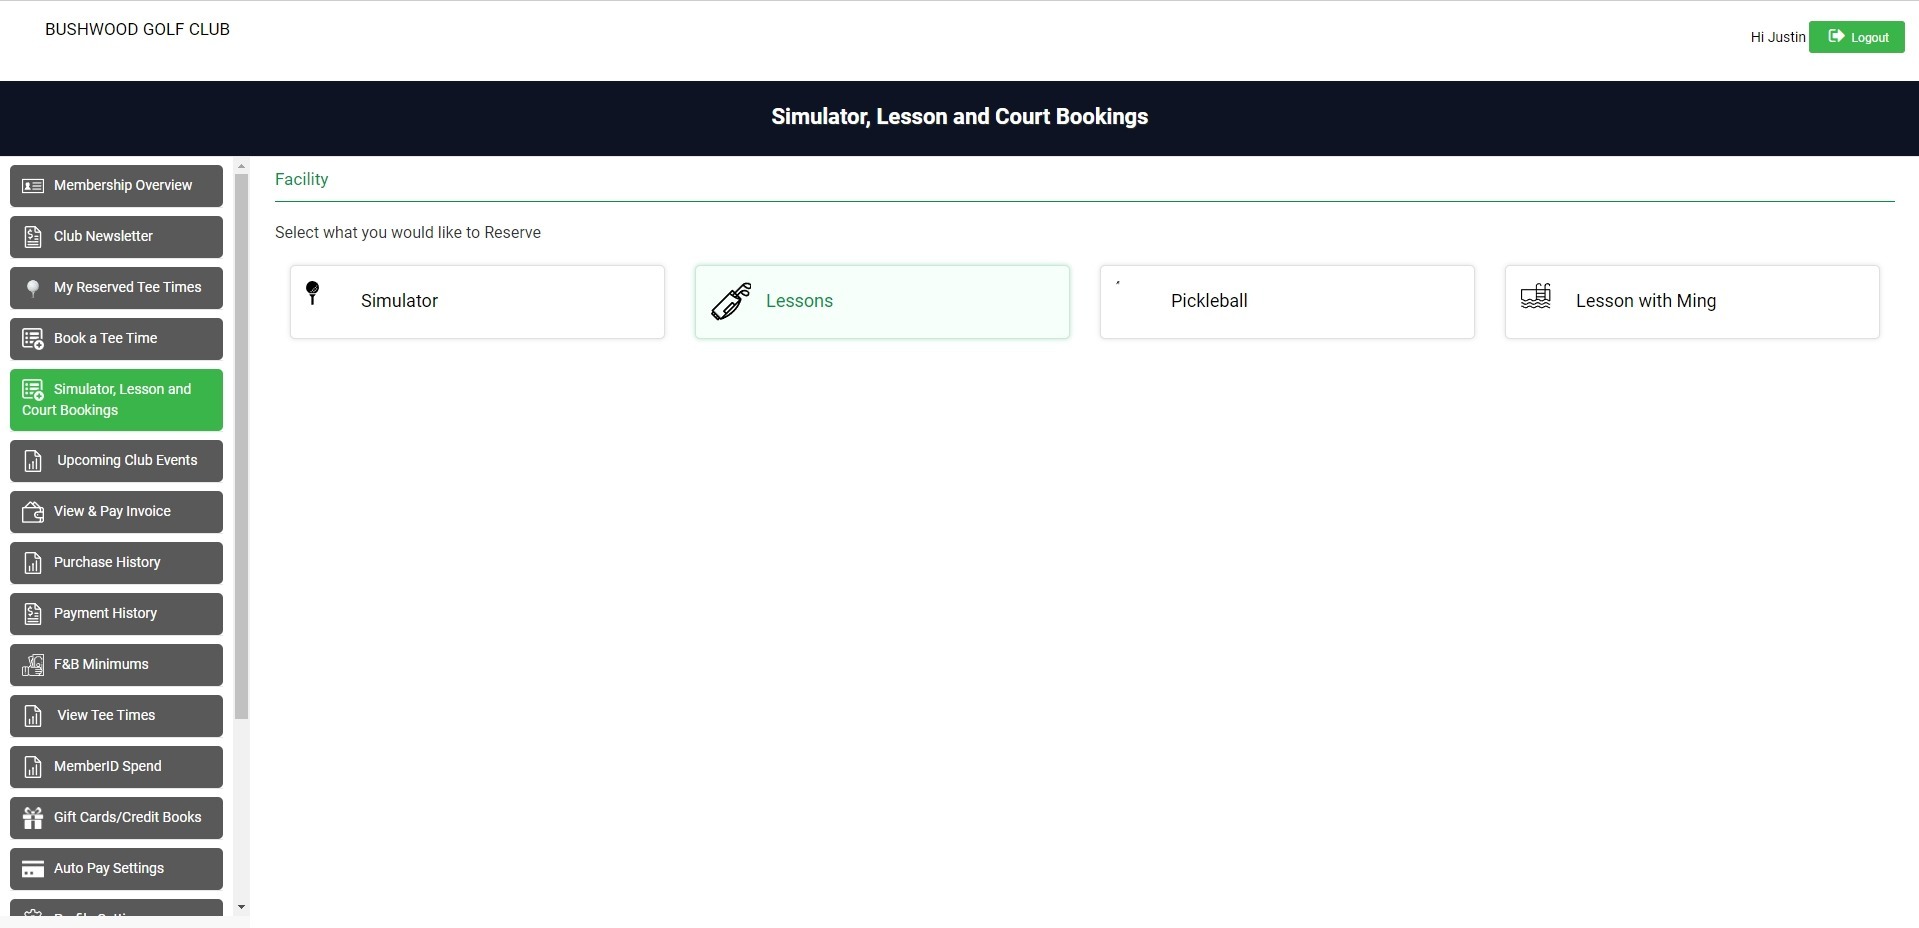
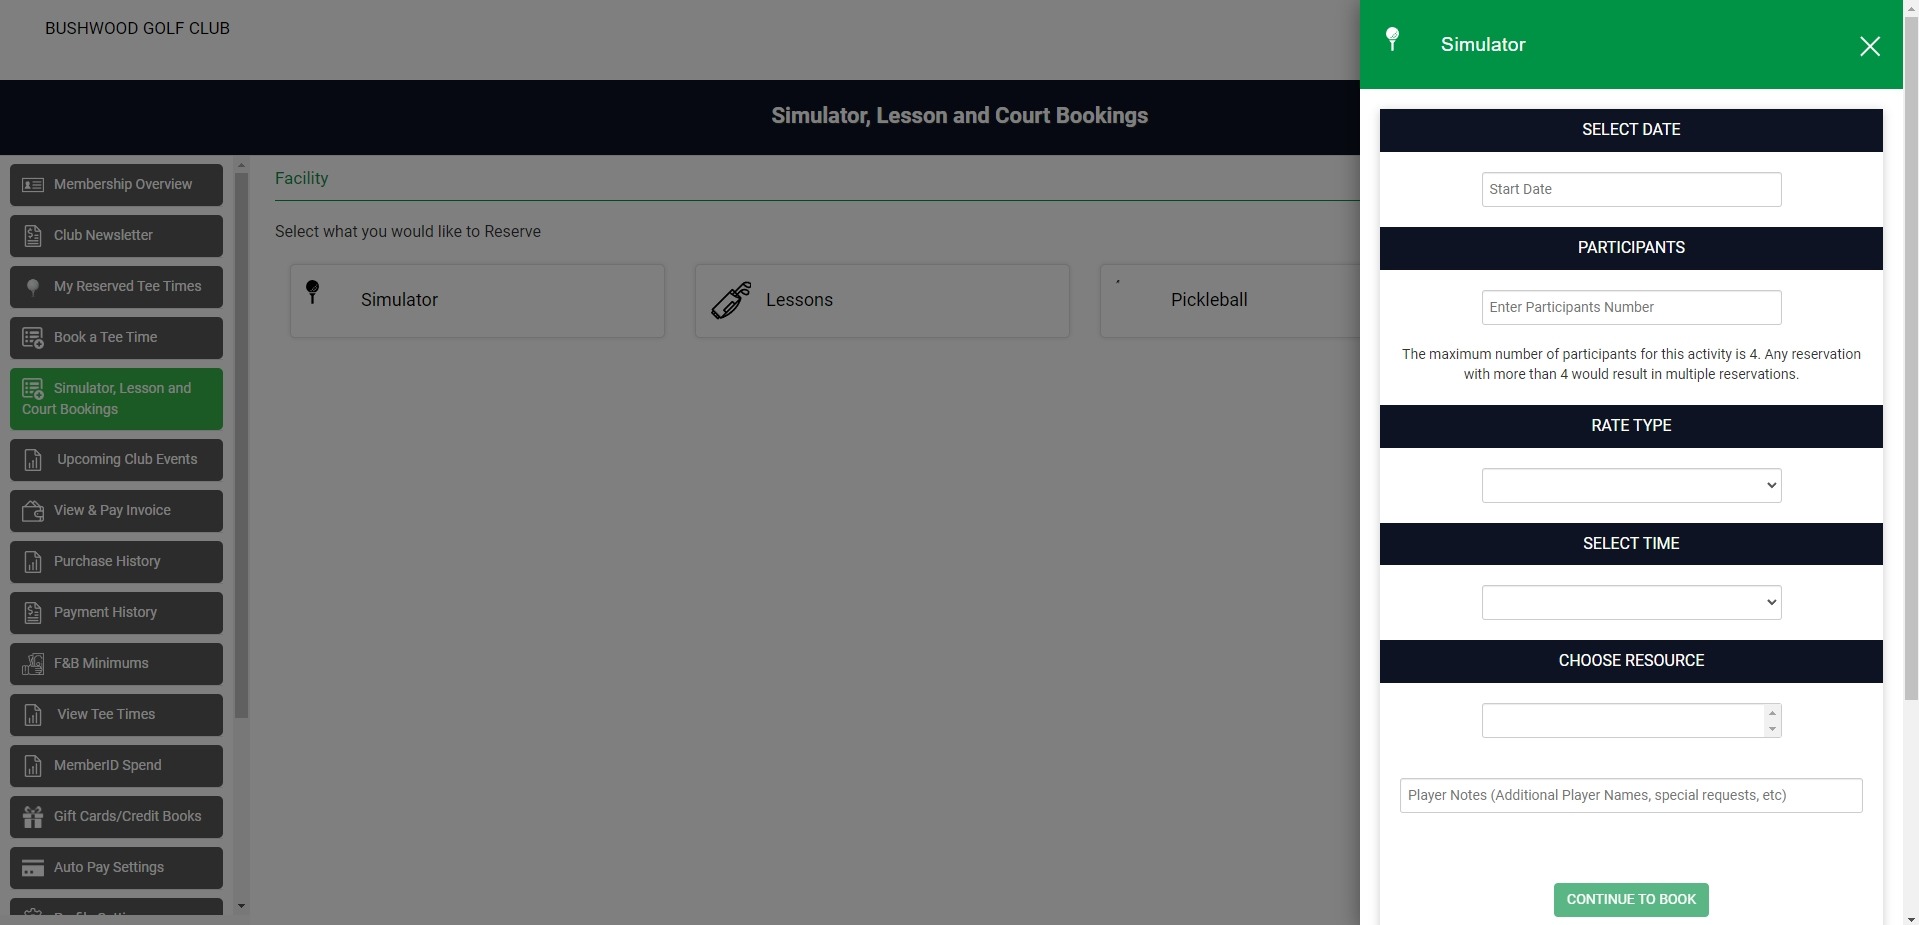
Activities: This section allows members to book activities such as tennis, golf simulators, swimming, etc. You can also set the availability, pricing, and booking rules for each activity within Jonas Synergy and those will be displayed within this activity booking engine.
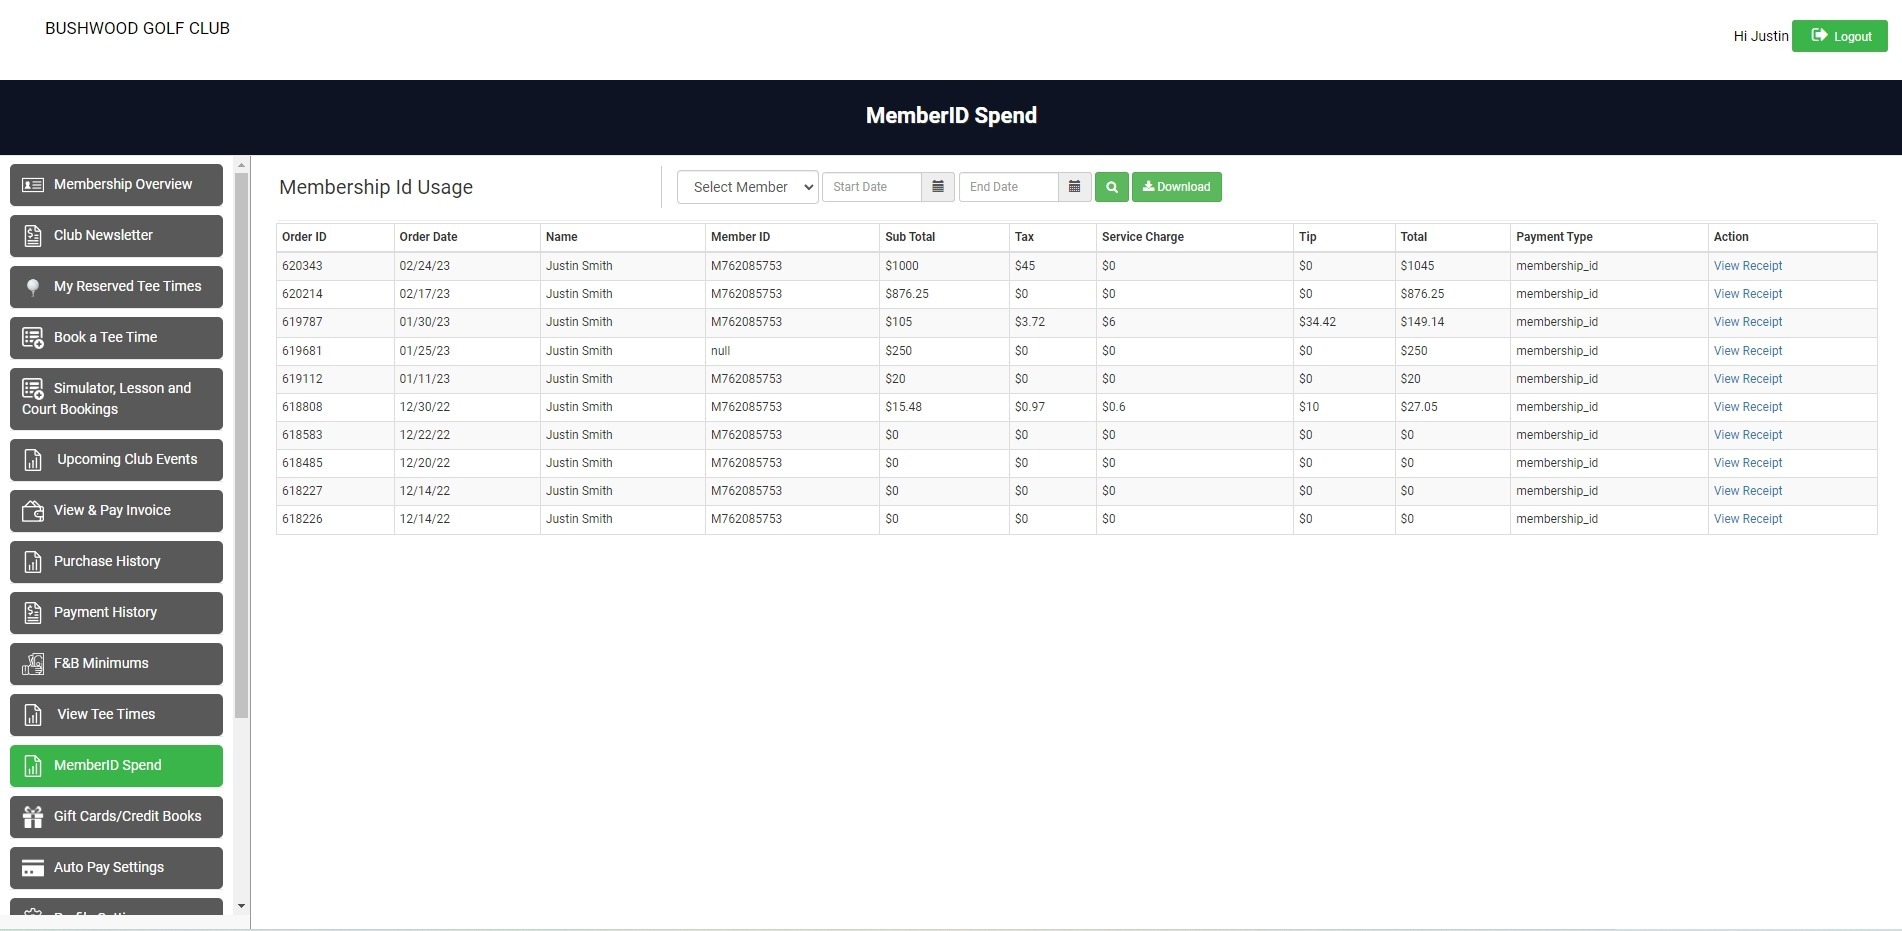
Membership ID Usage: This page allows your members to view their membershipID payment. They can see details like the date, amount, and status of each payment. The payment history can be filtered by date using the Start date / End date fields.
Directory: This section displays a list of all your members and their contact information sorted alphabetically by surname.

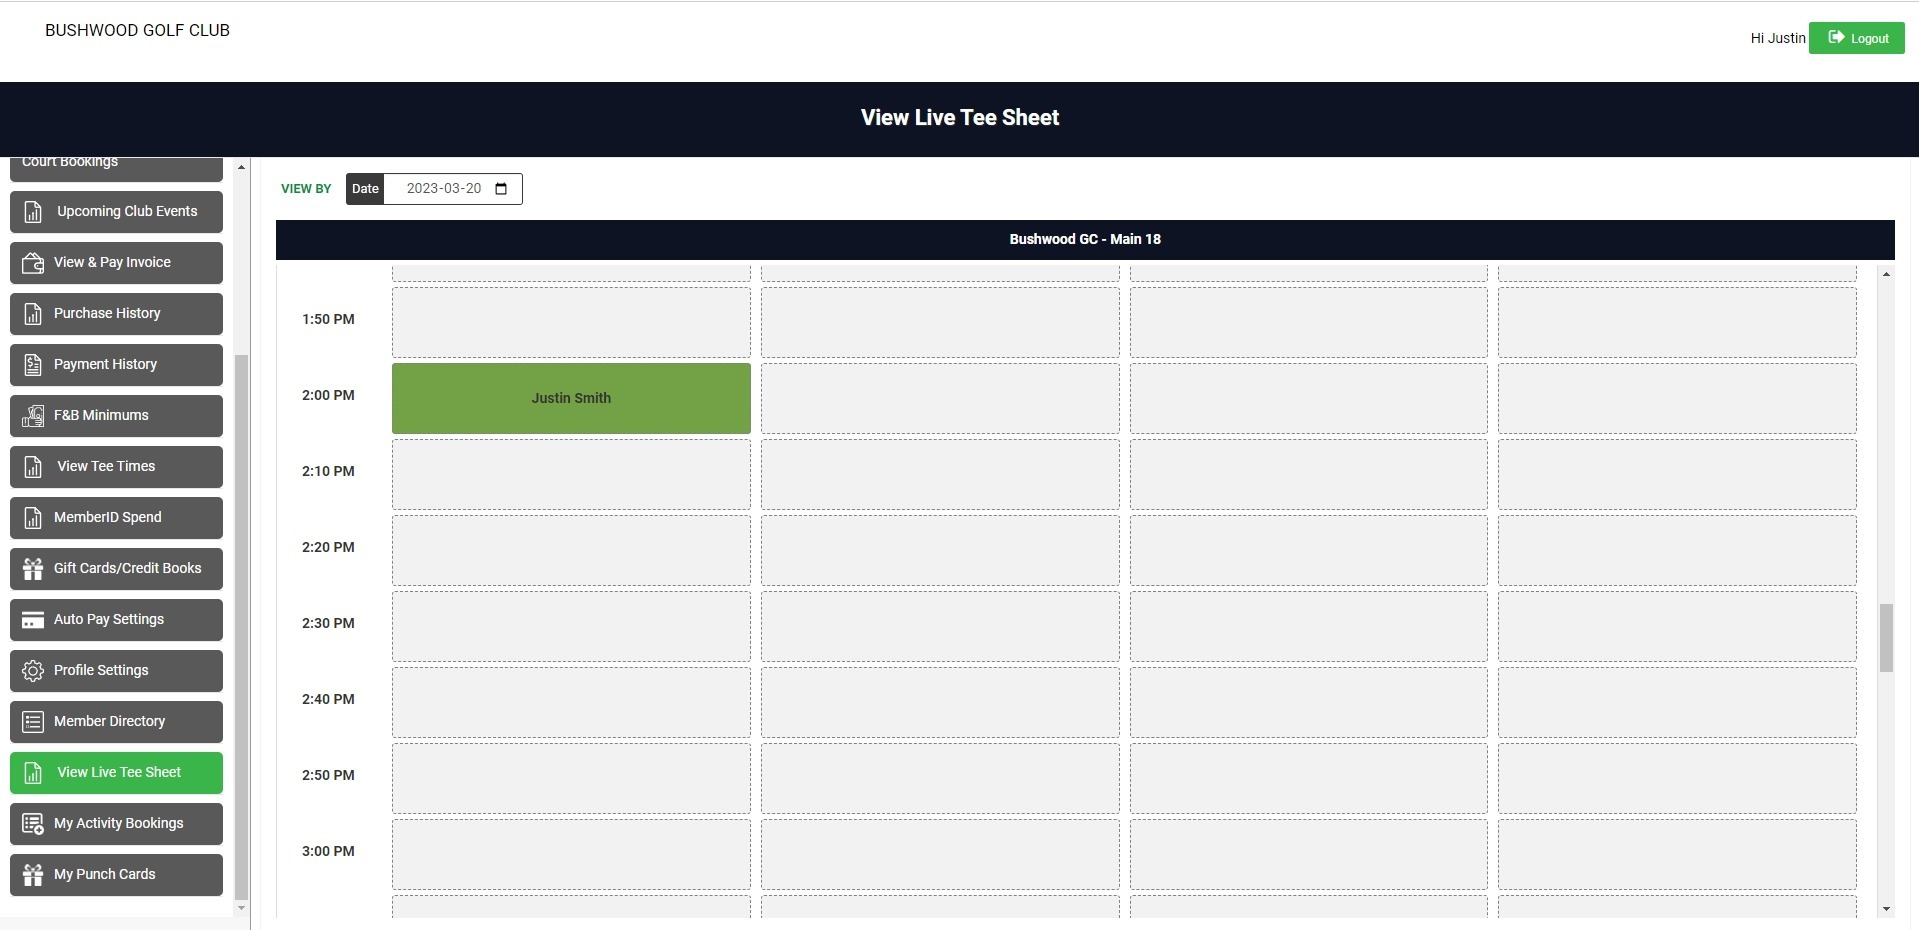
Tee Sheet: This section allows you to manage your tee times and reservations for golf. You can view the availability of each tee time slot, assign players or groups, check-in or cancel reservations, and print receipts or reports.
Vouchers: This section allows you to sell gift cards to your members or guests. You can create different types of vouchers with different values and expiration dates.

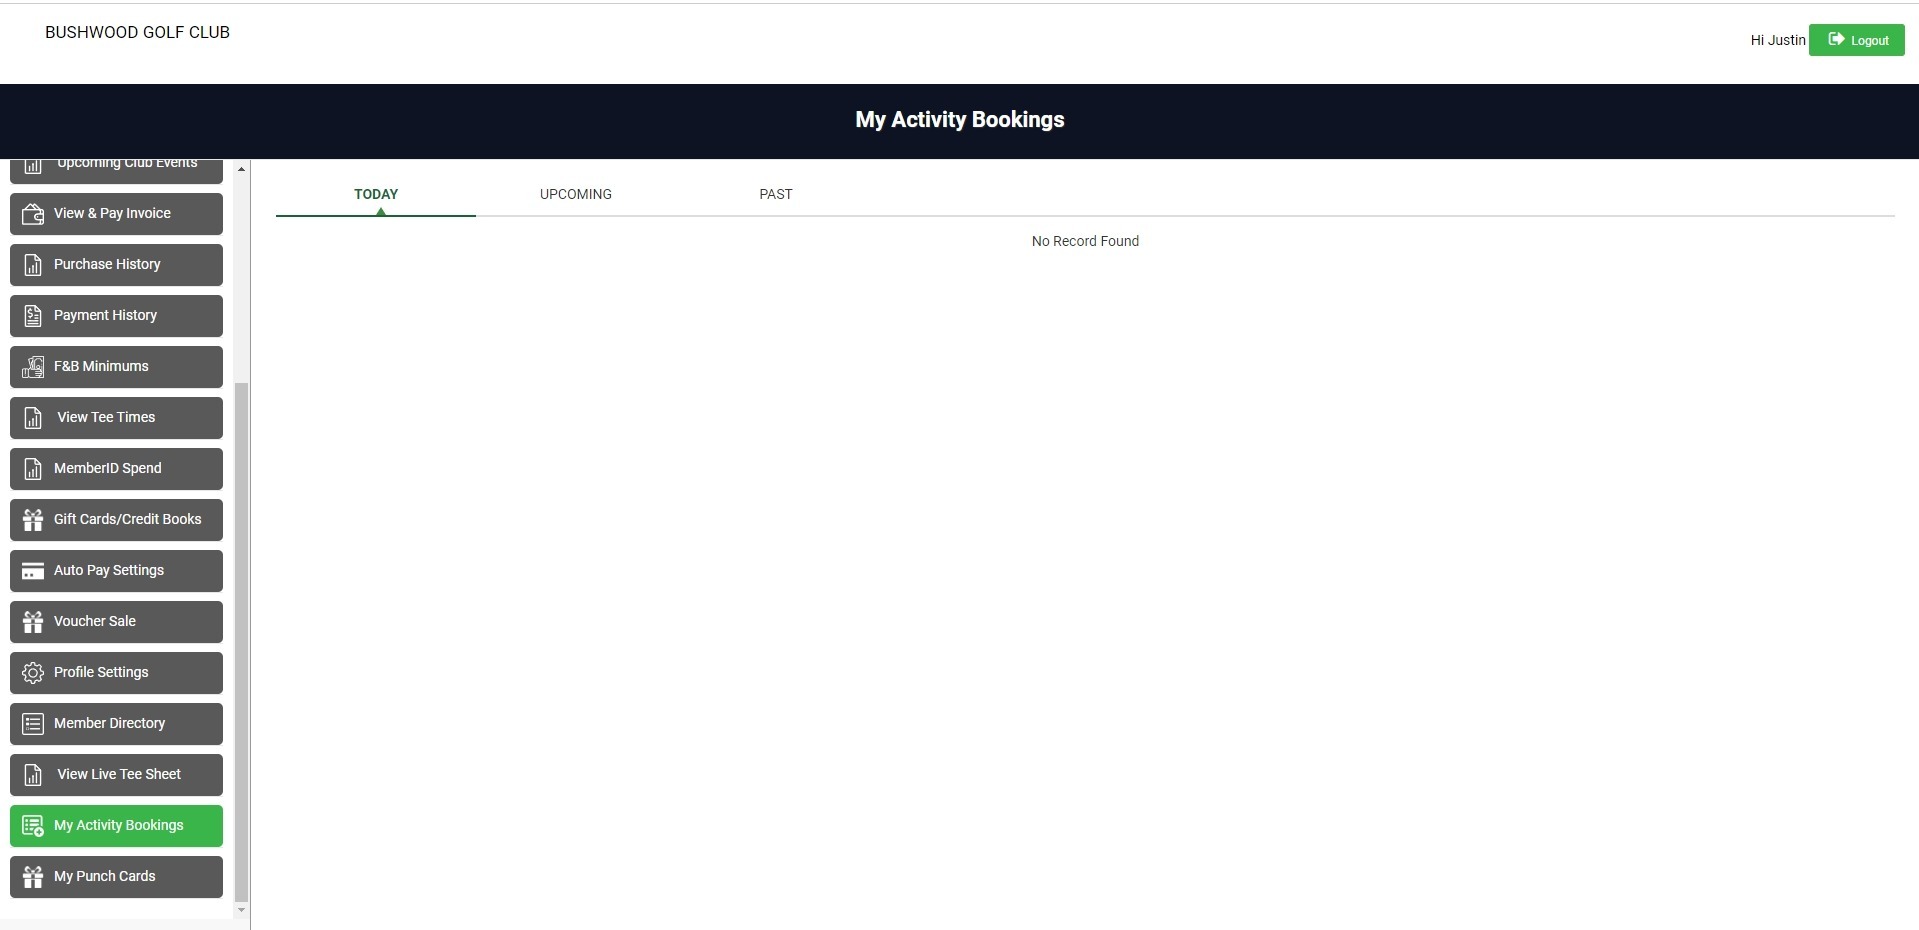
My Activity Bookings: This page allows members the ability to see activity times they have reserved either online or at the club. There are tabs for the current day, future bookings, and historical past bookings.
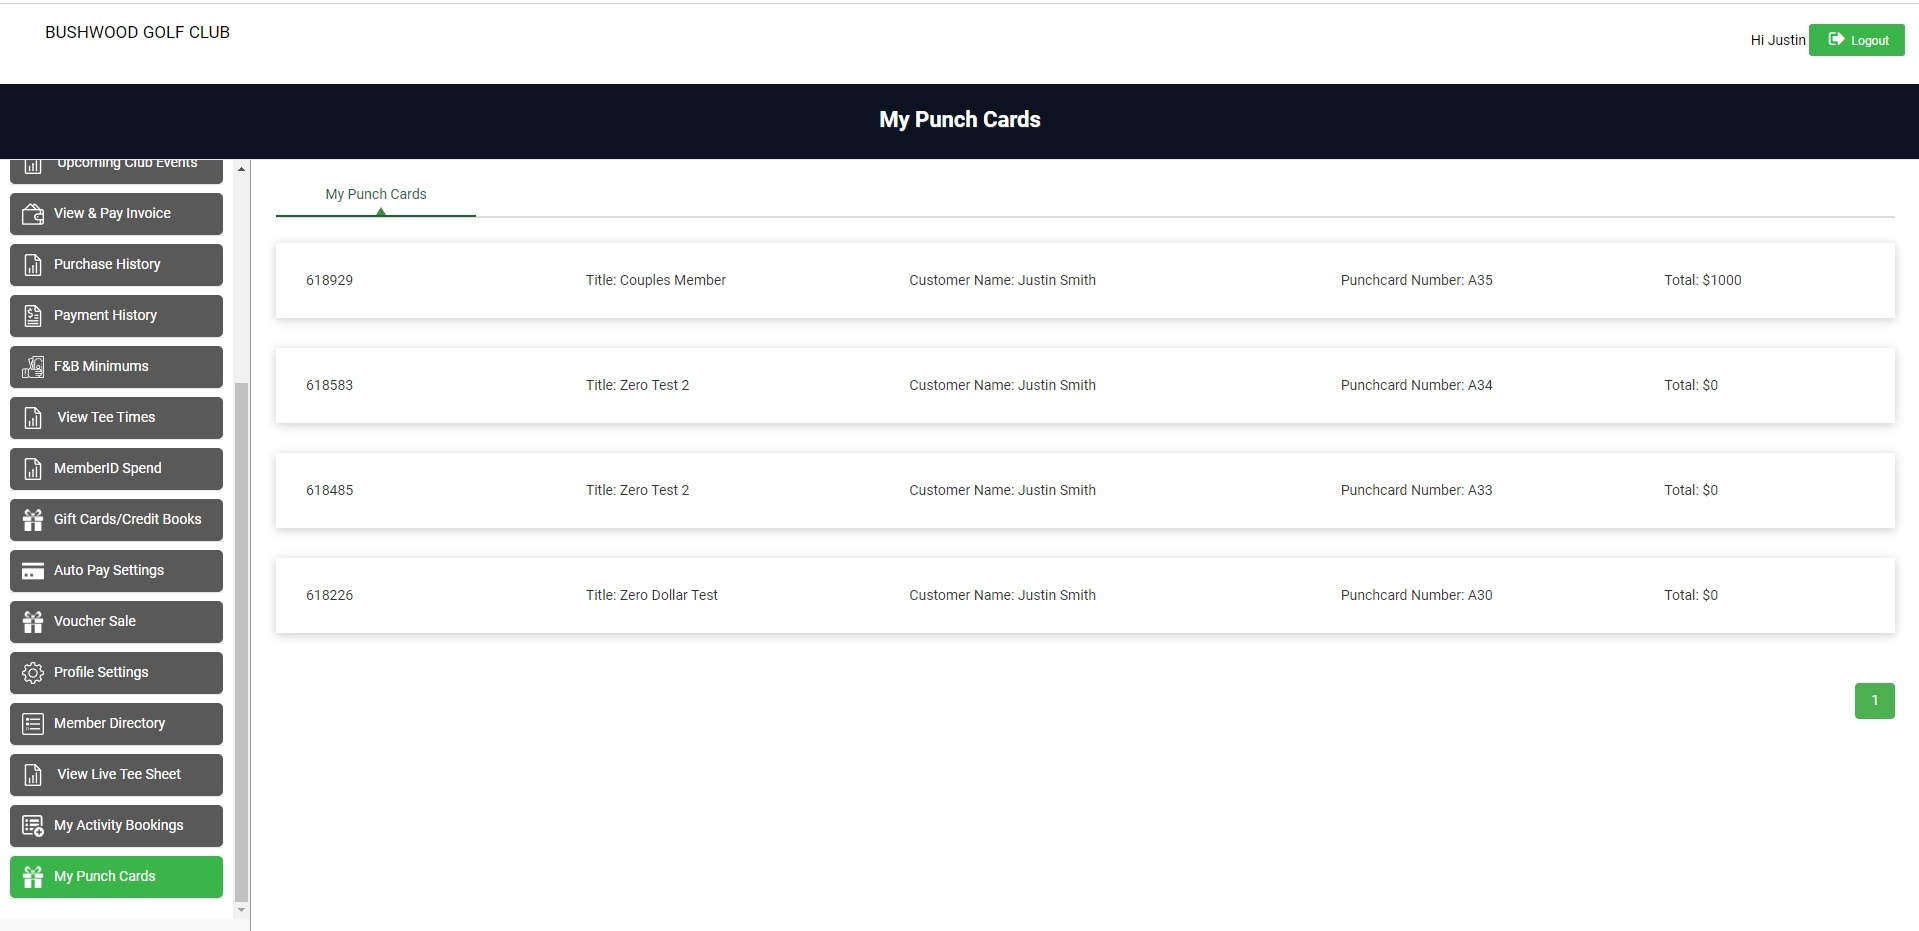
My Punch cards: This section allows your members to their punch cards online. They can also see how many “punches” they have left, their usage history, and when they expire.
Related Articles
Notifying Members of the Membership Portal
We recommend sending members an email with step-by-step instructions to access your facility's membership portal. Depending on enabled features, members can view transactions, invoices, payments, as well as book tee times and activities. Step 1: ...Registering for the Member Portal
This article provides steps to registering for the member portal Registering for the Member Portal: If it is your first time logging in, and your club has not already provided you with a pre-set password please follow the instructions below from step ...Guest Module - Members and Portal features
Article Contents: This article contains step-by-step instructions on Guest Module Focusing On The Member And Portal Features. Step-By-Step: Step 1: To view an ad hoc statement, click on "Account Statement," which will download a PDF statement with ...Membership Payment through Saved Card
Article Contents:- This portion summarizes how to Add New Card to make payment through Membership Portal. Step-By-Step: Step 1: Click on the "Gear Wheel" icon from the right top corner of the window. Select "I-Frames" from the left row of the window. ...Ending a Membership
This article provides step-by-step instructions on how to completely end a membership. This includes expiring membership classes, expiring minimums if applicable, and removing charging privileges. Step-By-Step: Step 1: Expire Membership Classes. 1.1 ...