Multiple Job Roles

Multiple Job Roles

Article Contents: This article explains the use of Multiple Job Roles. Allowing employees to hold multiple roles within the system, simplifying payroll and time management. Employees can seamlessly switch between them as needed

Step-By-Step: 

Step 1: Navigate to  Settings >  Course User Info > then click on  Action next to the employee.
 
 
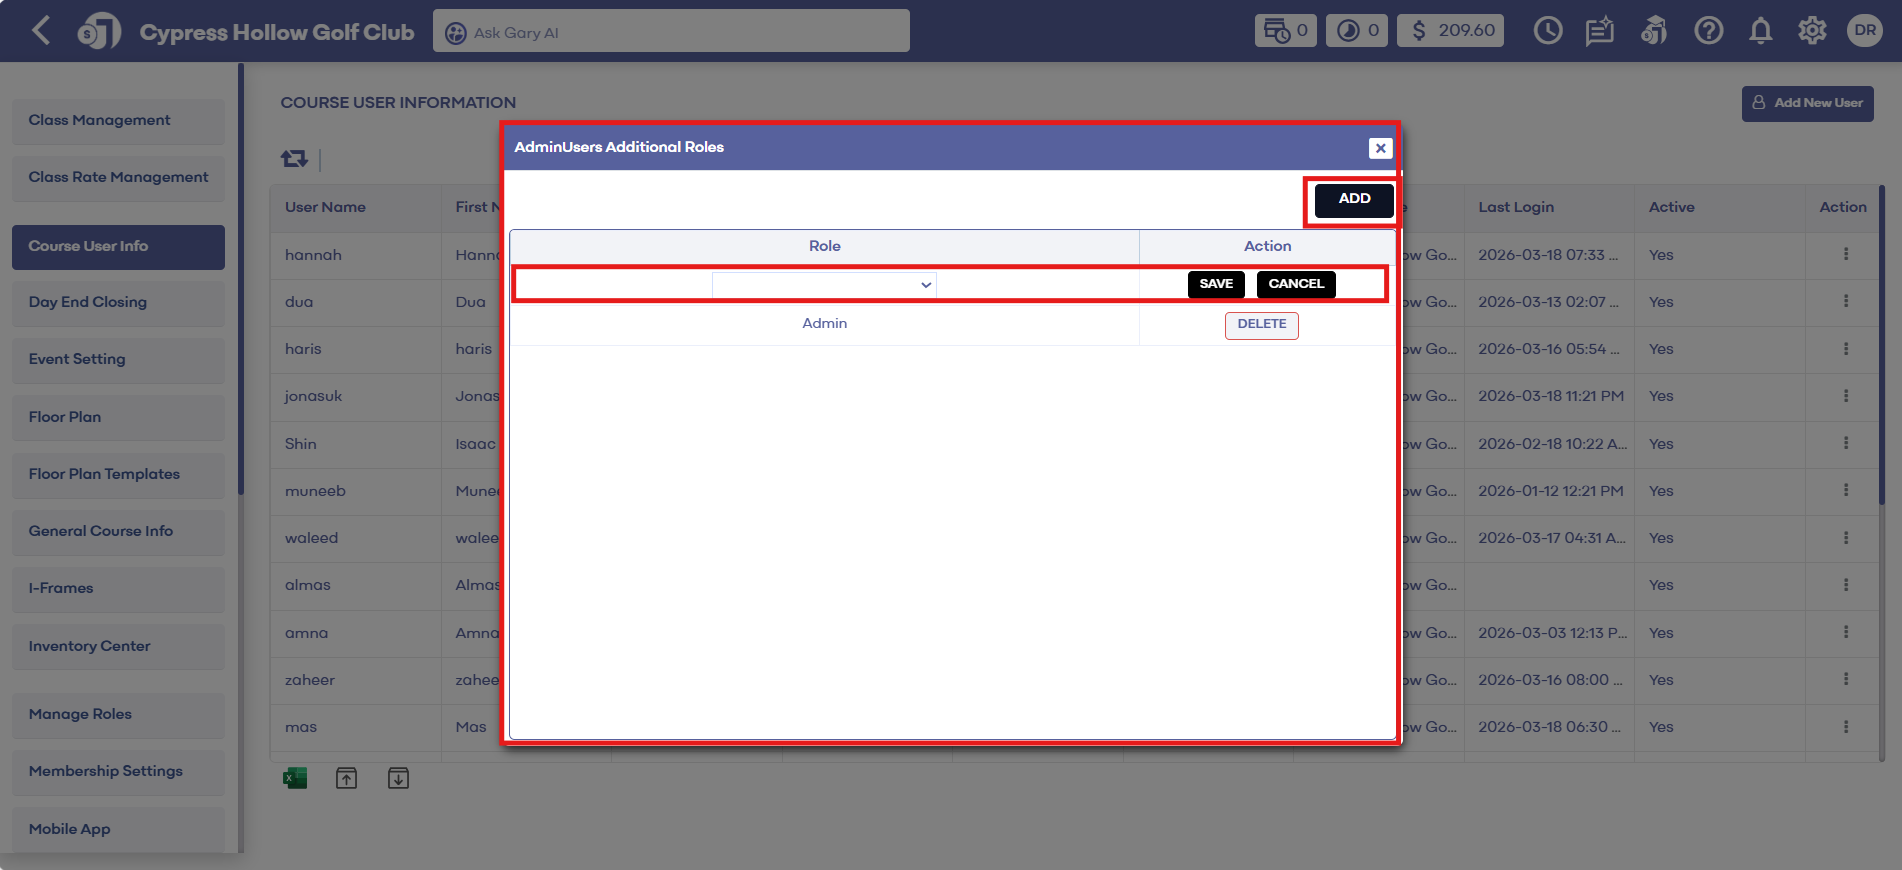
Step 2: Select  Manage Additional Roles. Then in the pop-up window, click  Add and chose the role you wish to add. Click  Save.


Step 3: 
When logging in, select the role along the top left.


While logged in, select  Switch Role.


When clocking in, the system defaults to the signed-in role, but users can switch roles if needed. This simplifies payroll and time management by consolidating roles under one login. The Payroll Center lists different roles for each employee, ensuring accurate tracking of hours. The clock-in/clock-out report details entries by role.

In the Payroll Center, under the Payroll Summary or Time Log, you'll see the different roles listed for each employee.


    • Related Articles

    • Manage Roles

      Article Contents: This article contains information on managing roles by adding or removing access to actions or modules. Settings -> Manage Roles -> Action Step-By-Step: Step 1: Click on the Gear Wheel icon on the top right corner of the screen. ...
    • Assigning Class Rates to Multiple Classes

      Article Contents: Class Rate Management can now give a Class Rate a “Title,” which will be what the guest/member sees during the booking experience. Users can now also apply multiple Classes to a given Class Rate. Step-By-Step Step 1: Click on the ...
    • SETTINGS: MULTI-COURSE PUNCH CARD USAGE

      Article Contents: This Article Guides You On How To Create A Punch Card To Be Used Across Multiple Courses. Step by Step: Step 1: Navigate to Settings, then click on Punchcard Type Center. Step 2: Add a new punchcard or edit an existing one. In the ...
    • SETTINGS: CLOVER FLEX DEVICE SETUP

      Article Contents: This article contains a step by step guide on how to set up your Clover Flex device for Jonas Synergy. Step by Step: Step 1: Opening and Activating the Clover. First, let’s open and activate your Clover device: - Turn on Clover: ...
    • Department Visibility

      Article Contents: This article contains step-by-step instructions on how to add or hide departments from users by utilizing the role manager. Step-By-Step: Step 1: Click the Gear Wheel icon from the top right corner of the screen. Click Manage Roles ...